Troubleshoot
Capture UI Screen
To capture the screen, the SDK's screen capture API needs to be called after the app UI loads on the device. By default, the SDK calls the following API during the onResume(..) lifecycle event behind the scene.
Tealeaf.logScreenLayout(activity, displayName, delayMS)
Note:
The default value for
delayMSis 500ms. You might need to increase the delay value when an activity is expected to take longer to render its UI.
If you see a blank screen in the replay, increase the CaptureLayoutDelay value. You can increase the CaptureLayoutDelay value in milliseconds in the TealeafLayoutConfig.json file. You can also increase the value through a manual API call as follows.
"ControlsActivity1": {

 "ScreenChange": true,

 "DisplayName": "CAuto1",

** "CaptureLayoutDelay": 2000**

}
If you're not sure when to call Tealeaf.logScreenLayout(..) API, use an emulator to set a breakpoint in the code. Observe the code and determine the place to start the manual screen logging.
Enabling raw request and response headers
For debugging purposes, it may be useful to include the raw request and the response headers in the data that is passed by the PCA to the Canister. This method is useful if you are not seeing any JSON data that is parsed in Acoustic Tealeaf. Including these sections in your Tealeaf sessions can significantly increase the storage requirements for mobile sessions. These options should be enabled only for debugging purposes.
In the PCA Pipeline tab, set the following properties:
| Setting | Value |
|---|---|
| Include Raw Request | true |
| --- Include Response Headers | --- true |
Managing client-side issues
The section that follows describes how the Acoustic Tealeaf Android SDK manages application crashes, exceptions, or other issues that can occur on the mobile device or the network.
Exceptions or crashes
Application exceptions are logged and reported to Acoustic Tealeaf in JSON format.
For devices that run iOS, a transmission of the current exception to the server is attempted. A copy is added to the set of messages queued locally and is sent the next time that the application is started.
For Android devices, all local data in the device is flushed. The exception object is transmitted to the server.
Power failures
A TL Library Error: File Not Found exception might be caused by disruption to the monitored application. If the user turned off the application or if it is closed, the posting task is disabled. When the application restarts, the library begins sending the queued JSON messages. However, if some of these reference images that are no longer available, the File Not Found error is generated.
If power failures are a persistent problem, you can configure the client application to save to local disk at smaller intervals, sending to server at more frequent intervals. You can modify the local cache size and POSTs from the client. These settingssettings are managed with the configuration file.
Kill switch
If the device is unable to connect to the target page, the device does not capture data.
Network issues
If there are network connectivity issues, these events are logged as connection objects with details on the issues.
- For GET issues as a result of application interruptions, an exception object is generated.
- If the network connection is interrupted, user actions are saved and sent later.
Low memory or local storage
If low memory or low local storage conditions occur, a custom log message is generated.
For devices that run iOS, user data is trimmed in memory until more memory becomes available.
For Android devices, all collected data on the device is flushed, and the Android SDK is disabled for the device.
Images are still missing in your Replay session
If you used the Android Image Extraction tool
Note:
For dynamic images, it is recommended to programmatically set
View's tag by using either of the following APIs:
View.setTag(R.id.image1)View.setTag(resourceId, R.id.image1)
Check if the file exists on the replay server (see steps below). If it is not there, follow these instructions to use the tool: Capturing and uploading images for application replay with the Android Image Capture tool.
If you used the Target Simulator
Check if the MD5 file exists on the replay server (see steps below). If it is not there, follow these instructions to use the tool to collect the missing images: Collecting images from your application with the Target Simulator for Android.
Note:
You have to run the Target Simulator against a set of common resolutions to support different form factors.
Determining if the file exists on the replay server:
-
Paste the Replay session link in a Chrome browser.
-
Inspect the URL of the image by right-clicking on the image and selecting Inspect.
-
Copy the URL of the image.

-
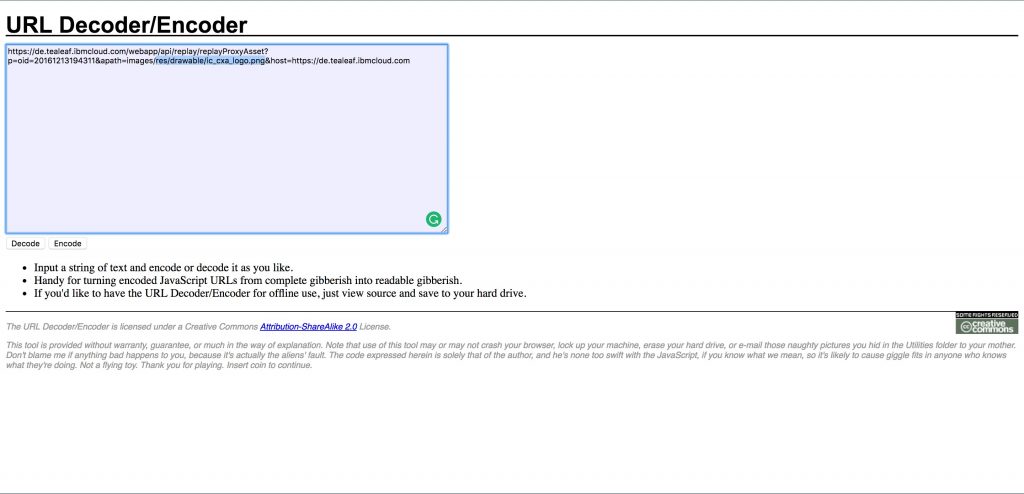
Paste the URL in a URL decoder (for example, https://meyerweb.com/eric/tools/dencoder/) and press Decode twice.
-
Depending on which tool you used:
- If you used the Android Image Extraction tool, you should discover the path that the image has on the Replay sever (like in example 1). This means that in the "images" folder you uploaded, there should be a path with a .png inside (in example 1,
res/drawable/ic_cxa_logo.png)
- If you used the Android Image Extraction tool, you should discover the path that the image has on the Replay sever (like in example 1). This means that in the "images" folder you uploaded, there should be a path with a .png inside (in example 1,

- If you used the Target Simulator tool, you should discover an MD5 (like in example 2). This means that in the "images" folder you uploaded, there should be an MD5 (in example 2, 9457EE13792FE1124B3CF49025A3861B.png).