Enable privacy protection in Android Compose apps
When capturing user behavior data, you must take measures to exclude personally identifiable information (PII) such as credit card numbers or home addresses.
Before you begin
We recommend assigning accessibility labels to the UI elements that require privacy protection. Use the contentDescription semantic property for that purpose.
import com.acoustic.connect.android.connectmod.composeui.customcomposable.LoggedText

LoggedText(
    text = "This is some text",
    contentDescription = "private"  // Required for masking
)
You can reuse the same label for several composables.
Important
- The accessibility labels will be available to your users through screen readers, so make sure they are helpful.
- Using the same accessibility labels across the iOS and Android versions of an app creates consistency and is considered an industry standard. For more information, see Mobile Accessibility at W3C.
Instructions
- Copy the ConnectLayoutConfig.json from our sample app and paste it to the
assetsdirectory in your project. - In the
maskingobject, setHasMaskingtotrue. - Add the
MaskAccessibilityLabelListparameter and populate it with the accessibility labels of the elements that require privacy protection.
{
  "AutoLayout": {
    "GlobalScreenSettings": {
      "ScreenChange": true,
      "DisplayName": "",
      "CaptureLayoutDelay": 500,
      "ScreenShot": true,
      "NumberOfWebViews": 0,
      "CaptureUserEvents": true,
      "CaptureScreenVisits": true,
      "CaptureLayoutOn": 2,
      "CaptureScreenshotOn": 2,
      "Masking": {
        "HasMasking": true,
        "HasCustomMask": false,
        "Sensitive": {
          "capitalCaseAlphabet": "X",
          "number": "9",
          "smallCaseAlphabet": "x",
          "symbol": "#"
        },
        "MaskIdList": [
        ],
        "MaskValueList": [],
        "MaskAccessibilityLabelList": [
          "sensitive_label",
          "mask_label"
        ]
      }
    },
    "MainActivity": {
      "ScreenChange": false,
      "DisplayName": "MainActivity",
      "CaptureLayoutOn": 0,
      "CaptureScreenshotOn": 0
    },
    "plantDetail/{plantId}": {
      "ScreenChange": true,
      "DisplayName": "plant Detail",
      "Masking": {
        "HasMasking": true,
        "HasCustomMask": true,
        "Sensitive": {
          "capitalCaseAlphabet": "X",
          "number": "9",
          "smallCaseAlphabet": "x",
          "symbol": "#"
        },
        "MaskAccessibilityLabelList": [
          "mask_label"
        ]
      }
    },
    "home": {
      "ScreenChange": true
    },
    "GardenActivity": {
      "ScreenChange": false
    }
  },
  "AppendMapIds": {
    "com.any.package:id/givenIdOnXmlLayout1": {
      "mid": "giveAdditionalId1"
    },
    "com.any.package:id/givenIdOnXmlLayout2": {
      "mid": "giveAdditionalId2"
    }
  }
}
- (recommended) Run the file through a JSON validator.
How it works
The masking object in ConnectLayoutConfig.json contains all properties related to PII protection.
| Property | Values | Description |
|---|---|---|
HasMasking | Boolean. Default value - false. | Set the value to true to allow masking. |
HasCustomMask | Boolean | Defines how protected text is displayed in session replay. |
MaskAccessibilityLabelList | Array of string | The accessibility labels of the elements that require privacy protection |
You can create a general privacy rule that applies to all screens of your app. In that case, use the AutoLayout.GlobalScreenSettings object. To create a rule for a particular screen, add the AutoLayout.ScreenName object where ScreenName is the name of the screen. Feel free to combine general and screen-specific rules within the same configuration file.
Test the settings (Connect Ultimate)
If your company has an Ultimate subscription for Connect, you can check how your new rule is working.
- Run the app and enter something into the fields you have masked.
- In your Connect account, navigate to Insights > Sessions > Session search.
- Find the session and check how the input is displayed.
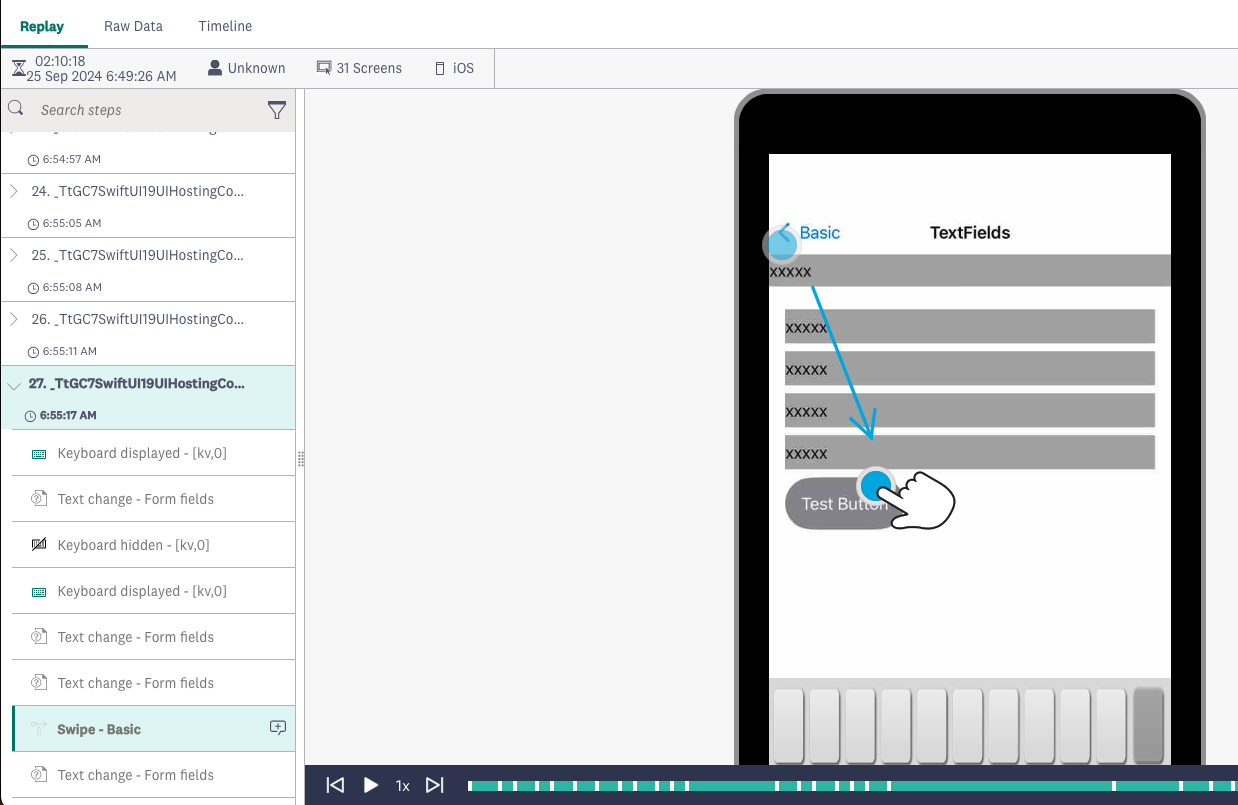
Protected text input in session replay
Updated 3 days ago