
Integrate the Connect SDK into a native iOS app (Swift)
The Connect SDK is a library that captures visitors' interactions with mobile applications. You can integrate the library into your native iOS app written in Swift and track the findings in the Acoustic Connect interface. For Objective-C instructions, see Integrate the Connect SDK into a native iOS app (Objective-C).
Note
New to Connect? Install our preconfigured sample app and explore the implementation faster.
Requirements
- Acoustic Connect. To use the Connect SDK, your company must have an active Connect subscription. Proper credentials are required for each app. For instructions, see Generate Connect credentials for integration.
- Development environment. You will need Xcode with Command Line Tools.
- Mobile app compatibility. The library can capture user experience data on end users' devices running iOS 15.1 and later. On iPadOS, only single-window applications are fully supported.
Limitations
We offer limited support for iPad apps with a multi-window architecture as well as iOS apps using SwiftUI or UIScene. The library captures data from such apps and makes it available for analytics, but session replays may not work correctly.
General guidelines
It is important that you assign unique IDs to all UI controls that you want to capture.
Initial setup
You can add the Connect library to your iOS app using the CocoaPods dependency manager. This option requires a recent version of CocoaPods.
Here are steps to follow:
- If you don't have a Podfile in your Xcode project directory, create one.
- Open the Podfile in a text editor and make sure the iOS version is 15.1 or later. Then uncomment
use_frameworks!. - In the same Podfile, set
podto eitherAcousticConnectorAcousticConnectDebug, depending on the build you want to use.
source 'https://github.com/CocoaPods/Specs.git'
platform :ios, '15.1'

target 'SwiftUIMindBlowing' do
  use_frameworks!
  pod 'AcousticConnect'
end
- In a terminal emulator, navigate to your project directory.
- Install the pods. Make sure the command is completed with no errors. If you get an error, run the same command with the
--verboseoption and share the error log with our services team.
pod install
Important notes:
- Sometimes CocoaPods fails to load the latest version. So you may need to pull it using
pod update. - If you get a warning message after running
pod install, see our help article Removing CocoaPods warnings during integration.
You can add the Connect iOS library as a Swift Package.
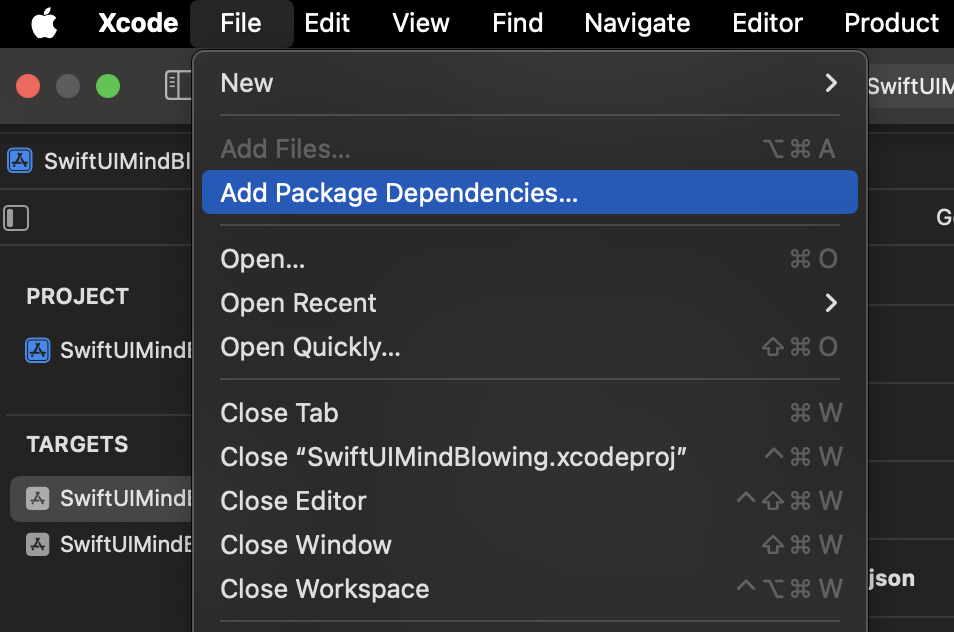
- In your Xcode project, go to File > Add Package Dependencies.
- Search for
https://github.com/go-acoustic/Connect-SP. For the debug build, replaceConnect-SPwithConnectDebug-SP. Never use both versions in the same project.
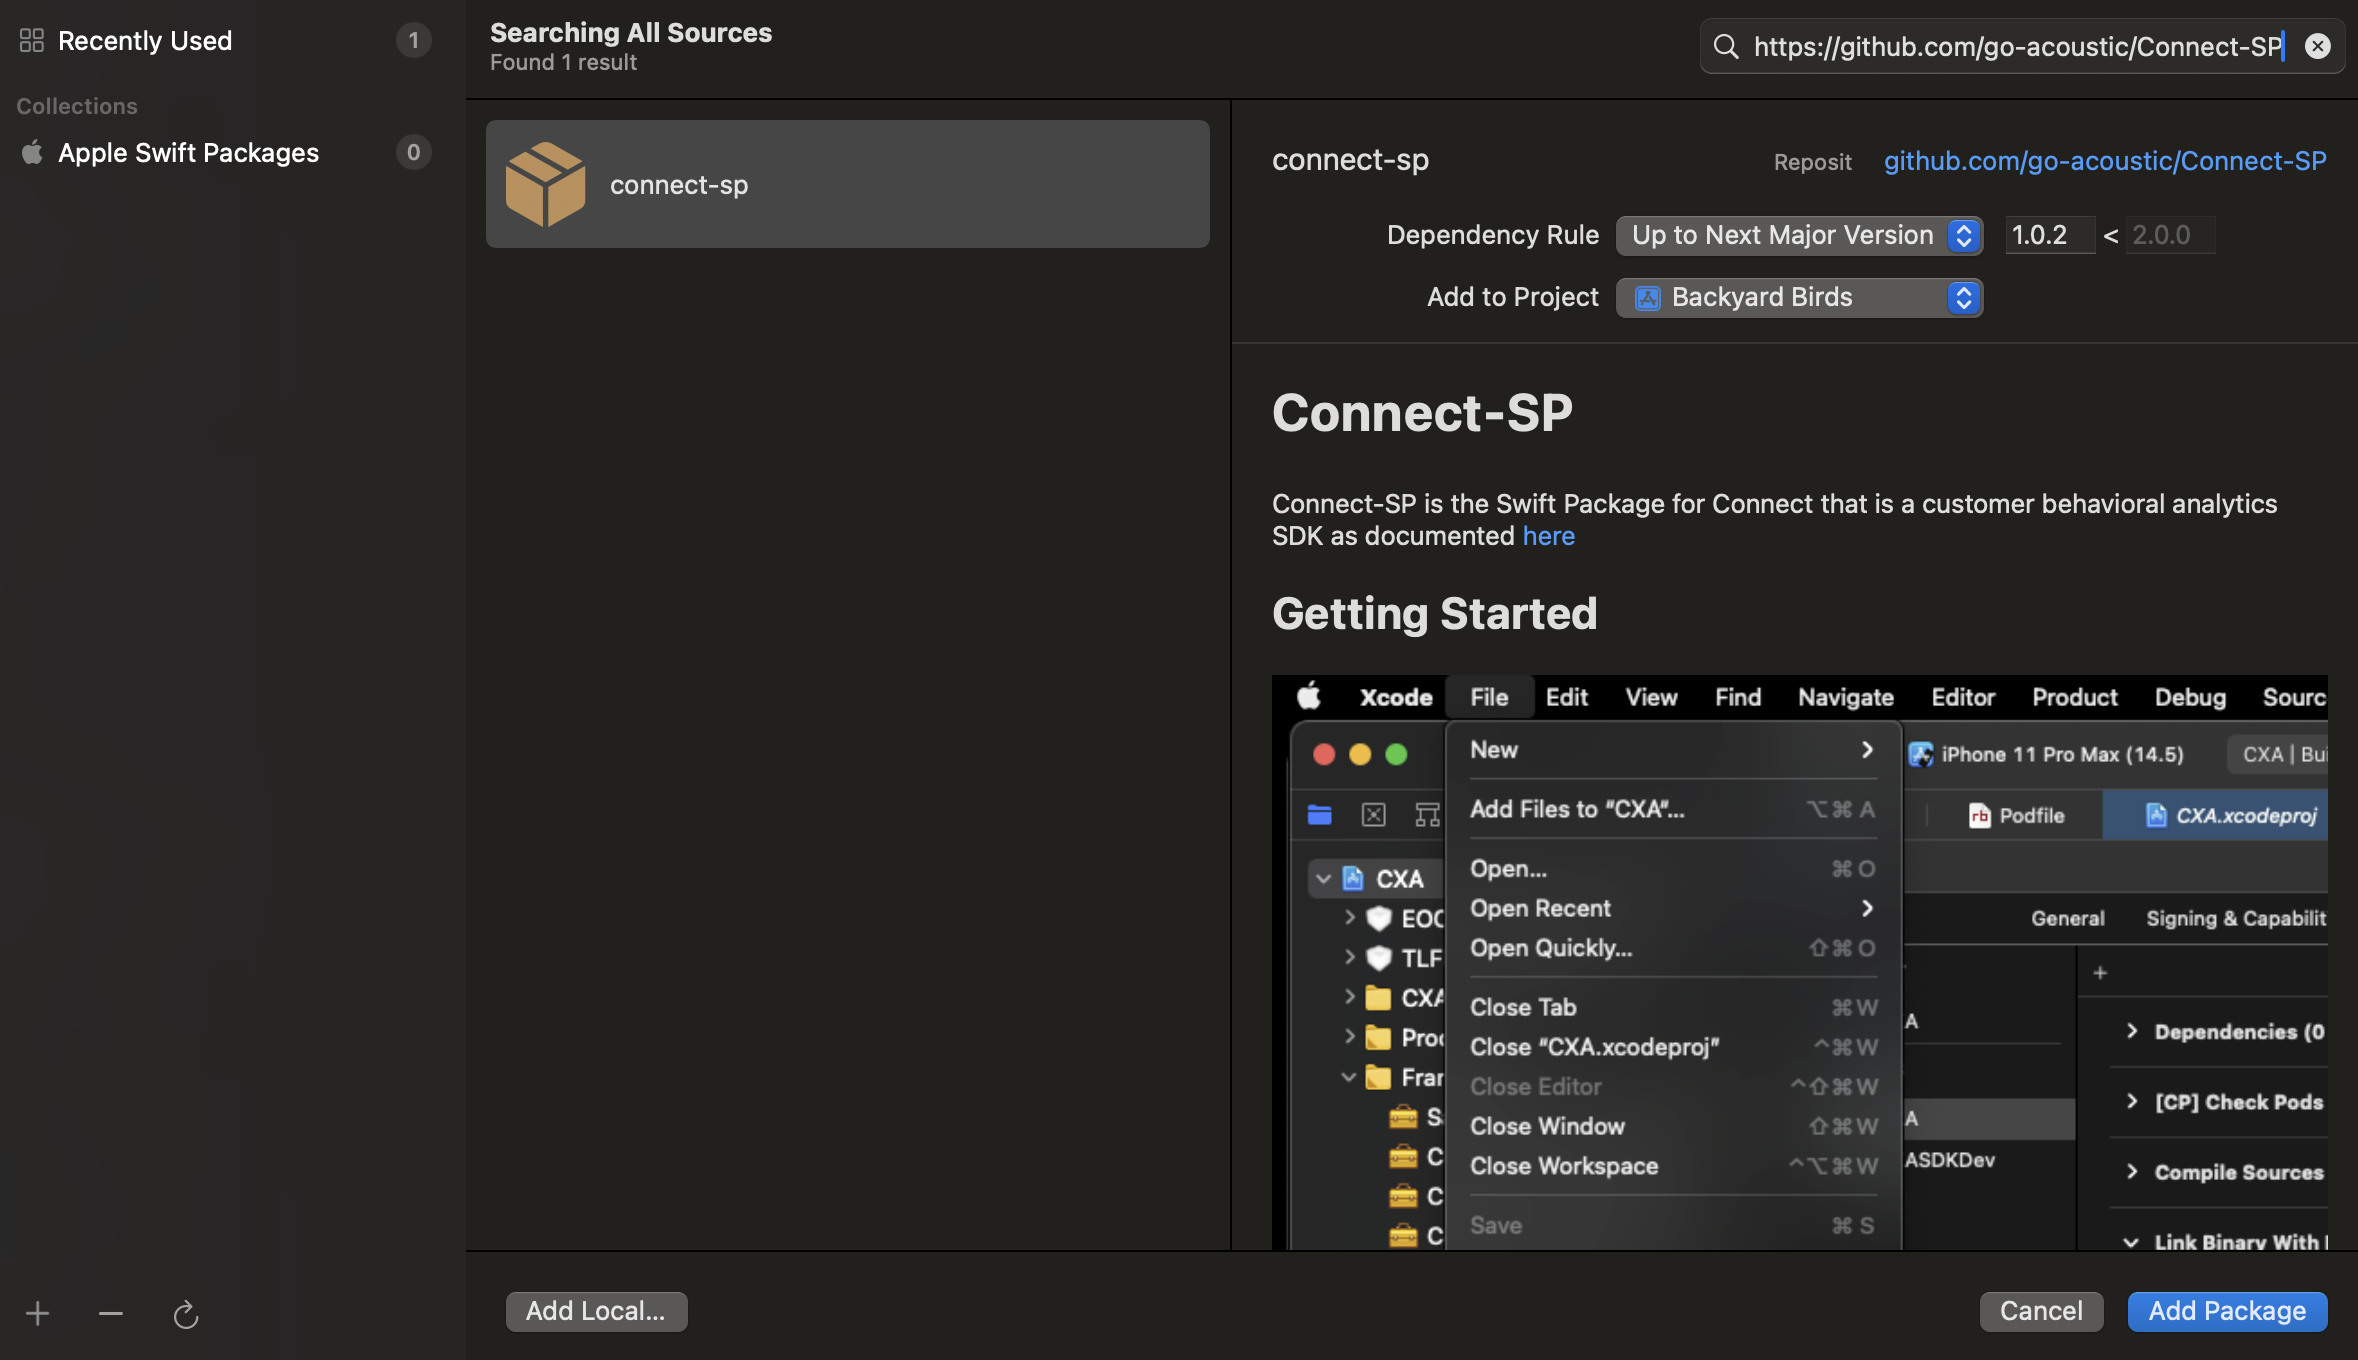
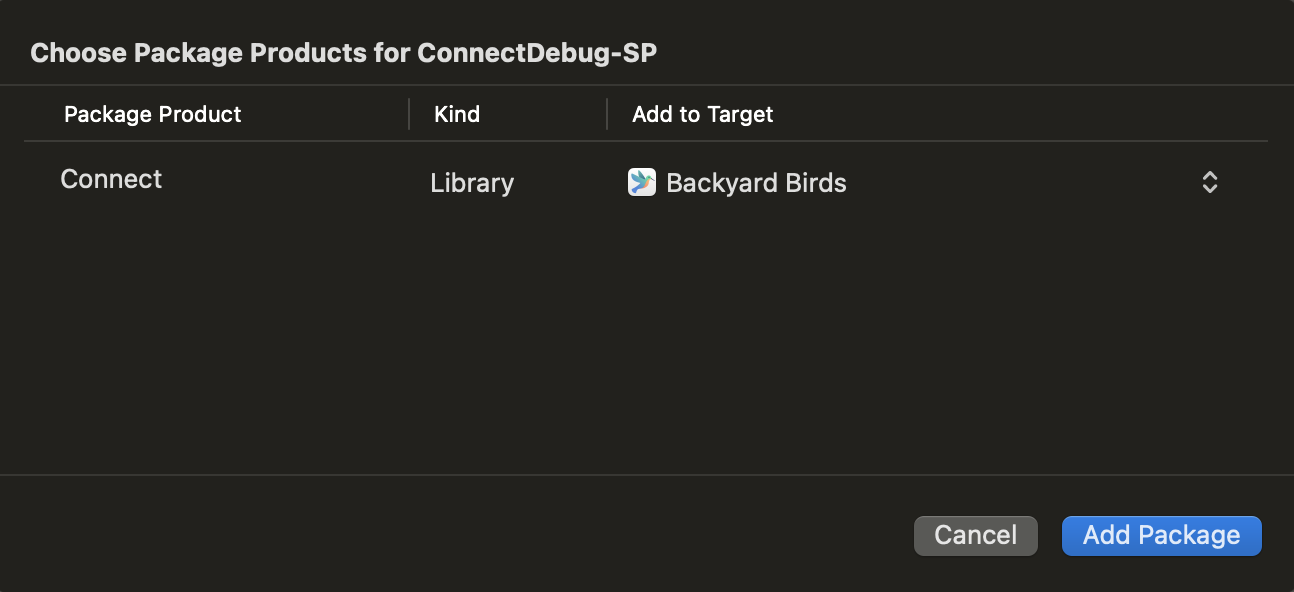
- Select the target to add the library to.
You can add the Connect library to your iOS app using the Carthage dependency manager.
- Create a Cartfile in your Xcode project directory if you don't have one yet.
touch Cartfile
- Open the Cartfile in a text editor and add the following lines for the release build. To add the debug build, update the file names: instead of EOCore.json use EOCoreDebug.json, instead of Tealeaf.json use TealeafDebug.json and instead of Connect.json use ConnectDebug.json.
binary "https://raw.githubusercontent.com/go-acoustic/EOCore/master/EOCore.json"
binary "https://raw.githubusercontent.com/go-acoustic/Tealeaf/master/Tealeaf.json"
binary "https://raw.githubusercontent.com/go-acoustic/Connect/master/Connect.json"
Warning
Never use the release and debug builds together in the same project.
- From the main project directory, run the command
carthage update --use-xcframeworks. Make sure it completes without errors. - In a file manager, navigate to
/Carthage/Buildinside your project directory and select all three bundles.
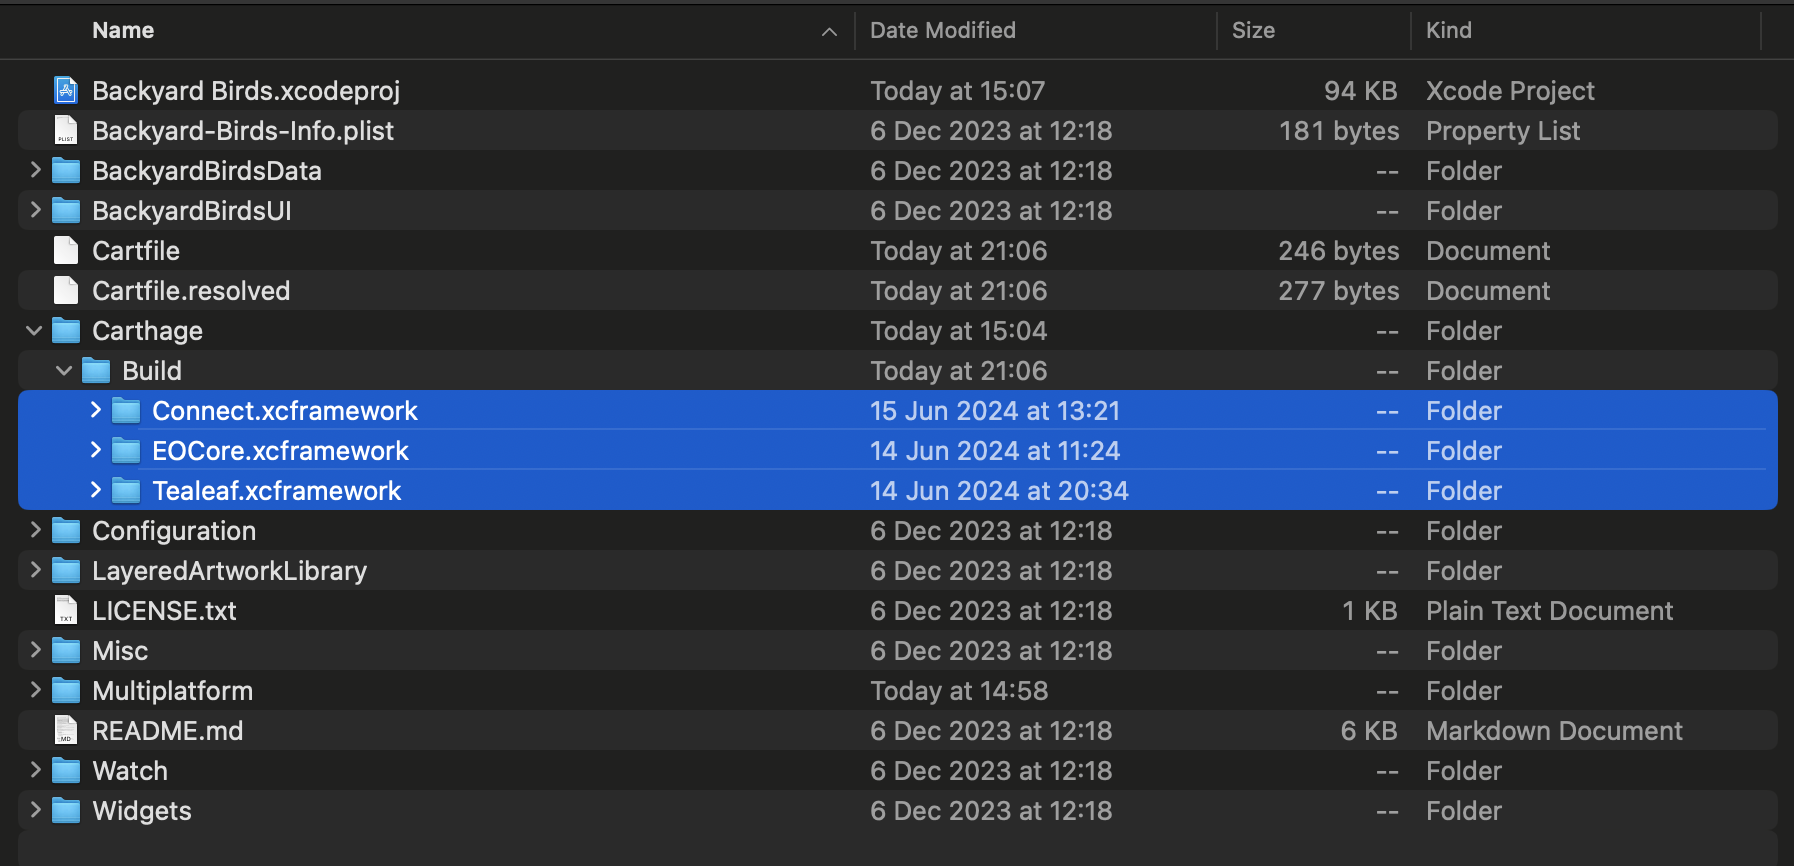
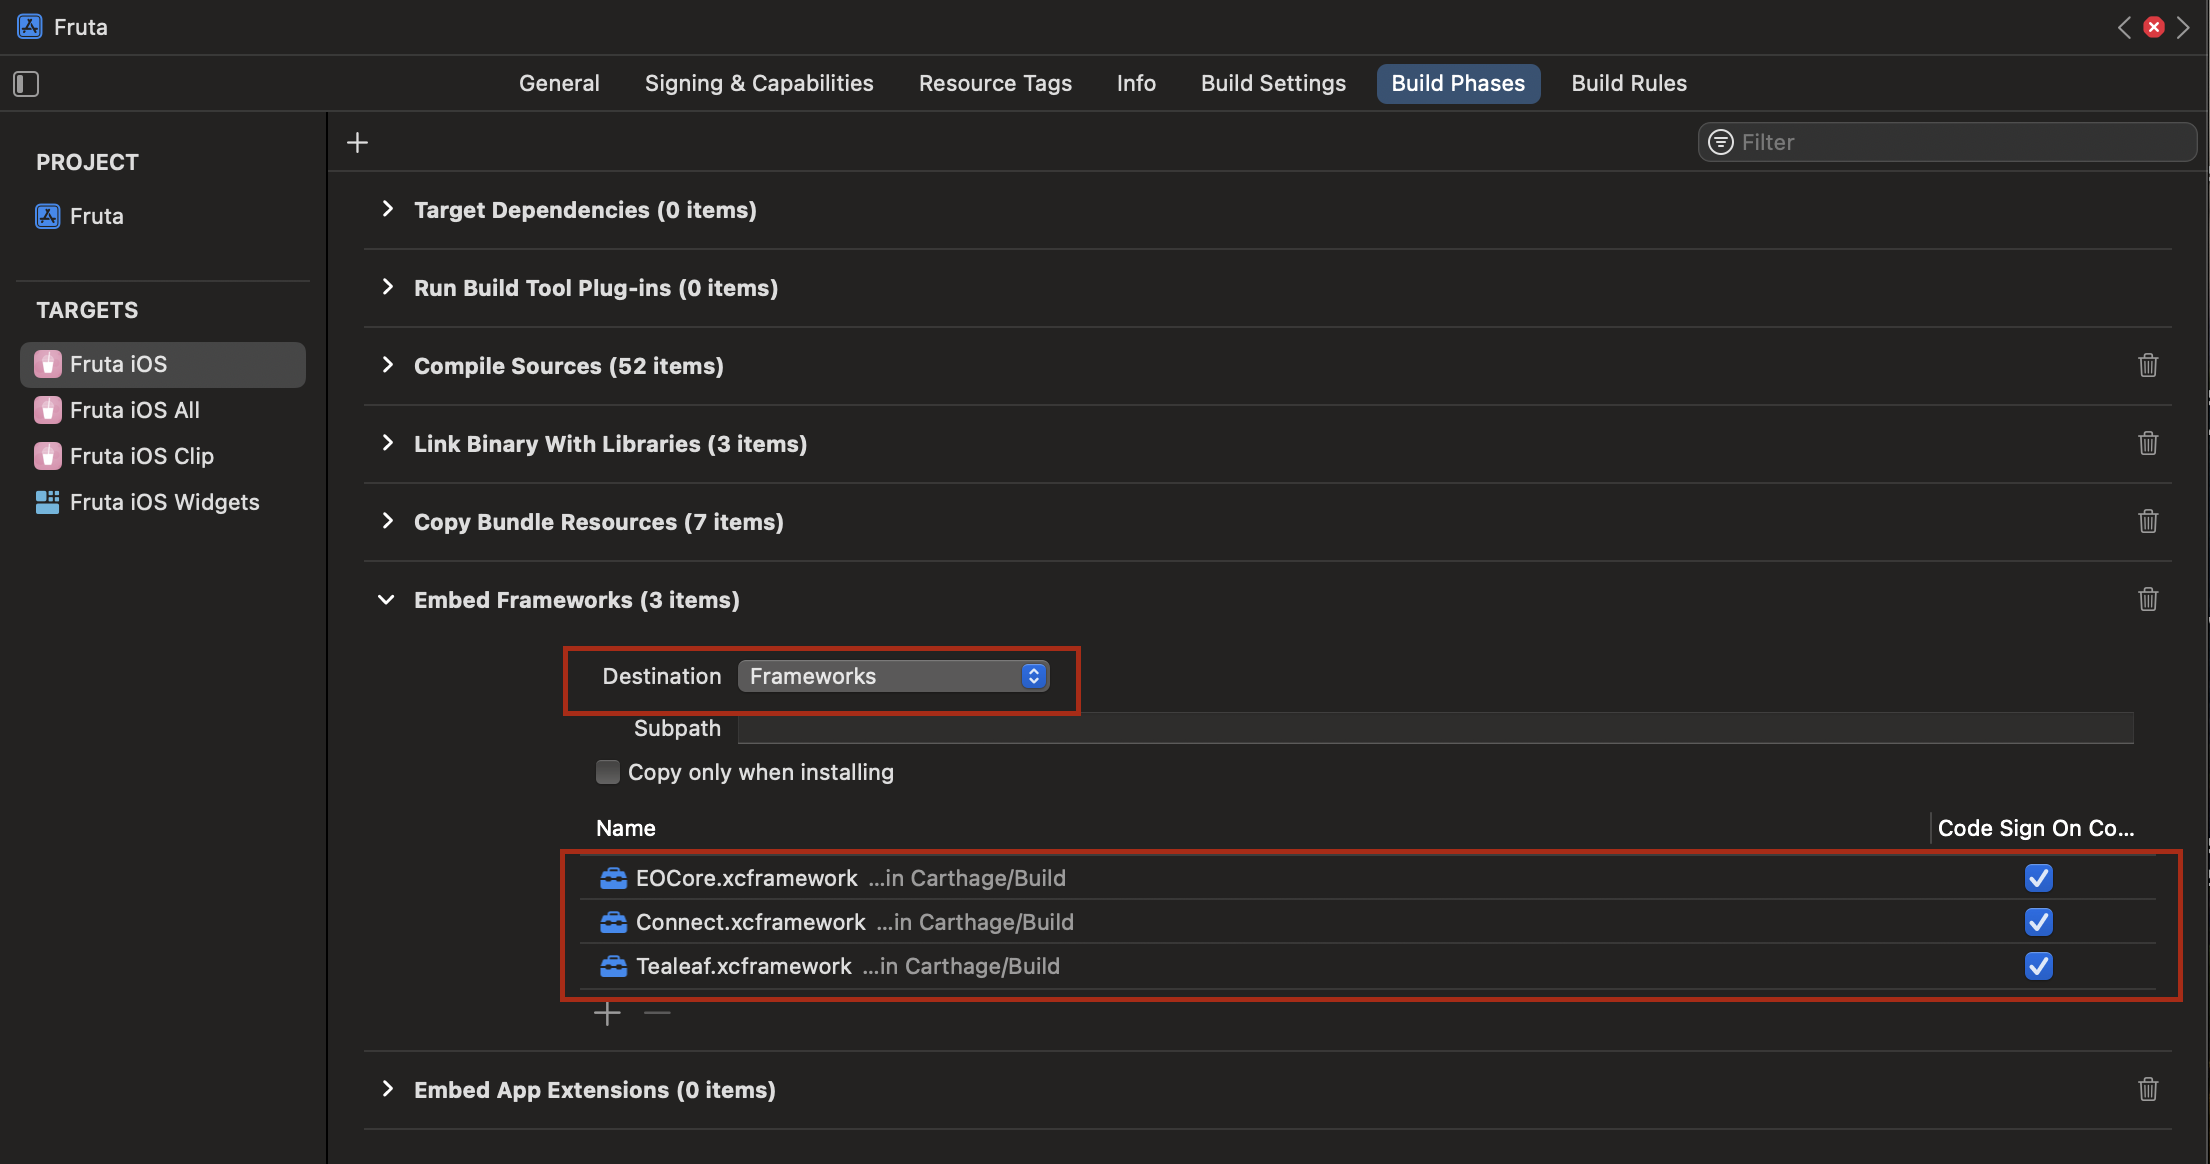
- In your Xcode project, select the primary project target. Drag and drop the bundles to Frameworks, Libraries, and Embedded Content. Select Embed & Sign for each bundle.
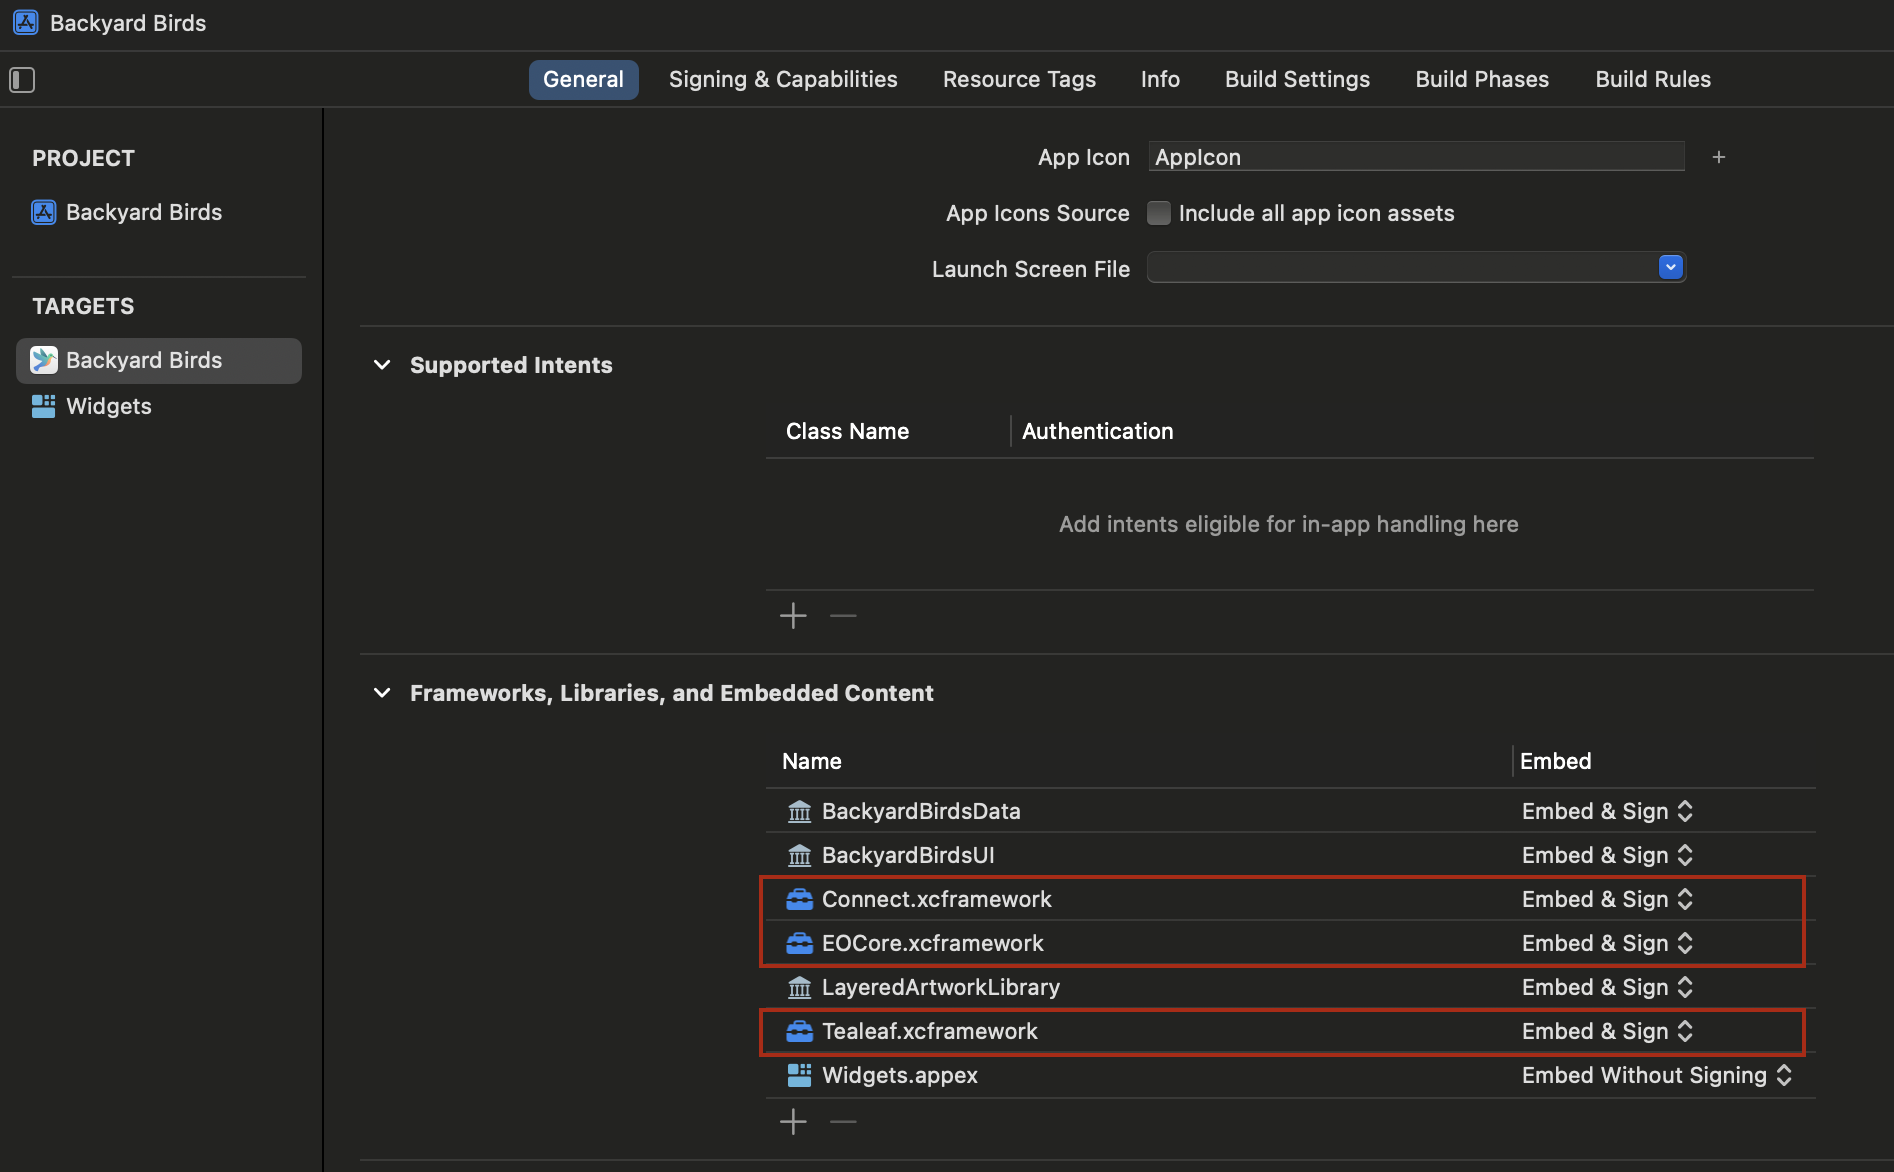
- Switch to the Build Phases tab and make sure all three appear under Embed Frameworks. If they don't, you will need to add them as frameworks.
- Rebuild the project.
Required configuration
There are some required steps to finalize the integration.
- If your project is built on SwiftUI, make sure it contains the AppDelegate file.
- Add the following code to AppDelegate. Replace
app_keyandcollector_urlwith the credentials issued for your organization.
import Connect
import EOCore
import Tealeaf
import UIKit

class AppDelegate: UIResponder, UIApplicationDelegate {
  func application(
    _ application: UIApplication,
    didFinishLaunchingWithOptions launchOptions: [UIApplication.LaunchOptionsKey: Any]?
  ) -> Bool {
    let connectApplicationHelperObj = ConnectApplicationHelper()

    // Enable library to load configuration settings
    let appKey: String = "app_key"
    let postMessageURL: String = "collector_url"
    connectApplicationHelperObj.enableFramework(appKey, withPostMessageUrl: postMessageURL)

    return true
  }

  func applicationWillTerminate(_ application: UIApplication) {
    // Called when the application is about to terminate. Save data if appropriate. See also applicationDidEnterBackground:.
  }

  // MARK: UISceneSession Lifecycle

  func application(
    _ application: UIApplication, configurationForConnecting connectingSceneSession: UISceneSession,
    options: UIScene.ConnectionOptions
  ) -> UISceneConfiguration {
    // Called when a new scene session is being created.
    // Use this method to select a configuration to create the new scene with.
    return UISceneConfiguration(
      name: "Default Configuration", sessionRole: connectingSceneSession.role)
  }

  func application(
    _ application: UIApplication, didDiscardSceneSessions sceneSessions: Set<UISceneSession>
  ) {
    // Called when the user discards a scene session.
    // If any sessions were discarded while the application was not running, this will be called shortly after application:didFinishLaunchingWithOptions.
    // Use this method to release any resources that were specific to the discarded scenes, as they will not return.
  }
}
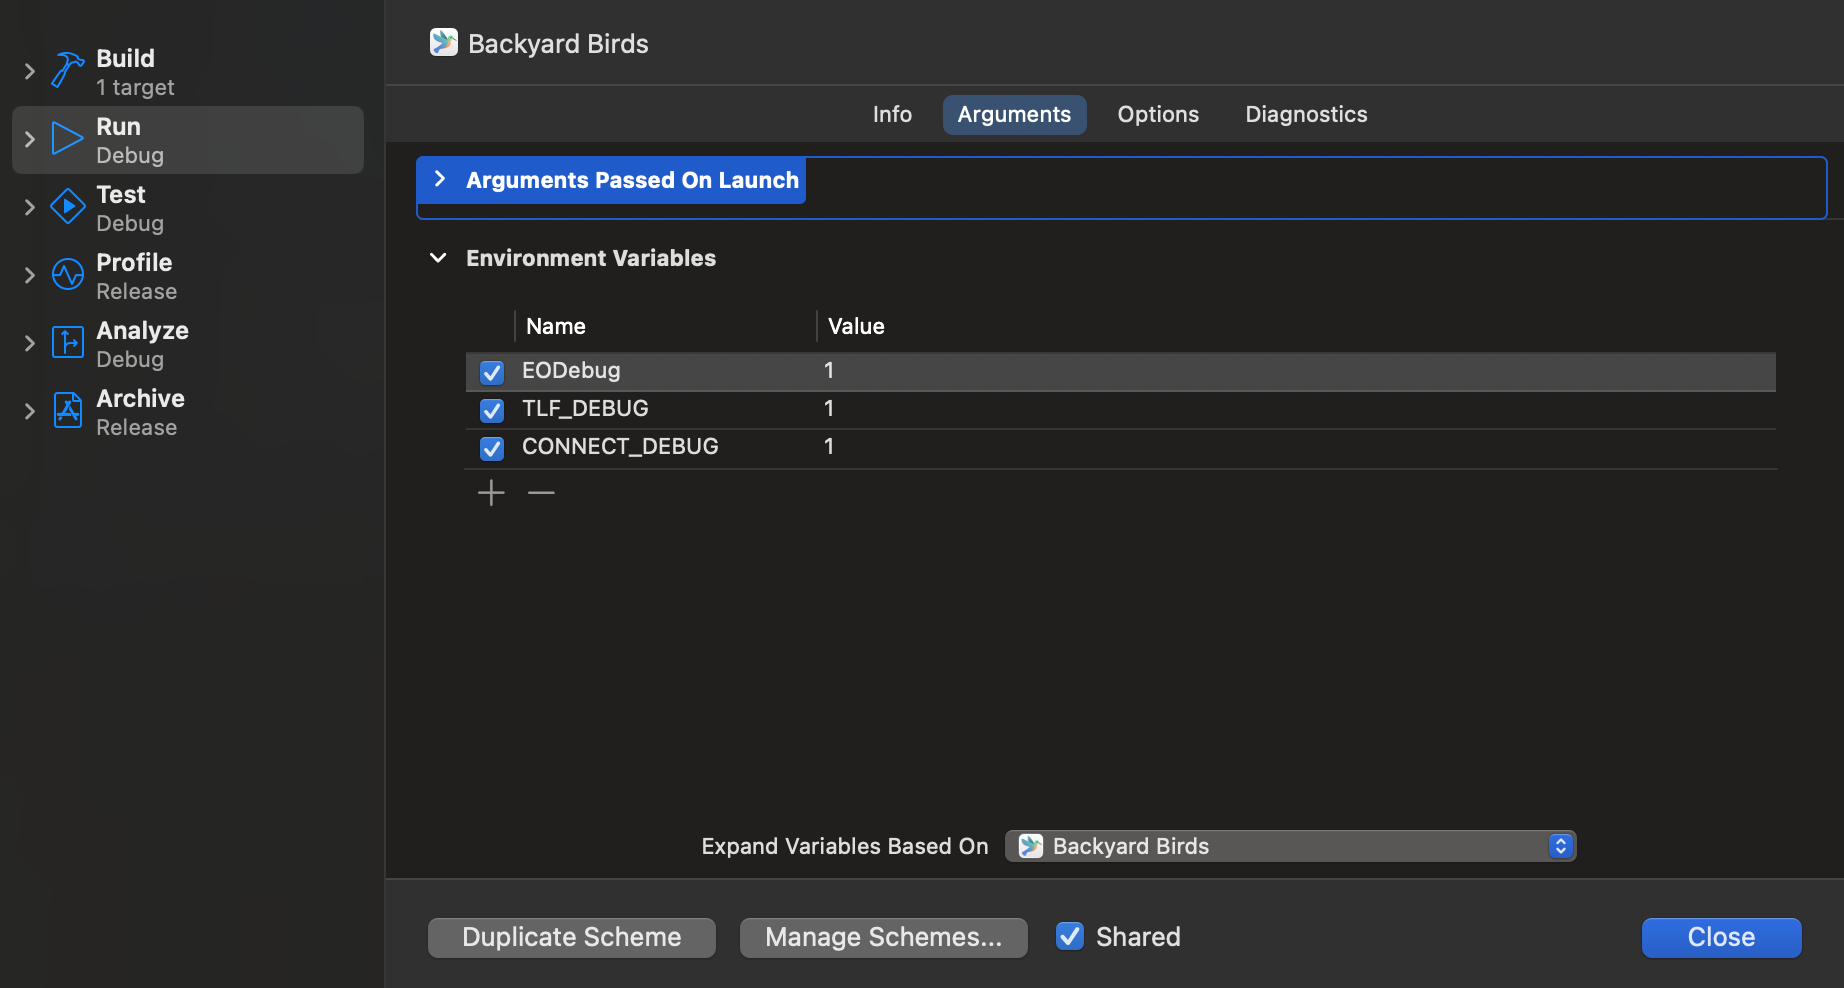
- If you have installed the debug version, update your project scheme by adding three environment variables with the value of
1:EODebug,CONNECT_DEBUGandTLF_DEBUG.
Important:
- Never use the release and beta builds together in the same project.
- When reporting an issue to our support team, always attach your debug log. It speeds up troubleshooting.
What's next?
Now you can build and run your app.
Related instructions
Updated about 21 hours ago