
Integrate the Connect library into a Flutter app
The Connect SDK is a library that captures visitors' interactions with mobile applications. You can integrate the library into your Flutter app and track the findings in the Acoustic Connect interface.
NoteNew to Connect? Install our preconfigured sample app and explore the implementation faster.
Requirements
- Acoustic Connect. To use the Connect SDK, your company must have an active Connect subscription. Proper credentials are required for each app. For instructions, see Generate Connect credentials for integration.
- Development environment. To integrate the library into your app, you need a standard Flutter environment. Supported versions: 3.16 and later.
- Mobile app compatibility. The Connect library can function on end users' devices running Android 5.0 (API level 21) - Android 14 (API level 34). Supported iOS versions - 13.0 and later.
General guidelines
It is important that you assign unique IDs to all UI controls that you want to capture.
Initial setup
- From the root project directory, run the following commands.
flutter pub add connect_flutter_plugin
flutter pub get- Open
lib/main.dartand add an import statement there:
import 'package:connect_flutter_plugin/connect_flutter_plugin.dart';- To wrap the Connect library over your app, add another statement to
lib/main.dart. ReplaceFormAppwith the name of your app.
runApp(Connect(child: const FormApp()));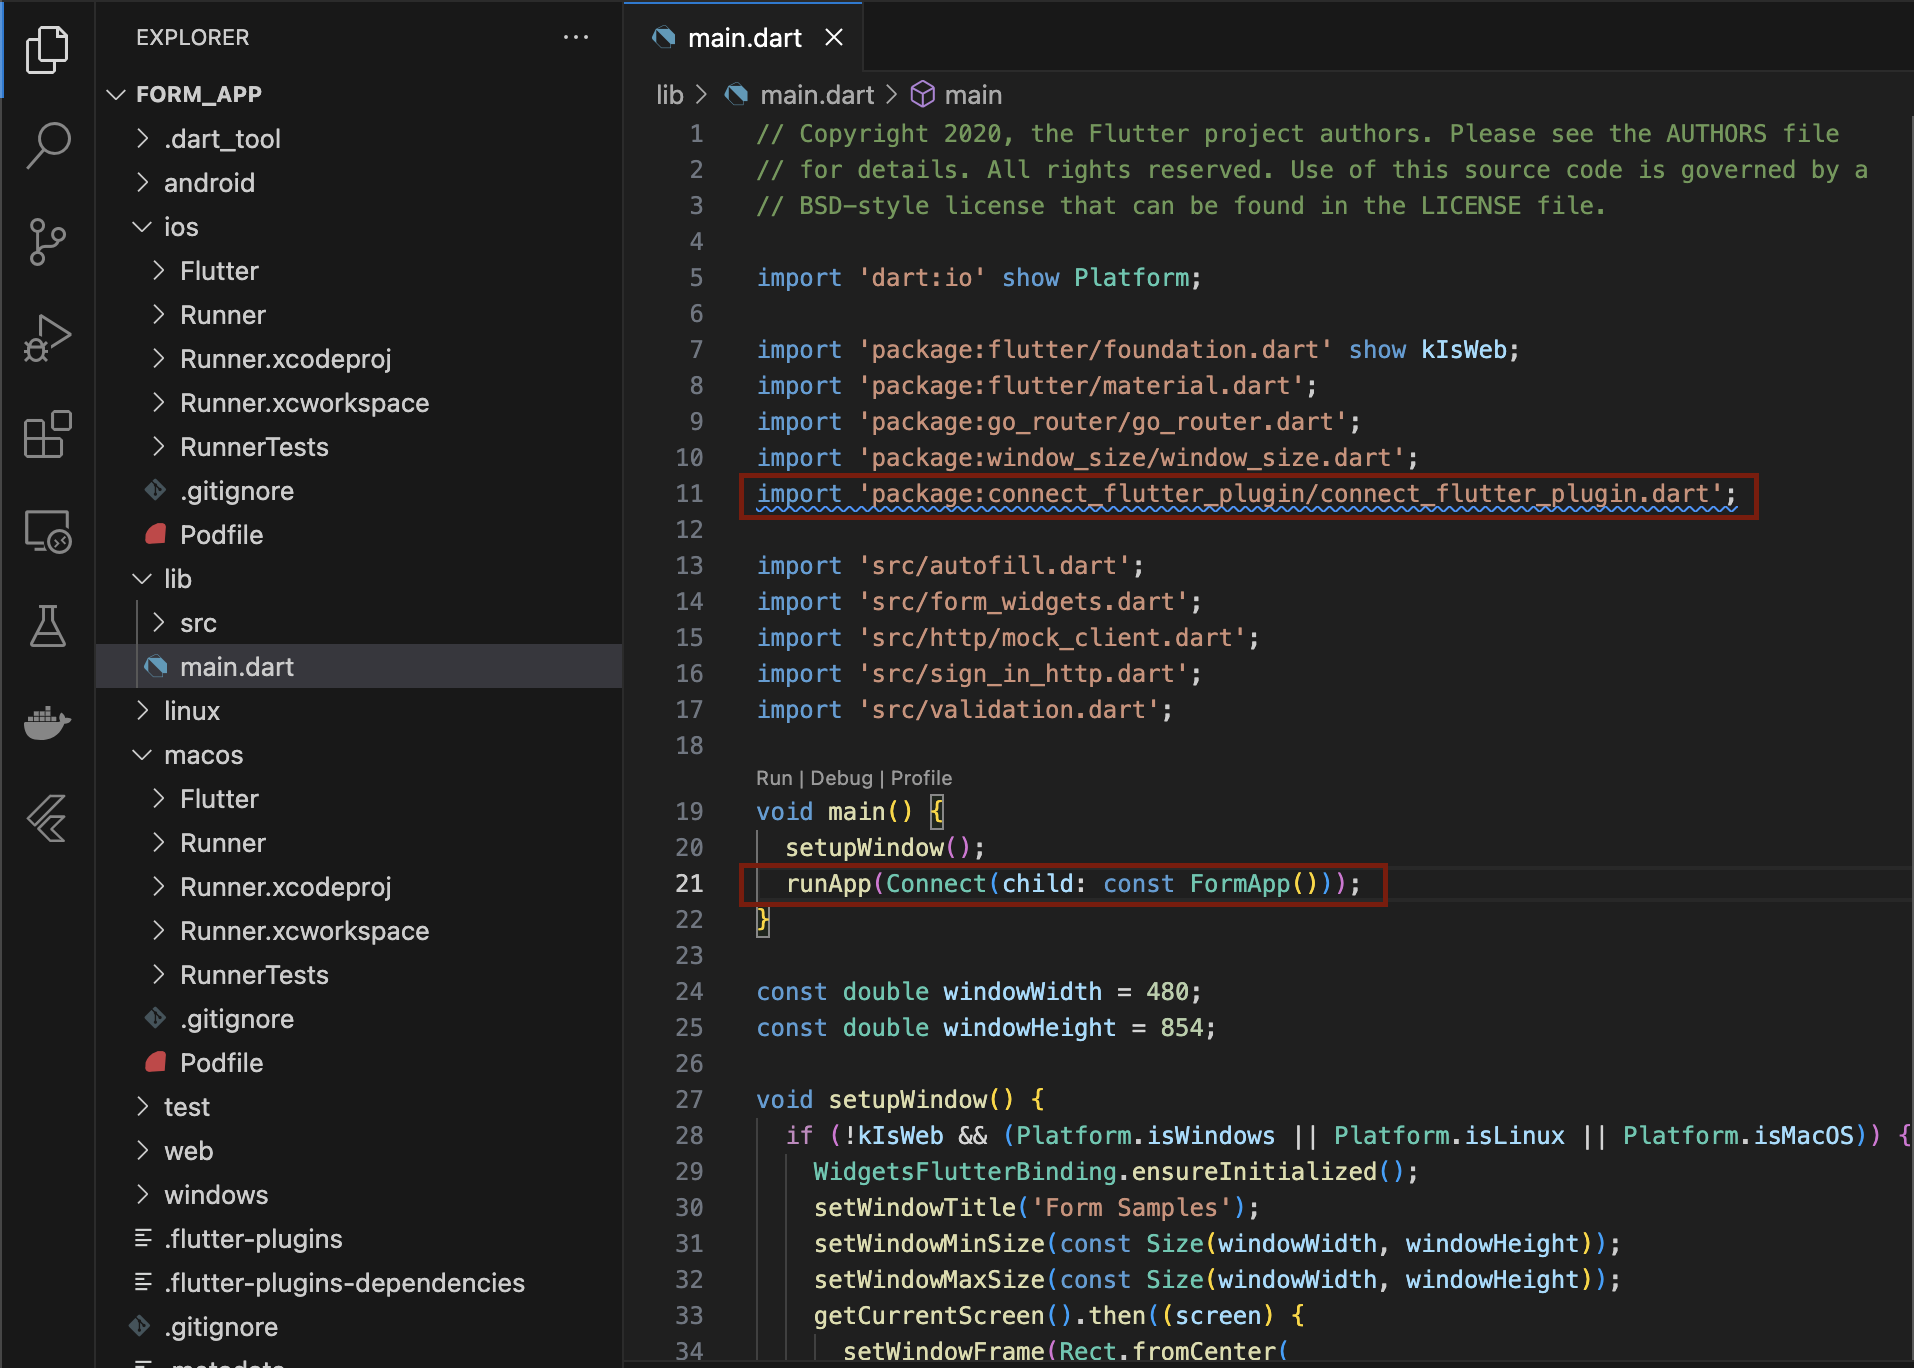
- In the same file, add the Connect Wrapper and Navigation Observer. It handles the app's navigation route changes and event logging.
navigatorObservers: [Connect.loggingNavigatorObserver],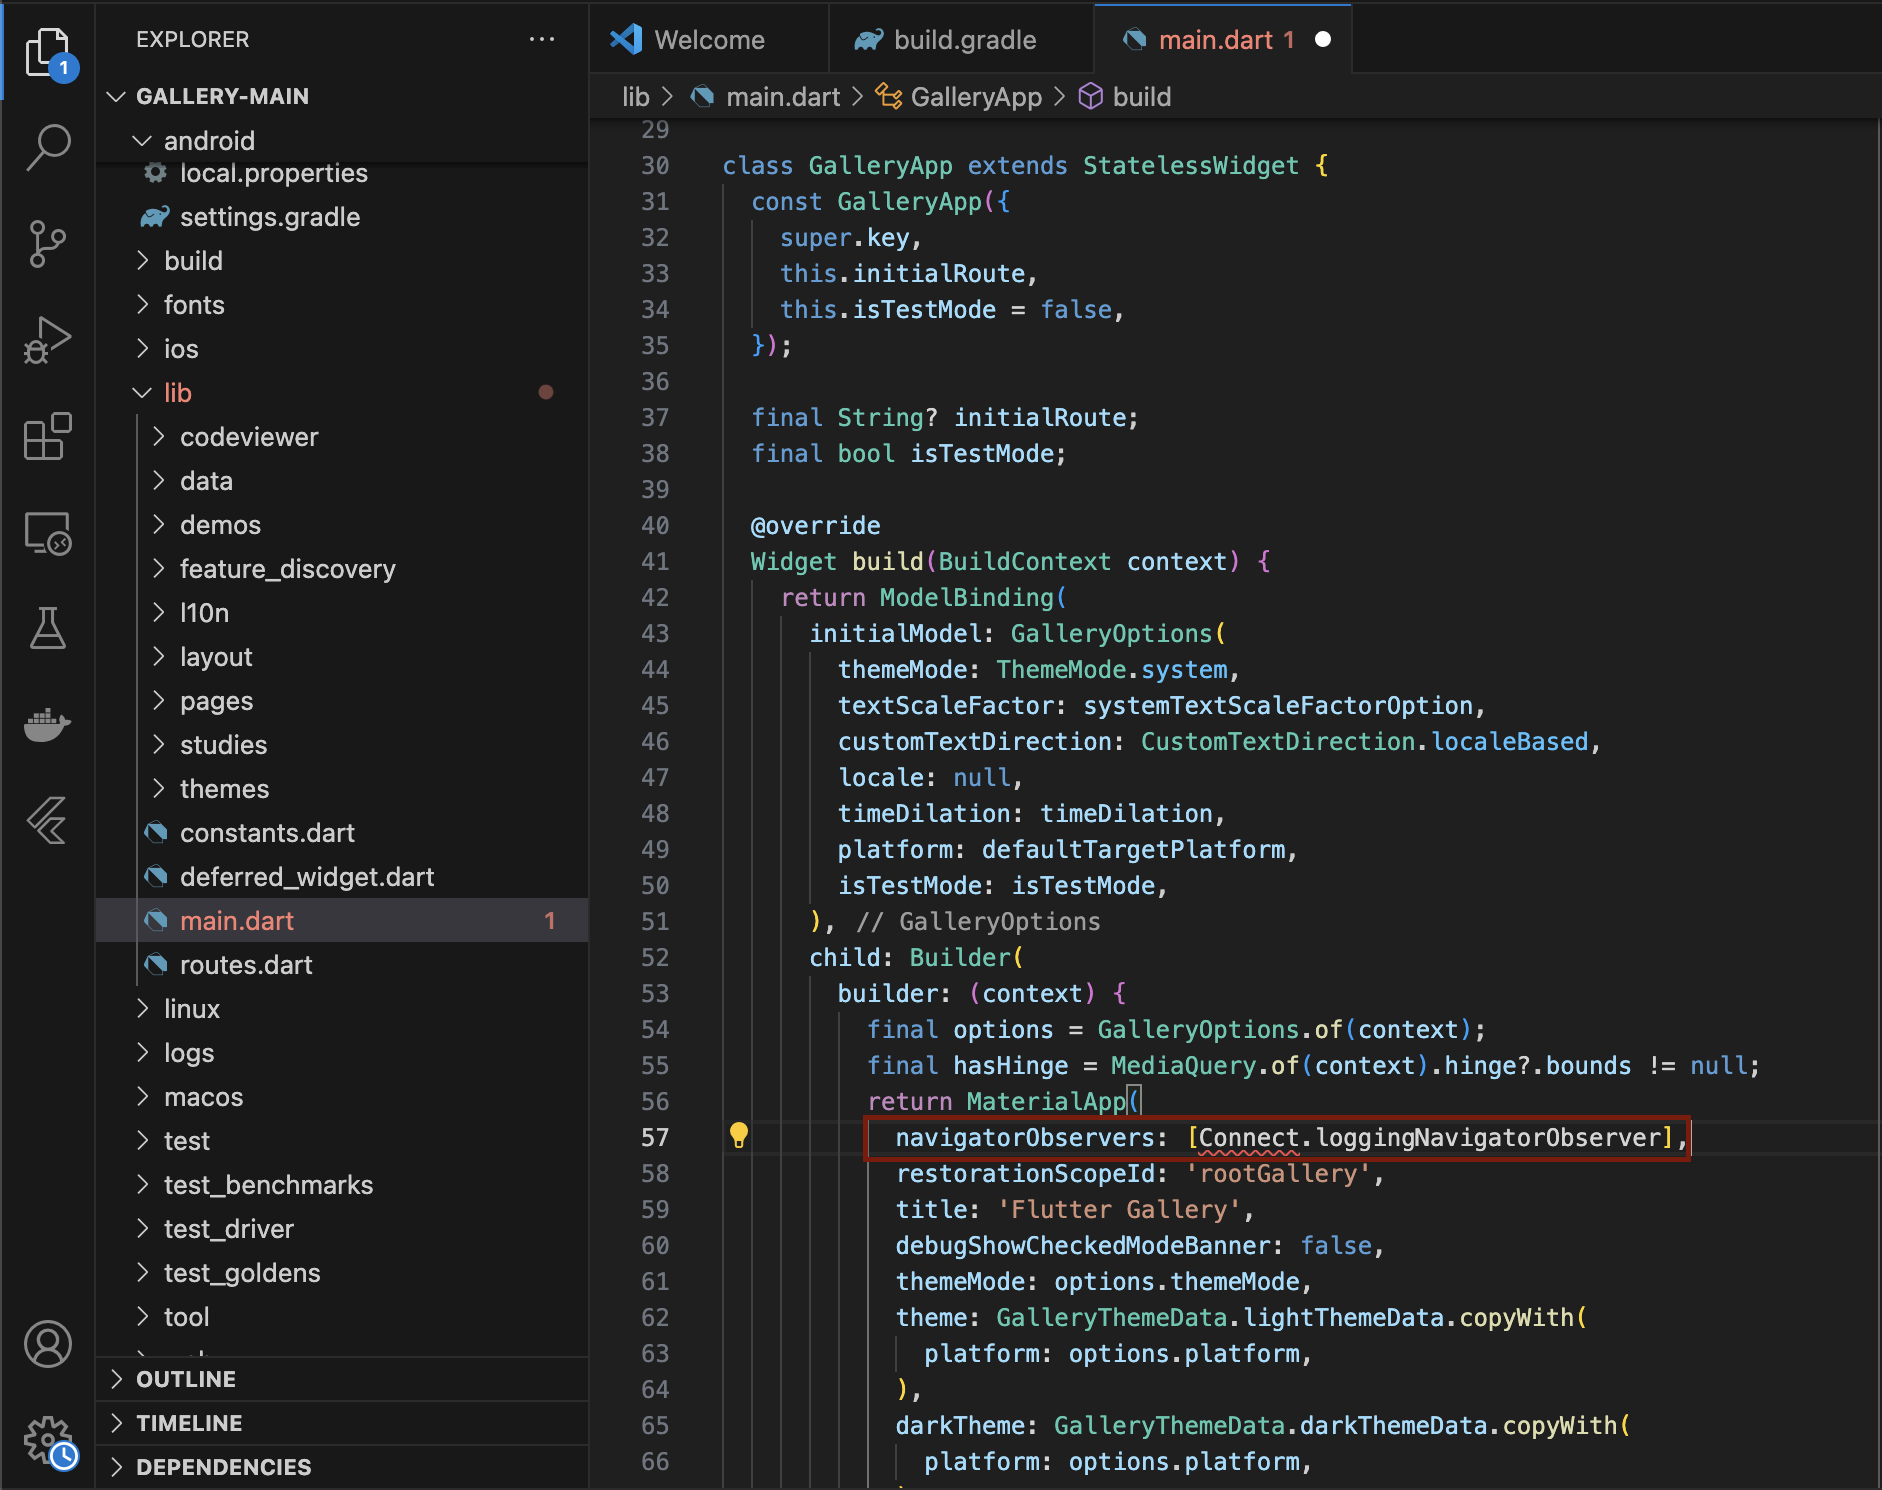
- Copy the Connect Automation CLI directory from
$HOME/.pub-cache/hosted/pub.dev/connect_flutter_plugin-<version>/package/connect_clito the root of your user directory.
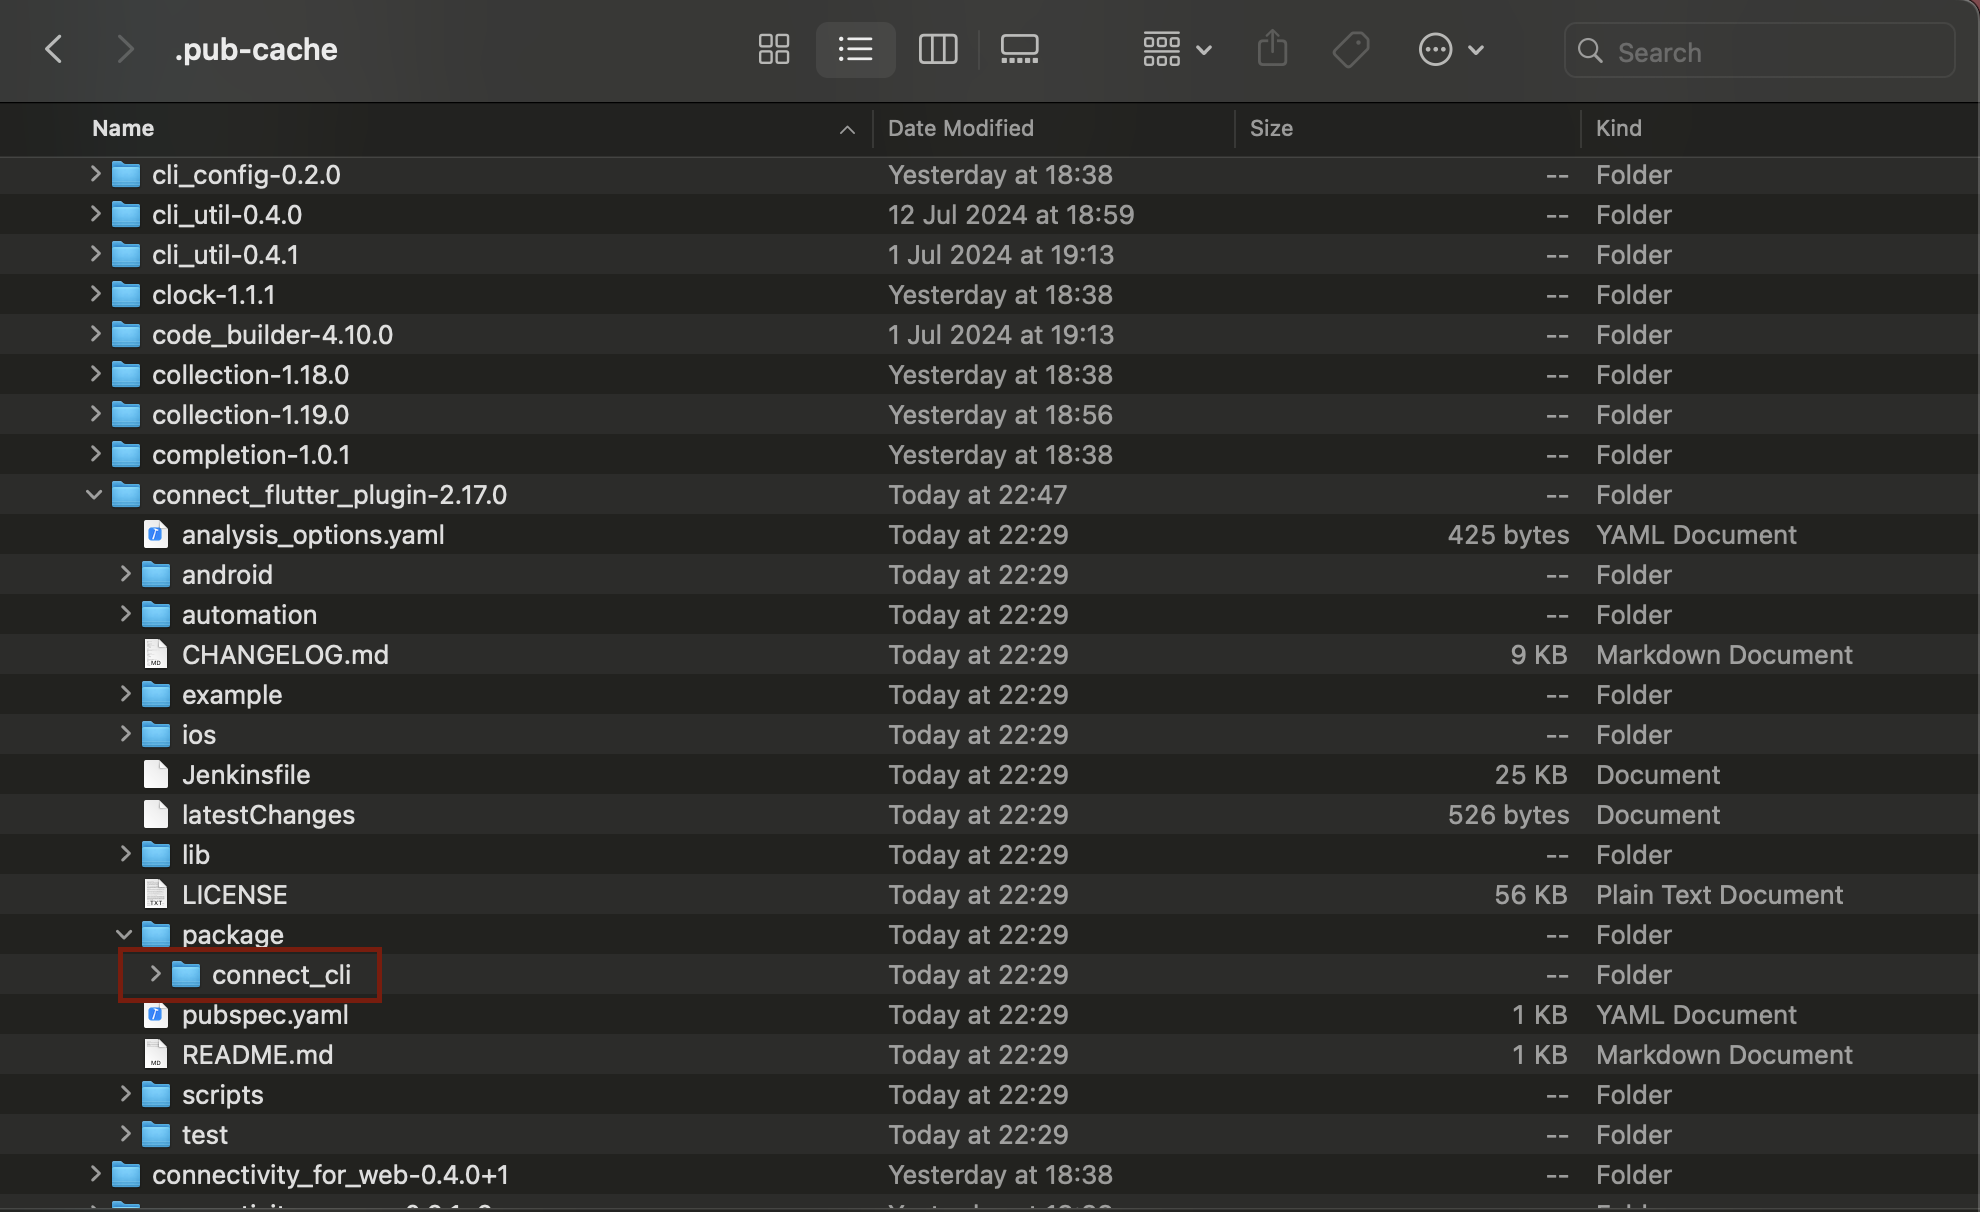
- Navigate to the
connect_clidirectory that you have just created and fetch dependencies for your project.
cd $HOME/connect_cli
flutter pub get- From the root project directory, run a Dart file.
cd <YOUR_PROJECT_PATH>
dart run $HOME/connect_cli/bin/connect_cli.dart- Install the pods in the iOS version of the library.
cd ios && pod installRequired configuration
Steps
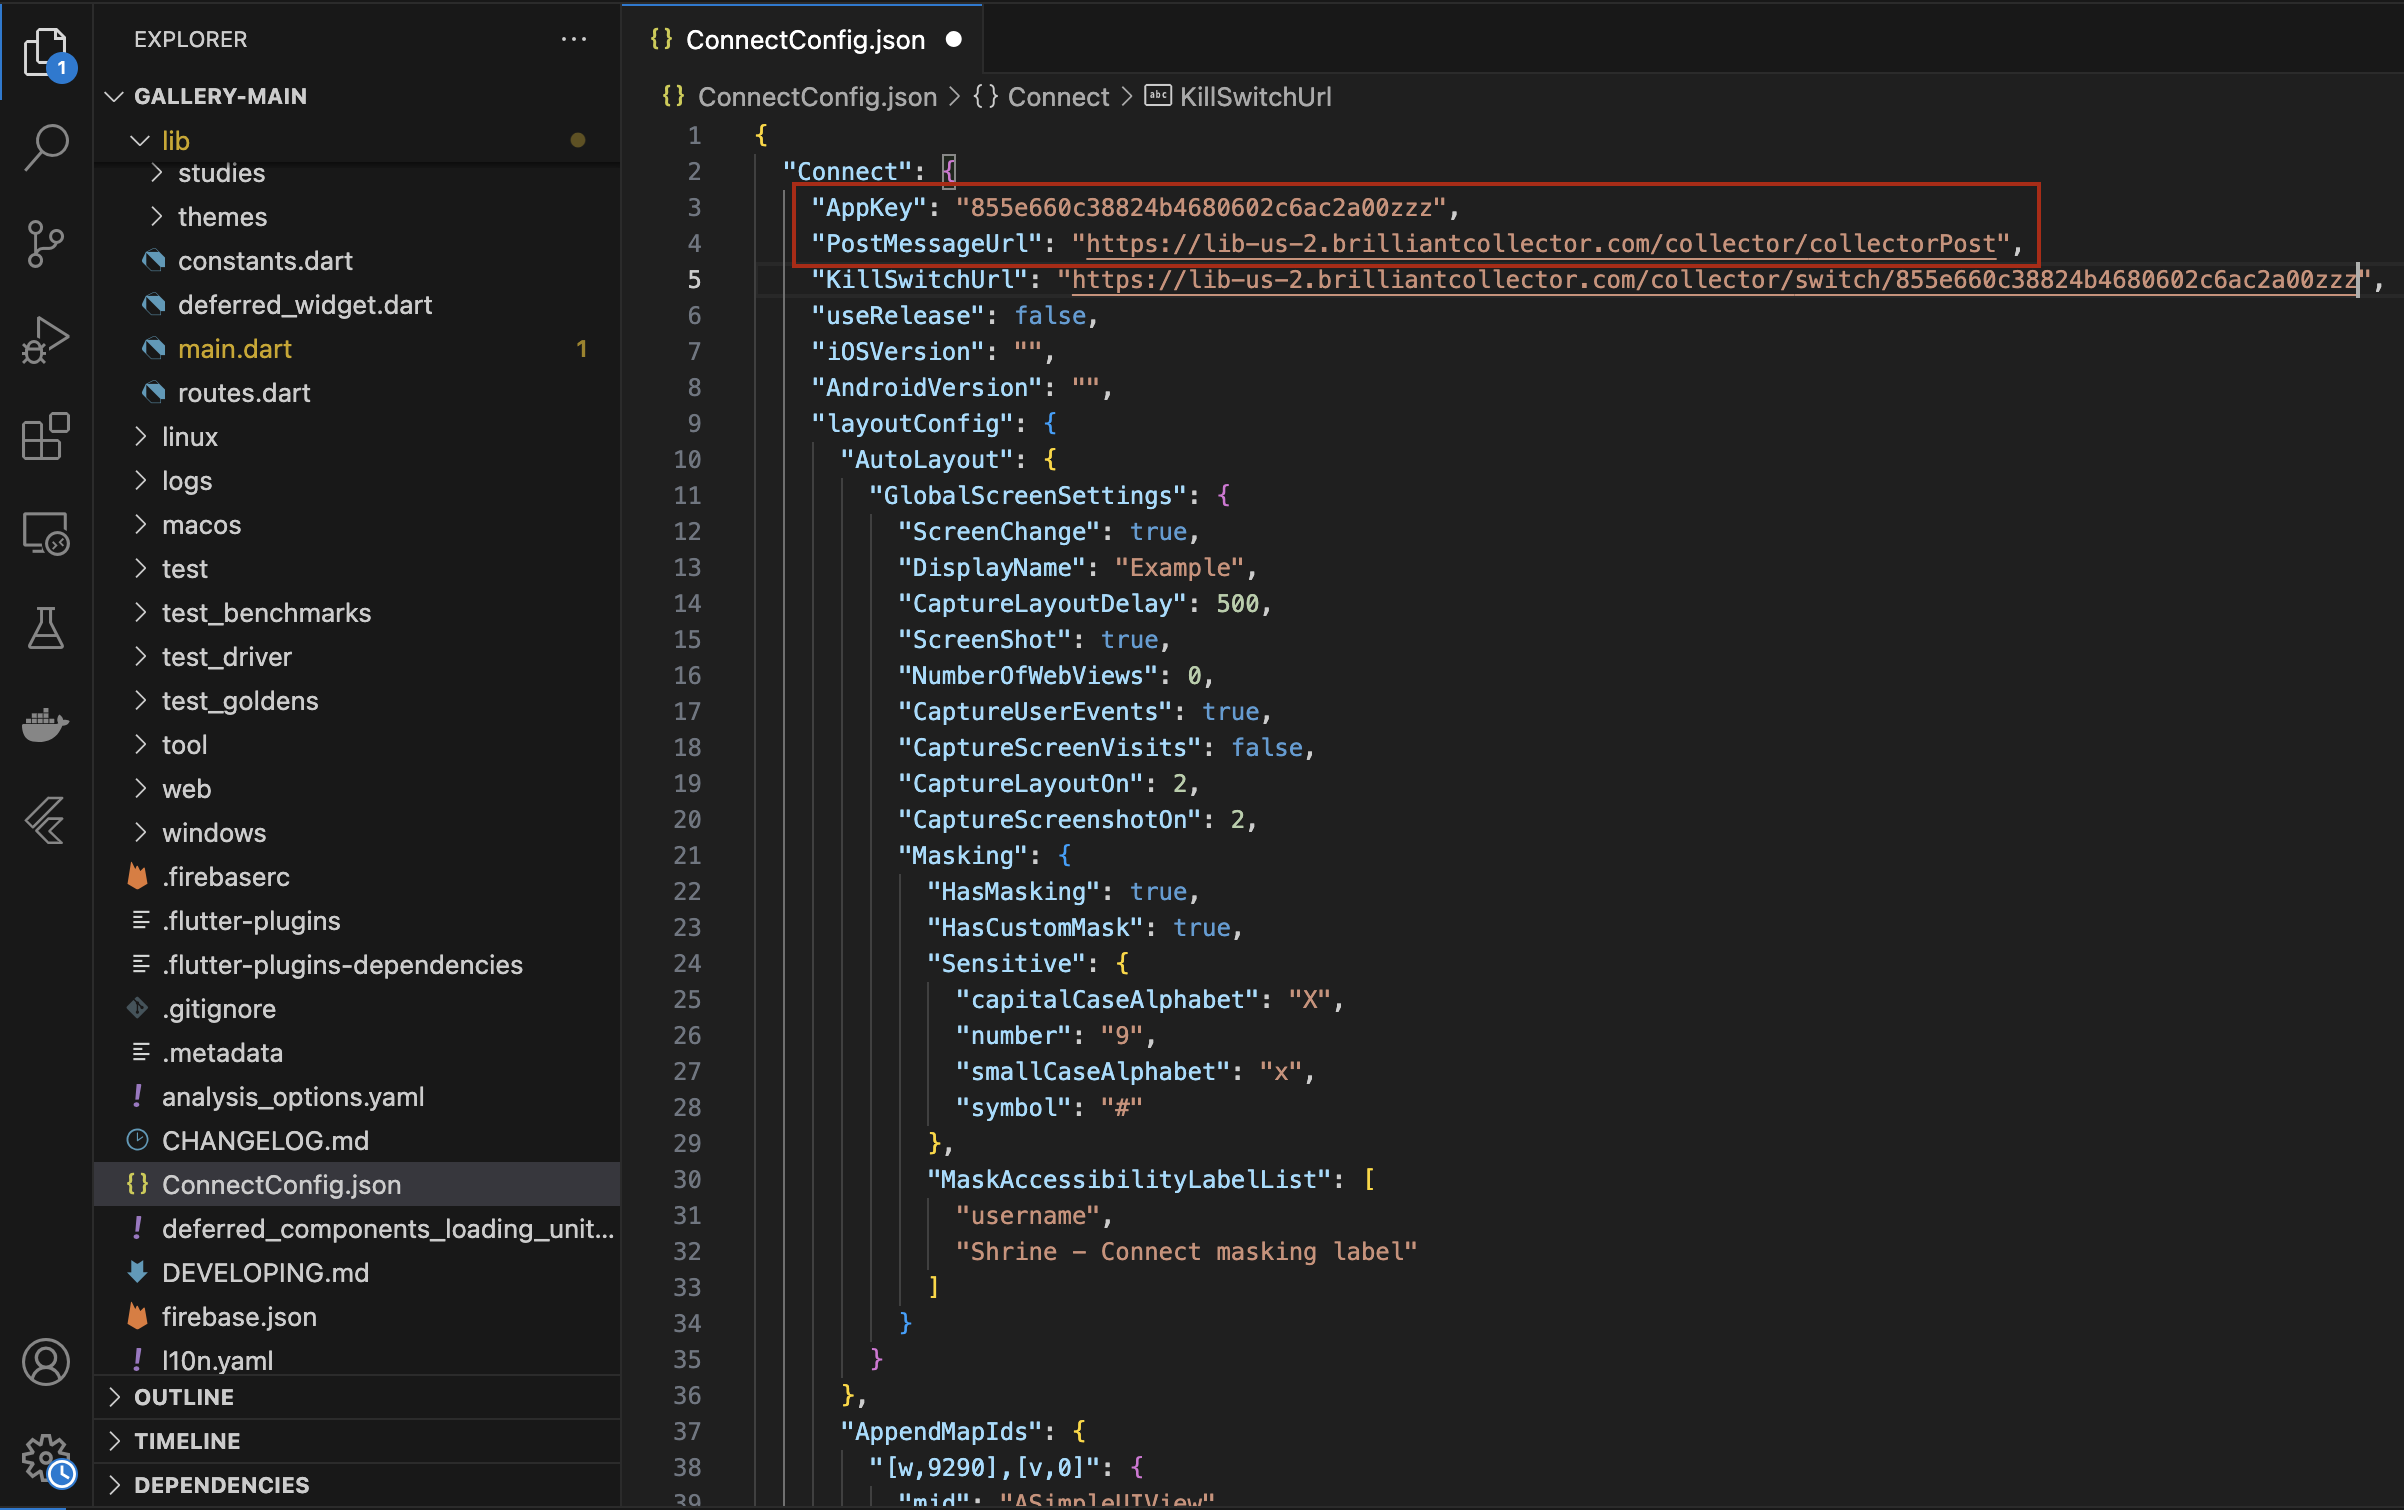
- In the root project directory, open ConnectConfig.json and update the
AppKeyandPostMessageUrlparameters in it. - If necessary, update other parameters (the list is available below).
- Navigate to the root project directory and run the Connect Command Line Tool.
cd <YOUR_PROJECT_PATH>
dart run $HOME/connect_cli/bin/connect_cli.dart
ImportantMake sure you run this command each time after updating ConnectConfig.json.
- Build and run your apps.
Parameters
Here is a full list of configuration parameters you may need during the initial installation.
| Parameter | Values | Required? | Description |
|---|---|---|---|
AppKey | String | Required | The application key generated for your Flutter app |
PostMessageUrl | String | Required | The collector URL associated with your Connect subscription |
KillSwitchUrl | String | Optional | For production, you will need to replace the default application key at the end of the URL with your application key. You can do it now, but this is not required. |
useRelease | Boolean. The default value is true. | Optional | Set the value to false to switch to the latest beta version of the library. It contains debug information. |
iOSVersion | String | Optional | Under the hood, the Connect Flutter SDK is a wrapper for two Connect SDKs: iOS and Android. Using this parameter, you can downgrade the iOS SDK to an older version. |
AndroidVersion | String | Optional | Using this parameter, you can downgrade the Android SDK to an older version. |
Final project preparation
Launch task creation (optional)
Our sample app contains a hidden directory (.vscode). The files in it integrate the above steps into a pre-build flow. You can re-use this directory for your app.
- Create the same directory in the root of your app.
- Add the prelaunch task labeled Run Connect CLI.
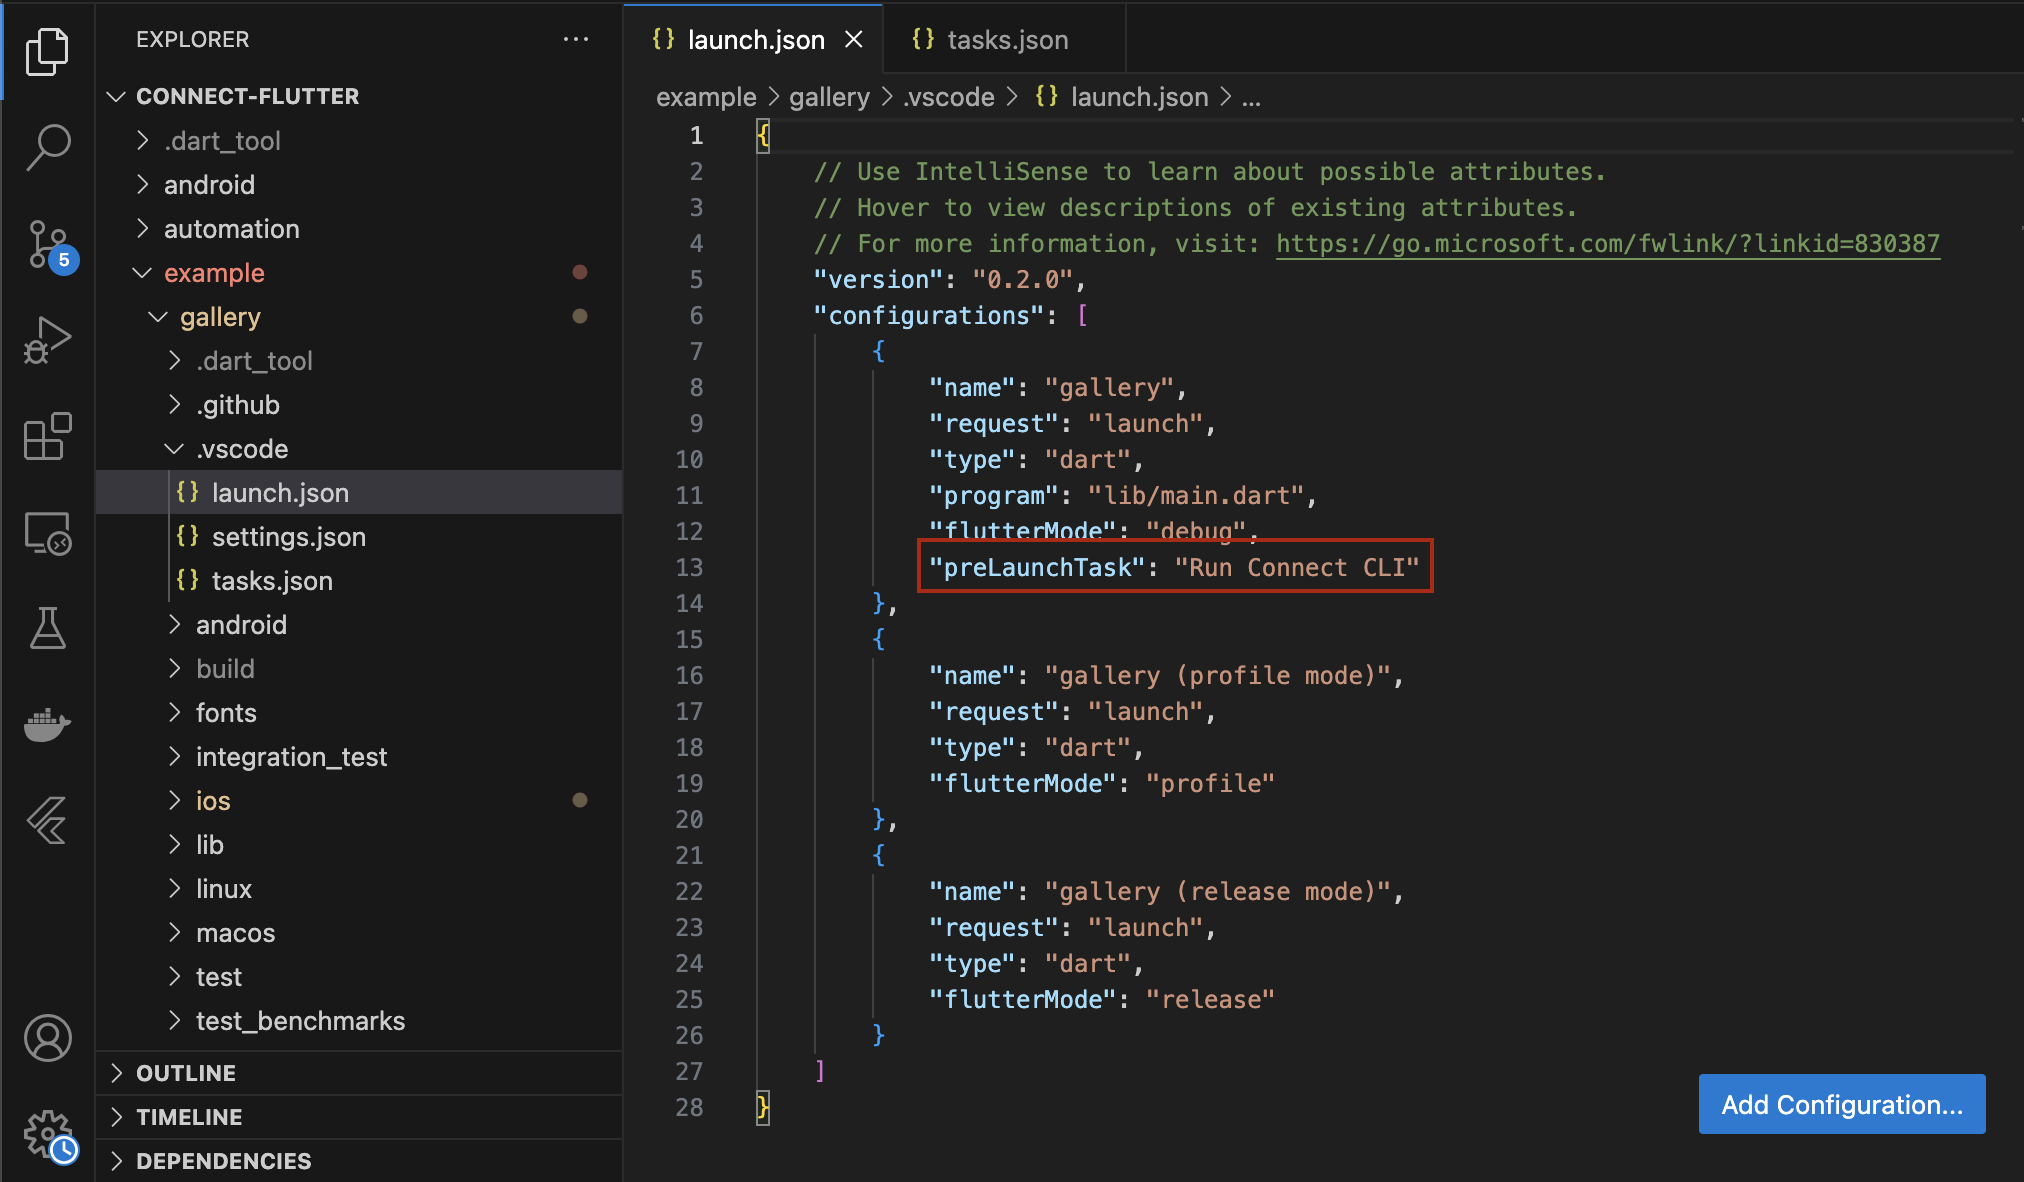
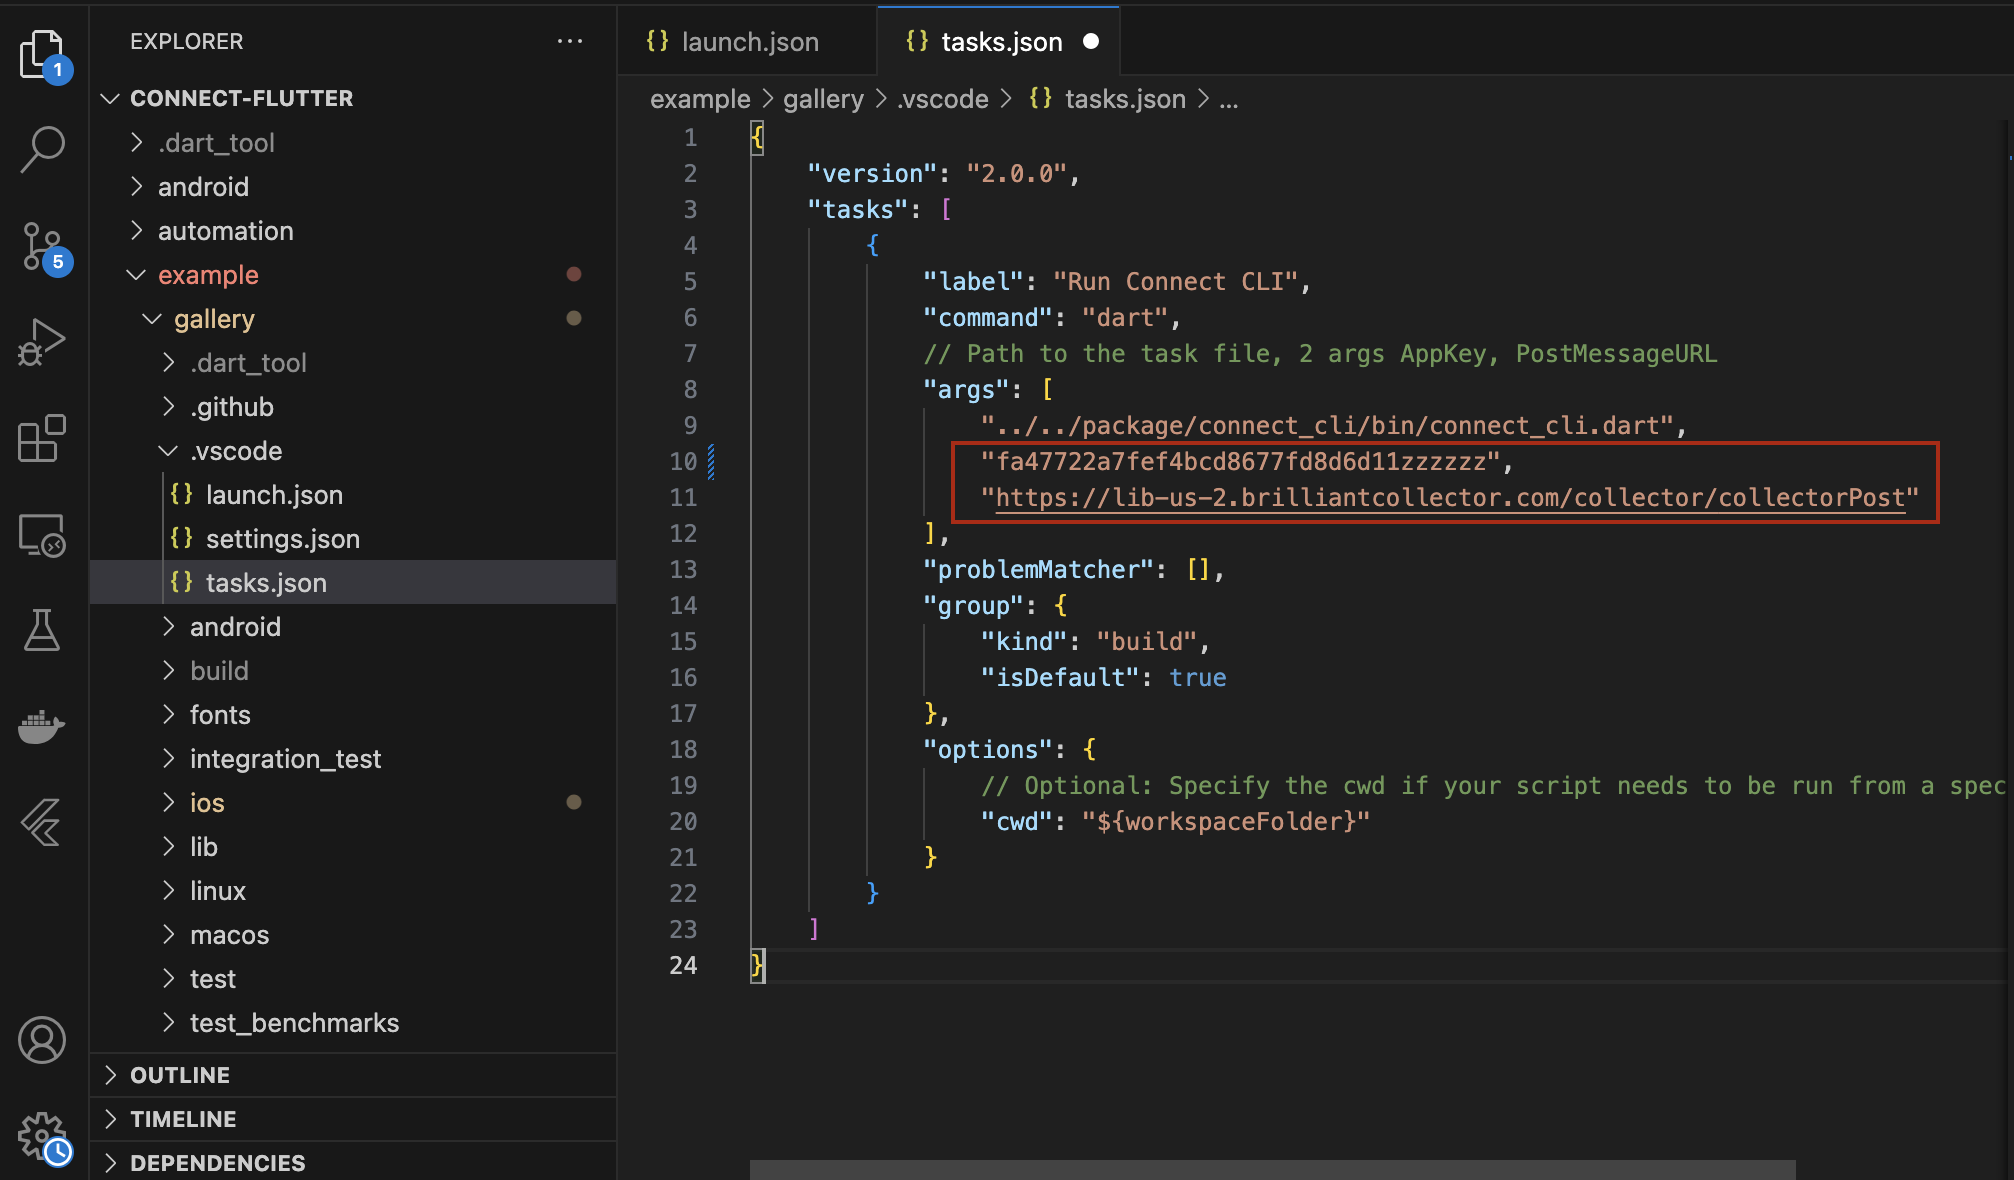
- Copy tasks.json from our sample app.
- In your tasks.json, update the
argssection with your application key and endpoint URL.
Material navigation and navigation widgets
Does your app use Material navigation or any of the following widgets: TabBar, TabBarView or BottomNavigationBar? Logging screen change events for them requires some additional setup.
For example, if a BottomNavigationBar is used without a proper Route-based navigation setup (e.g., by showing and hiding widgets within the same screen), LoggingNavigatorObserver won't be able to log navigation events.
To log navigation events for these types of widgets, add the following code snippets when the user interacts with these widgets (e.g., onTap or onChanged callback functions).
PluginTealeaf.logScreenLayout('logicalPageName');Troubleshooting
If there's a build issue or the Connect Flutter plugin is not using the latest SDK, run the following commands.
cd android && ./gradlew build --refresh-dependencies
cd ios && pod update
Updated 3 months ago