Behavioral signals in the Connect web library (Premium and Ultimate)
Guide for Connect Premium and Connect Ultimate Customers
If you have a Connect subscription of the Premium or Ultimate level, you can capture key user behaviors on your website and map them to contacts in your audience. The following signals are available:
- Add-to-cart. This signal notifies your marketing team that a contact has added products to their cart. The names, IDs, prices and quantities of the products are provided.
- Error. We suggest focusing on payment, promo code, and account registration errors - anything that leads users away from the happy path and results in lost sales opportunities.
- Identification. You can instruct the library to capture visitors' emails or client/contact IDs as they are browsing your website and feed the data to your audience in Connect.
- On-site search. Record the search terms that your website visitors use and the number of results they get. The on-site search signal usually requires little to moderate effort to configure.
- Order. The order signal comes each time a contact places an order on your website. For each order, there is the total amount and a detailed breakdown by the product.
- Page view. You can register page views as users are browsing your website. This signal type is the easiest to implement.
- Product configuration. This signal tracks interactions on product pages (for example, selecting clothing size, checking FAQs or reviews, etc) that suggest customer engagement.
- Product view. This signal collects data about the products people view on your website.
- Remove-from-cart. Captures when a user removes a product, service or offering from their shopping cart. This signal helps track cart modification behavior and can be used for understanding purchase hesitation and cart optimization.
- Rich media interaction. This signal records user interactions with video and audio content on your website. The findings can be valuable for audience segmentation based on product (or product category) interest.
Not sure what your license type is?
You can quickly check what type of Connect license your company is using. Log in to your Connect account and check the label in the upper-right section of the home screen.
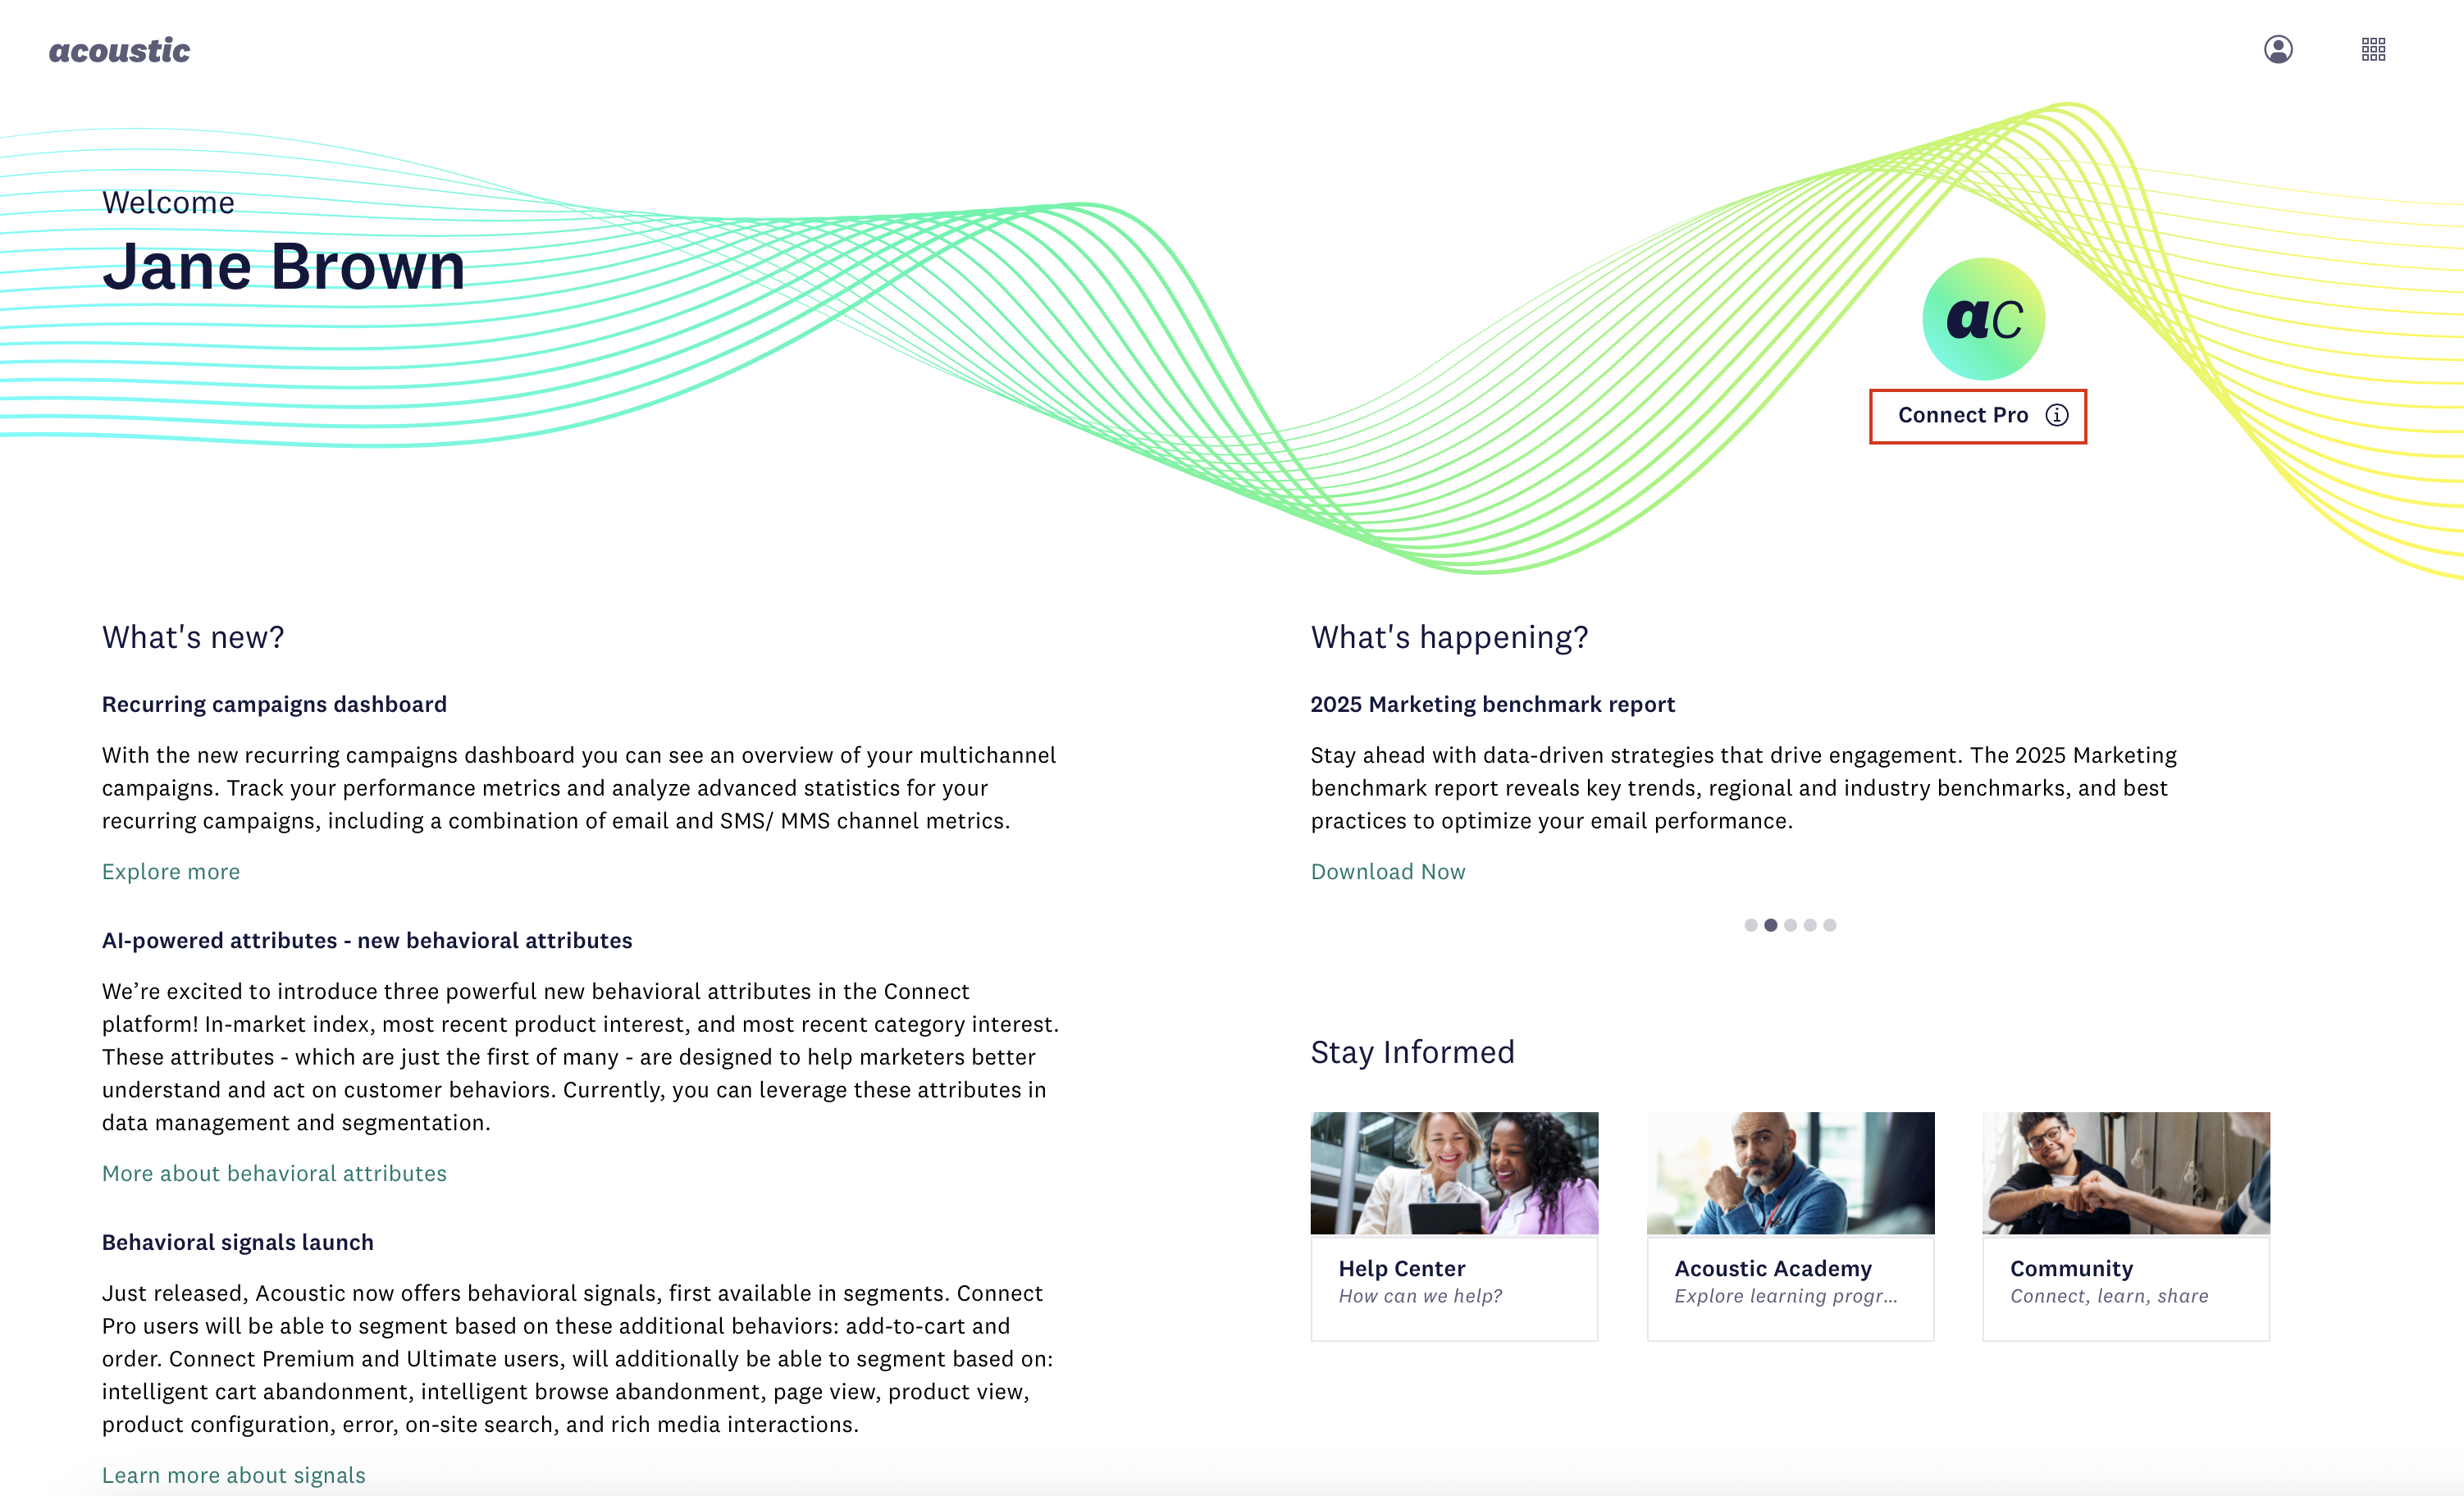
Sample Connect Pro subscription
Important considerations
The signals are designed to capture all necessary details for each use case. However, there is a chance that some of the available options will not be available for capture, or don't apply to your business. Here are some examples.
- If an insurance company website asks visitors to submit a quote request, there will be no unit price value for the product view signal. Also, the add-to-cart signal will be irrelevant.
- If your users are redirected to a third-party service that you cannot add the Connect library to, or if pages from that service are displayed within an iframe, it may be challenging to get required data for the order signal. Typical examples of such third-party websites are payment processing and ticket selling solutions.
- Until users are asked to identify themselves, for example by logging in, the identification signal cannot be sent. Identification is the key to tying the behaviors to a specific contact. You may want to consider surfacing the email or other unique user identifier in the application (for example, in the data layer once the user has logged in) so that it can be captured more easily by the Connect library.
Prerequisites
To integrate the Connect library into your app, you need an application key and collector URL. You can generate these credentials yourself in your Connect account. For instructions, see Get an application key for the Connect library.
Instructions
Step A: install the Connect library
To implement behavior signals, you must first add the Connect library to your web application. Connect Ultimate or Connect Premium customers should discuss options for deploying and hosting the SDK with their Acoustic representative before deploying the SDK in production.
Quick Start
If you want to begin development of the behavior signals code in a Test or Development environment, you can quickly include the SDK on your pages as follows.
In your webpage template, add the following code snippets anywhere within the <head> tag.
<script src="https://cdn.goacoustic.com/connect/latest/acoconnect.min.js"></script>
<script>window.TLT && window.TLT.initLib("APP_KEY","COLLECTOR_URL");</script>
Replace APP_KEY and COLLECTOR_URL with the values provided by our provisioning team.
Using a Callback
You cannot send behavior signals until the SDK has finished initializing. When a signal must be sent on page load (e.g. pageView) it is often helpful to use a callback, so your behavior signal code only executes after the SDK has initialized. To do so, use initLibAdv() as follows.
<script src="https://cdn.goacoustic.com/connect/latest/acoconnect.min.js"></script>
<script>
    (function () {
        TLT.initLibAdv({
            appKey: "APP_KEY",        // <- Enter your appKey here
            postUrl: "COLLECTOR_URL", // <- Enter your collector URL here
            callback: initLogSignal   // <- Your callback function. Executes when SDK is ready.
        });
        function initLogSignal() {
            // Add your logSignal code here
        }
    }());
</script>
Replace APP_KEY and COLLECTOR_URL with the values provided by our provisioning team.
Customizing the SDK configuration
The SDK is loaded with a default configuration which can be modified, for example to apply privacy masking rules, or to disable specific features. You can also enable optional modules, such as the Ajax Listener. To do so, use initLibAdv() as follows.
<script src="https://cdn.goacoustic.com/connect/latest/acoconnect.min.js"></script>
<script>
    (function () {
        function configureSDK() {
            // Get the default config from the SDK core
            const config = window.TLT.getDefaultConfig();
            // Modify the default config
            config.core.buildNote = "Connect SDK with custom config";
            config.core.modules.dataLayer.enabled = false;
            return config;
     }

        TLT.initLibAdv({
            appKey: "APP_KEY",        // <- Enter your appKey here
            postUrl: "COLLECTOR_URL", // <- Enter your collector URL here
            newConfig: configureSDK(),// <- Modify the default SDK configuration
            addAjaxListener: true,    // <- Enable the optional Ajax Listener module
            callback: initLogSignal   // <- Your callback function. Executes when SDK is ready.
        });

        function initLogSignal() {
            // Add your logSignal code here
        }
    }());
</script>
Tip
- Add the
<script>tags to the<head>of the page to have them executed as early as possible.- Do not change the order of the two
<script>tags; the SDK file must be loaded first.
Warning
Before capturing any customer data please work with your Acoustic representative to ensure that the SDK is configured to not collect sensitive information from your pages. More information about the default SDK configuration is available here.
Step B: enable behavior signals
Now you can customize the Configuration section of acoconnect.js to implement the behavior signals. Here are instructions for each signal:
- Add-to-cart signals
- Error signals
- Identification signals
- On-site search signals
- Order signals
- Page view signals
- Product configuration signals
- Product view signals
- Remove-from-cart signals
- Rich media interaction signals
Migrating from Acoustic Campaign?
You must replace the Silverpop Web Tracking pixel with the new, flexible logSignal-based tracking method in Acoustic Connect.
Verification
Option A: through contact details
To confirm that signals are implemented correctly and data is flowing, do the following:
- Click around on your website to trigger the signals you have activated. The identification signal is required because it maps users to behaviors.
- Log in to your Acoustic Connect subscription.
- Go to Data management > Audience.
- On the All contacts tab, select the contact you used for testing the signal.
- In the activity feed, view the activity associated with the selected contact.
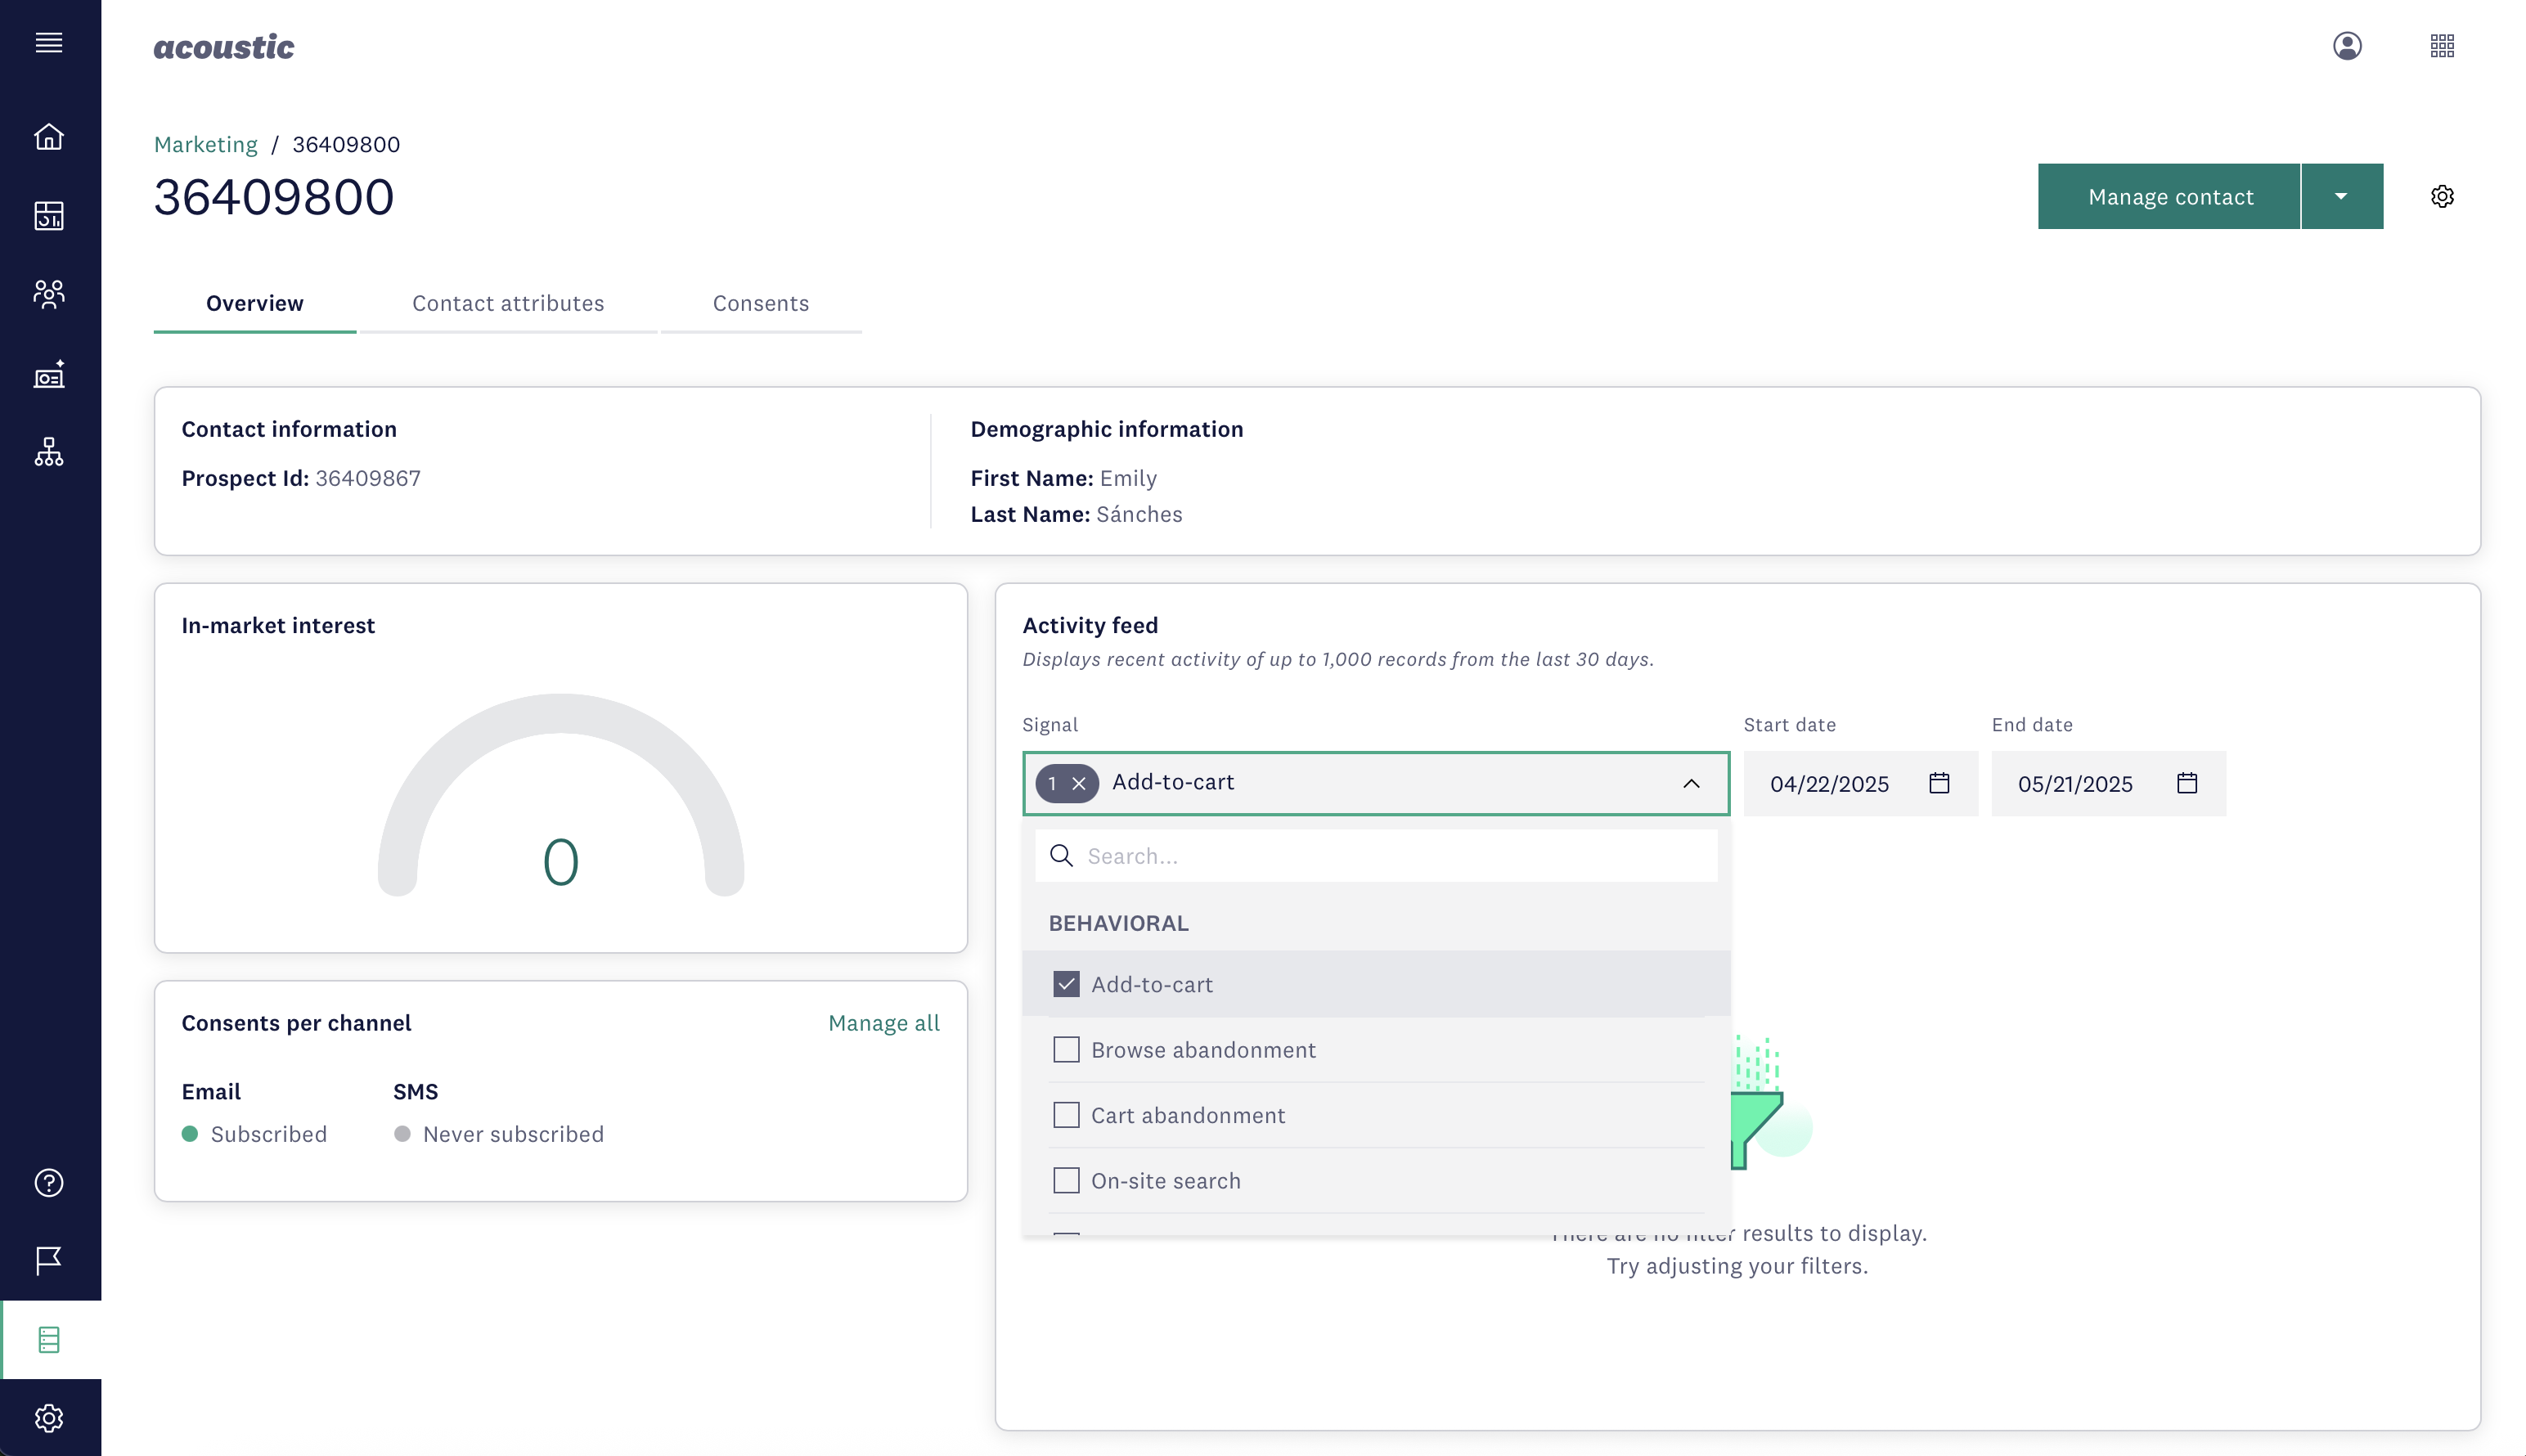
As you expand a user session, you can see 5 most recent signals associated with it. The identification signal is not displayed in the activity feed. All in all, the activity feed displays the last 1000 signals or signals from the last 30 days. In some cases newly added signals may not be immediately visible.
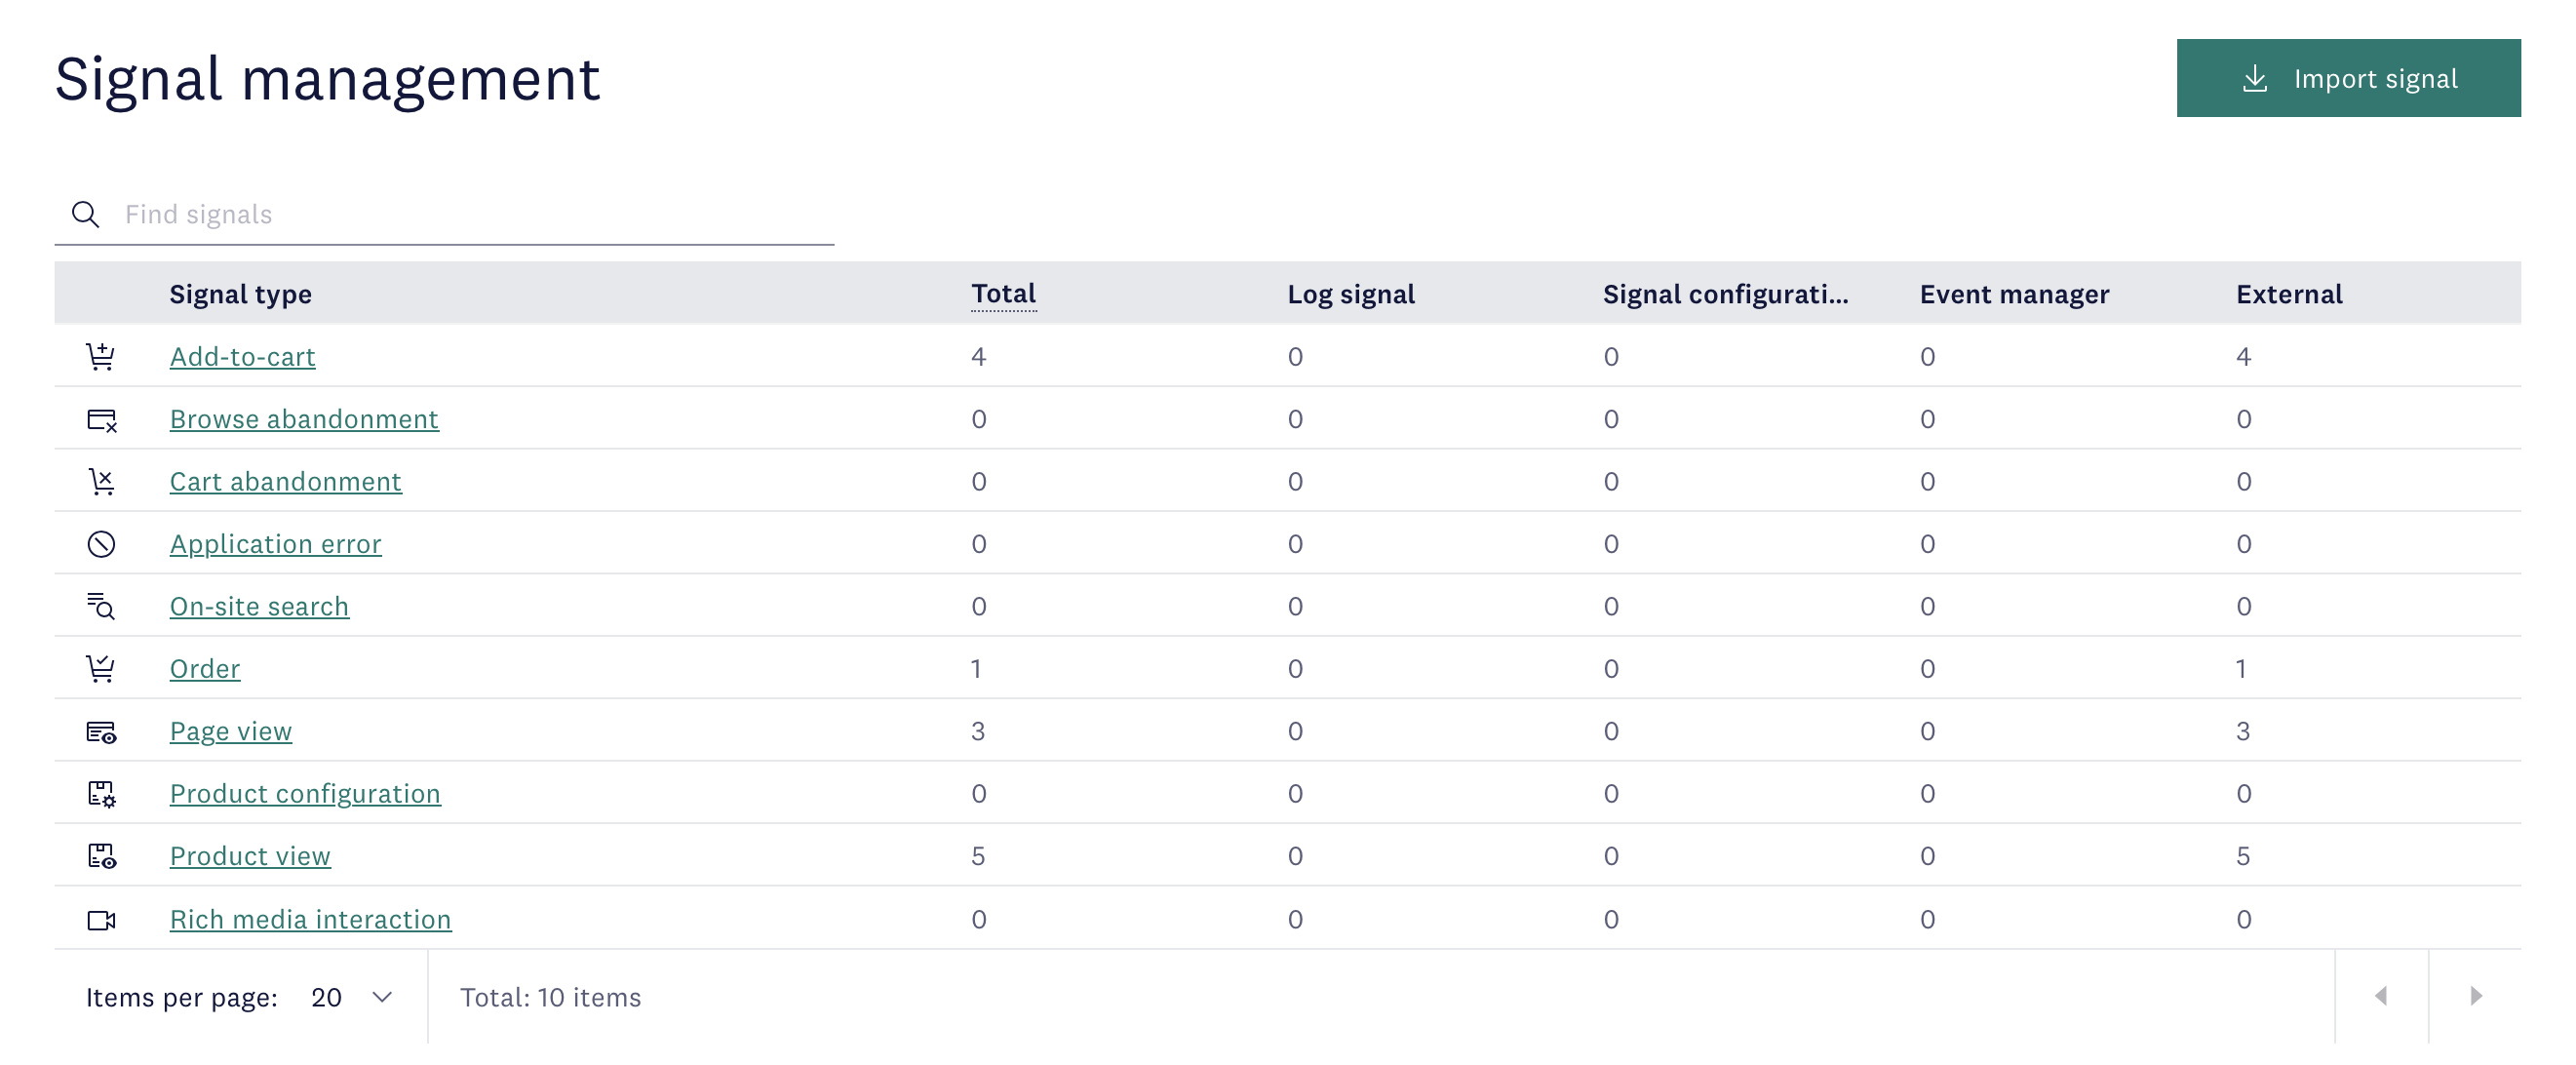
Option B: through Signal management
To view all signals without limitations, navigate to Behavioral management > Signal management and click on a signal type.
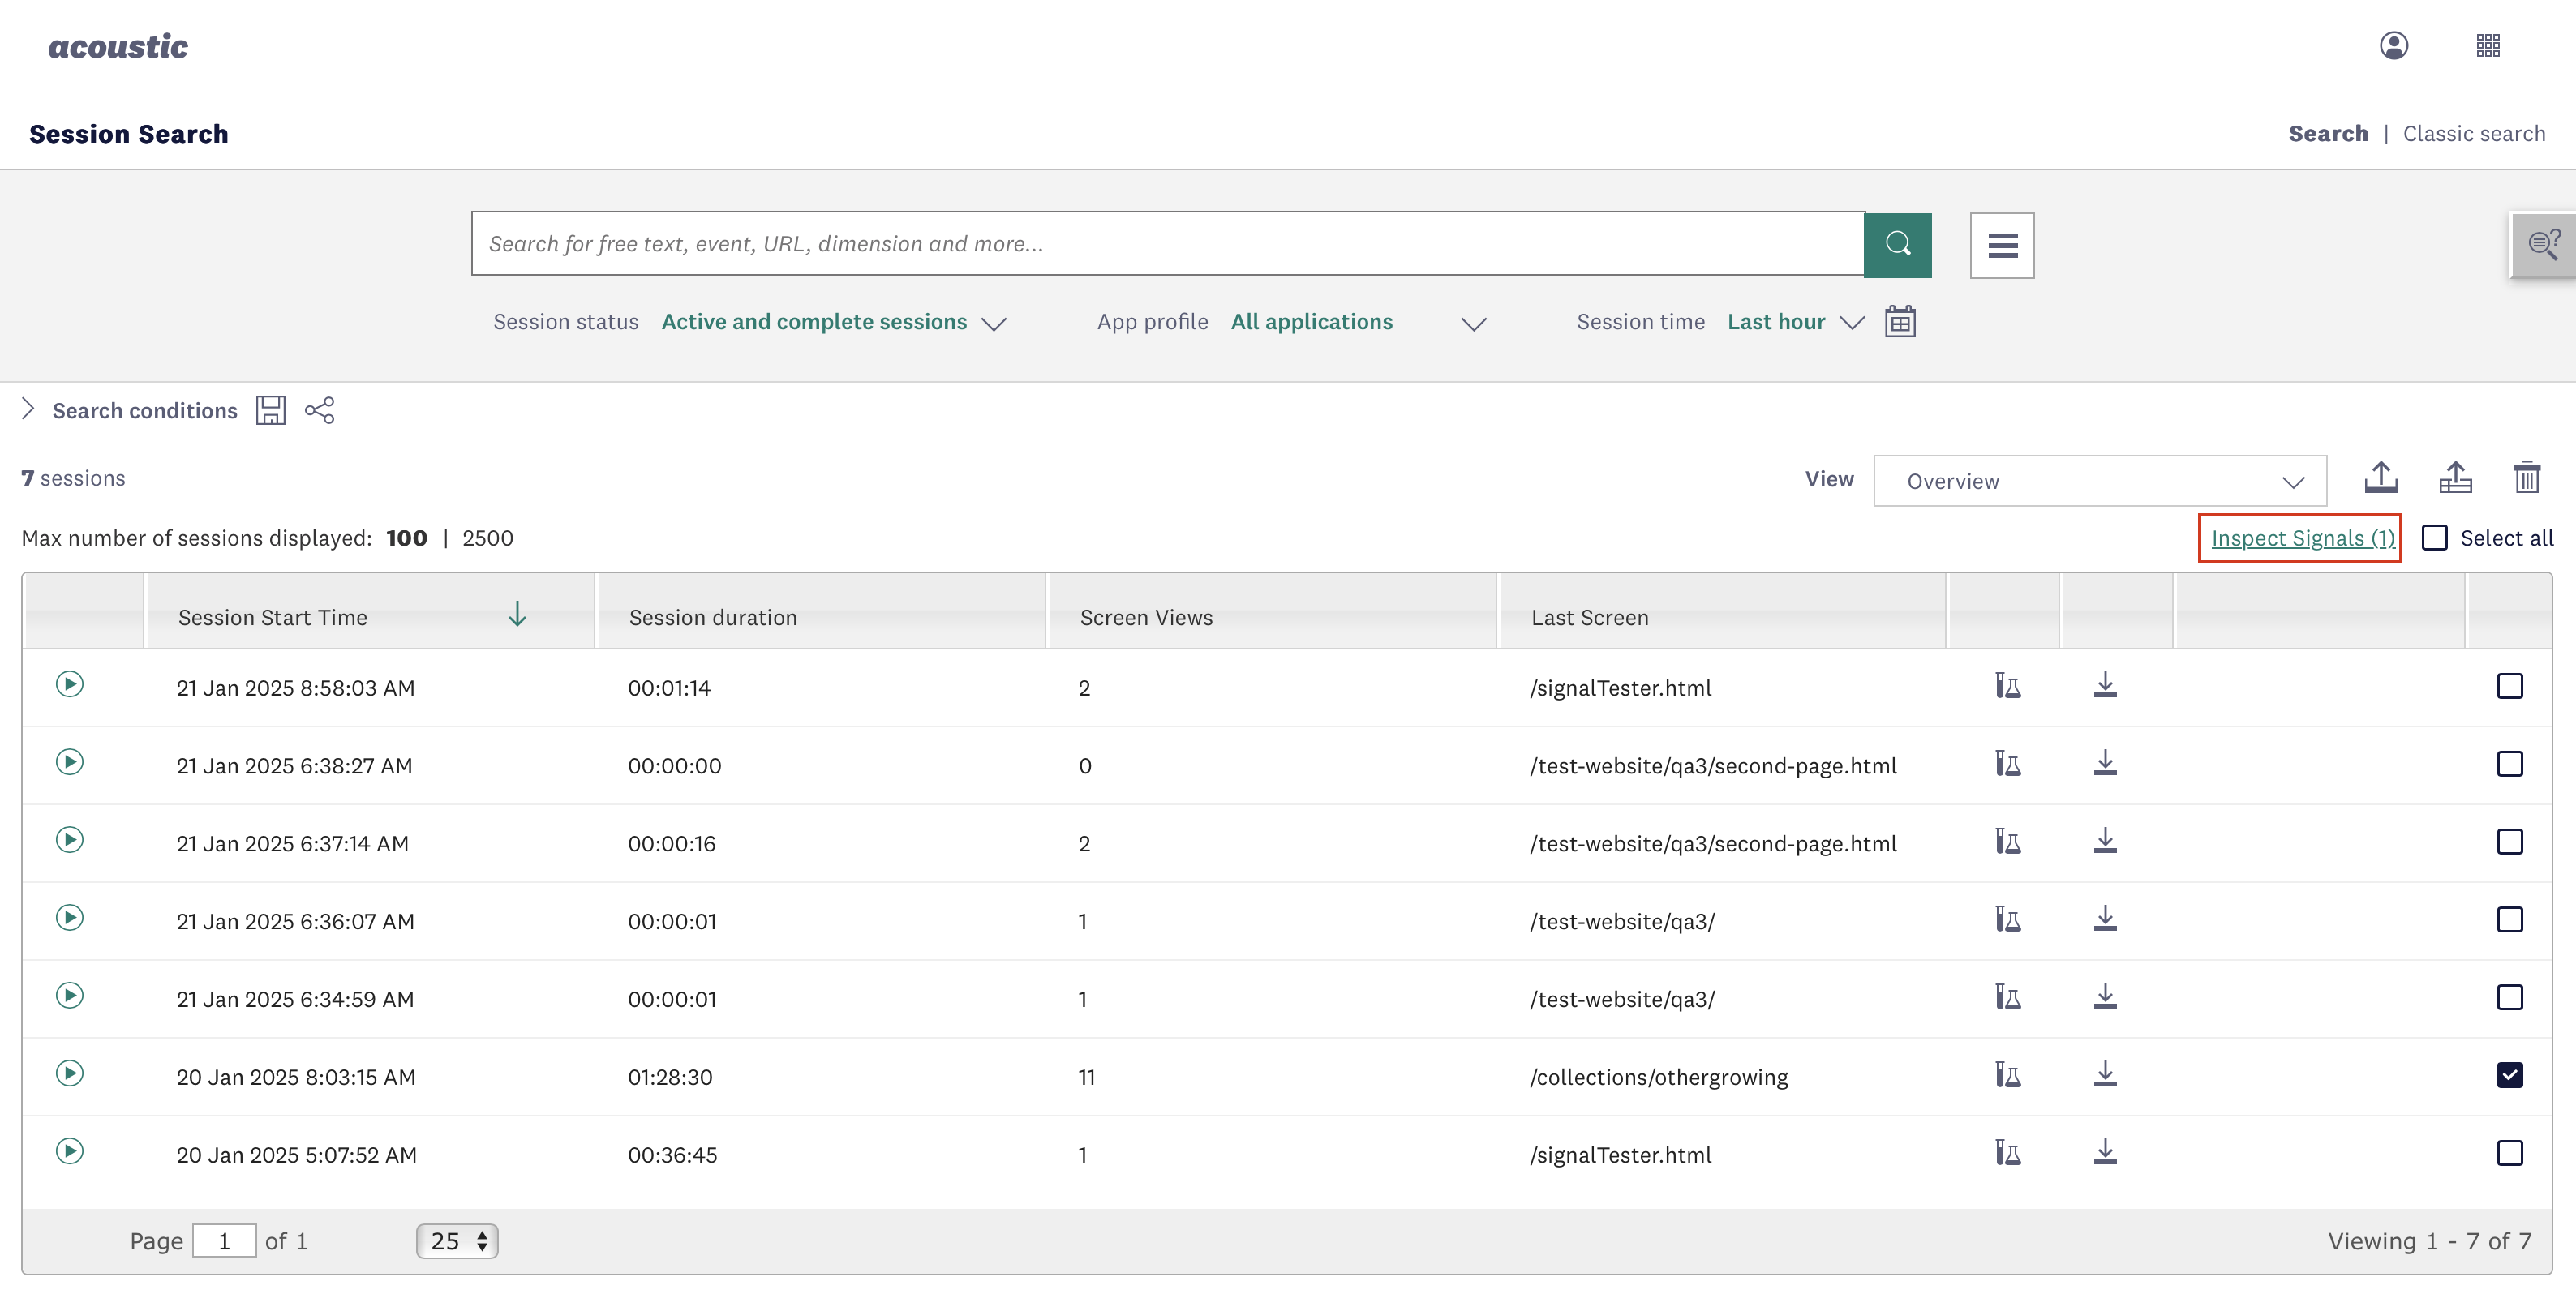
Option C: through Sessions (Connect Ultimate)
Ultimate subscription holders have access to the JSON payload generated by the signal. It is convenient for quick verification.
- Click around on your website to trigger the signals you have activated.
- In your Connect account, navigate to Insights > Sessions > Session search.
- Find your test session and select the checkmark next to it.
- Click Inspect signals.
- Find a JSON object of the following format.
{
  "signalType": "identification",
  "name": "identification from product page",
  "category": "Behavior",
  "identifierName": "email",
  "identifierValue": "[email protected]",
  "identificationFromLogin": true,
  "effect": "positive"
}
Maintenance note
As your website receives updates or gets redesigned, these changes may affect signal configuration. It is important to include signal verification into your regular quality assurance routine.
Updated about 22 hours ago