
Integrate the Connect SDK into Swift apps
The Connect SDK is a library that captures visitors' interactions with mobile applications. You can integrate the library into your native iOS app written in Swift and track the findings in the Acoustic Connect interface. This guide uses the current ConnectSDK API. For Objective-C instructions, see Integrate the Connect SDK into a native iOS app (Objective-C).
Requirements
- Acoustic Connect subscription. You must register your app in Connect and get credentials for it. For instructions, see Generate Connect credentials for integration.
- Development environment. Xcode 16 or later.
- Deployment target. iOS 15.1 or later.
Limitations
We offer limited support for iPad apps with a multi-window architecture as well as iOS apps using SwiftUI and UIScene. The library captures data from such apps and makes it available for analytics, but session replays may not work correctly.
General guidelines
It is important that you assign unique IDs to all UI controls that you want to capture.
Initial setup
The easiest way to add the Connect iOS library is using the Swift Package Manager.
- In your Xcode project, go to File > Add Package Dependencies.
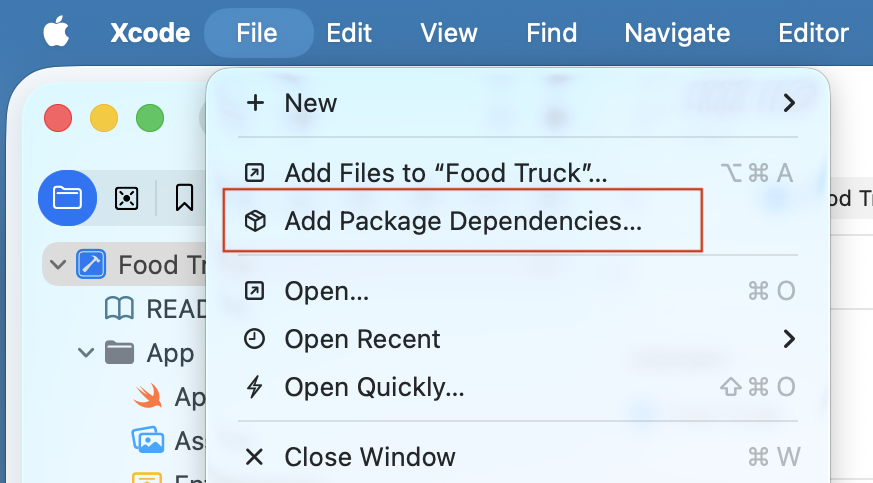
- Enter the repository URL
https://github.com/go-acoustic/ConnectDebug-SP. For the release build, replaceConnectDebug-SPwithConnect-SP.
WarningNever use the release and debug versions together in the same project.
- Set the dependency rule to Up to Next Major Version from 2.0.0 and click Add Package.

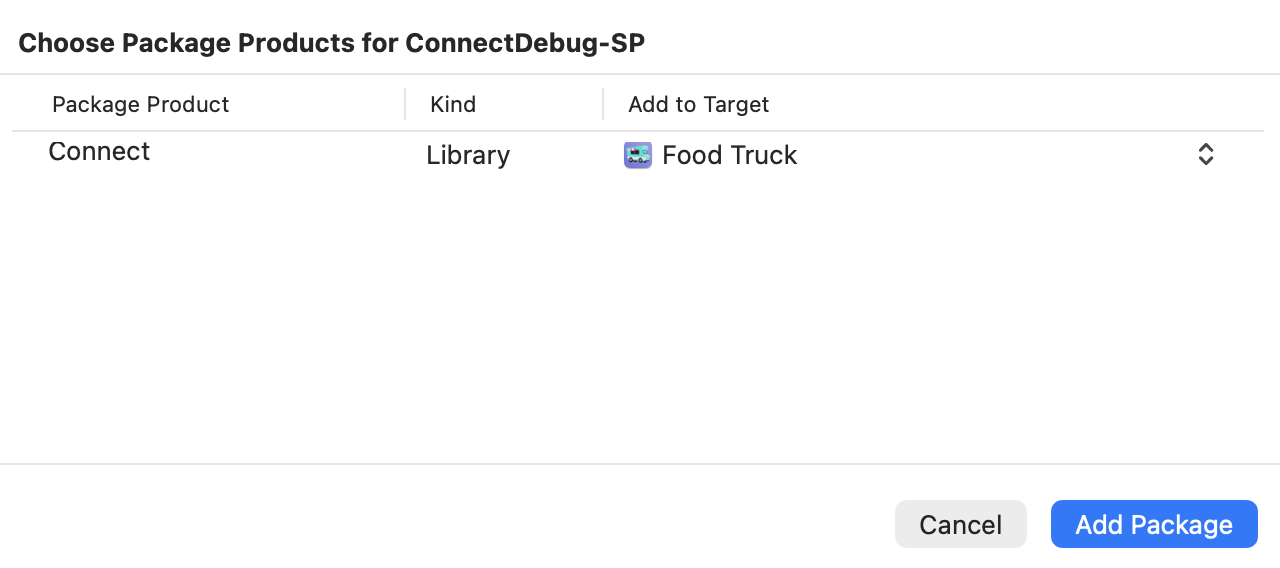
- In the target selection dialog, check your main app target and click Add Package.
- To verify the installation, add
import Connectto any Swift file — or create a new one for this purpose — and build. If it compiles without errors, the SDK is correctly linked.
import Connect
// If this builds, the SDK is installed correctly.
Adding an AppDelegate (SwiftUI)
The integration relies on the AppDelegate file. If your app is built on SwiftUI, AppDelegate is not generated and not required unless you need UIKit-level lifecycle hooks (like SDK initialization). So you must add it manually and register it with @UIApplicationDelegateAdaptor.
- In Xcode, click File > New > File from template > Cocoa Touch Class.
- Configure the properties as shown below.
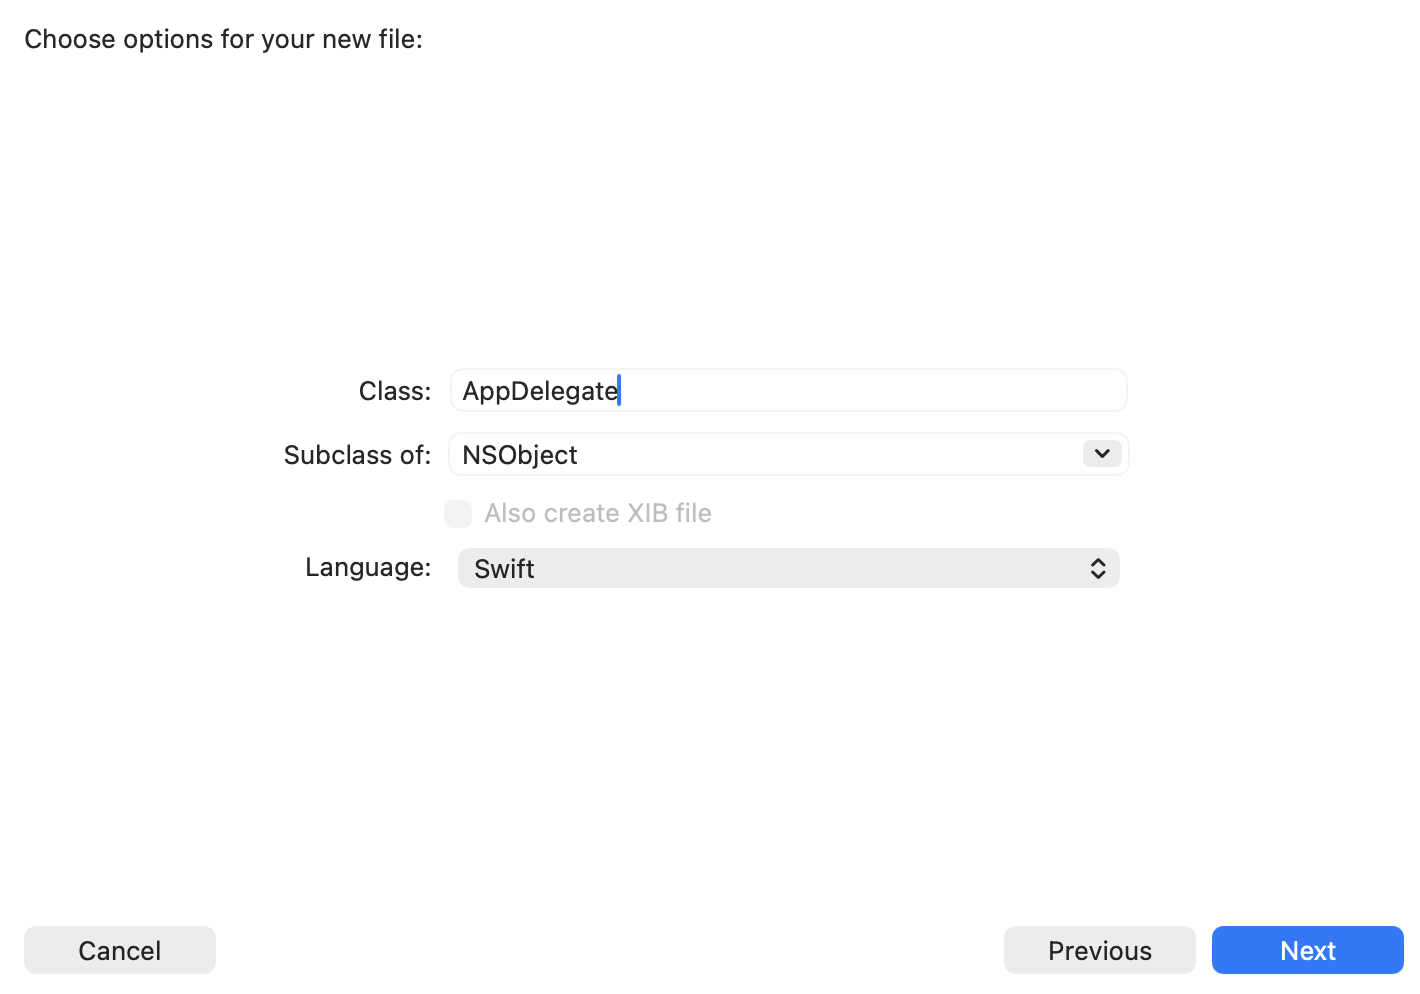
- Add the file to the primary project target.
- In the
@main Appstruct, use@UIApplicationDelegateAdaptorto bridge to anAppDelegate:
import SwiftUI

@main
struct YourApp: App {
    @UIApplicationDelegateAdaptor(AppDelegate.self) private var appDelegate

    var body: some Scene {
        WindowGroup {
            ContentView()
        }
    }
}
NoteAlways initialize the SDK in
didFinishLaunchingWithOptions, not in a SwiftUI.onAppearor.taskmodifier. The SDK must be initialized at UIKit lifecycle time to ensure data capture starts before any user interaction occurs.
Required configuration
To finalize the integration, add the following code to AppDelegate. Replace YOUR_APP_KEY and YOUR_COLLECTOR_URL with the credentials issued for your organization.
import Connect
import UIKit
class AppDelegate: UIResponder, UIApplicationDelegate {
func application(
_ application: UIApplication,
didFinishLaunchingWithOptions launchOptions: [UIApplication.LaunchOptionsKey: Any]? = nil
) -> Bool {
ConnectSDK.shared.enable(
with: ConnectConfig(
appKey: "YOUR_APP_KEY",
postURL: "YOUR_COLLECTOR_URL"
)
)
return true
}
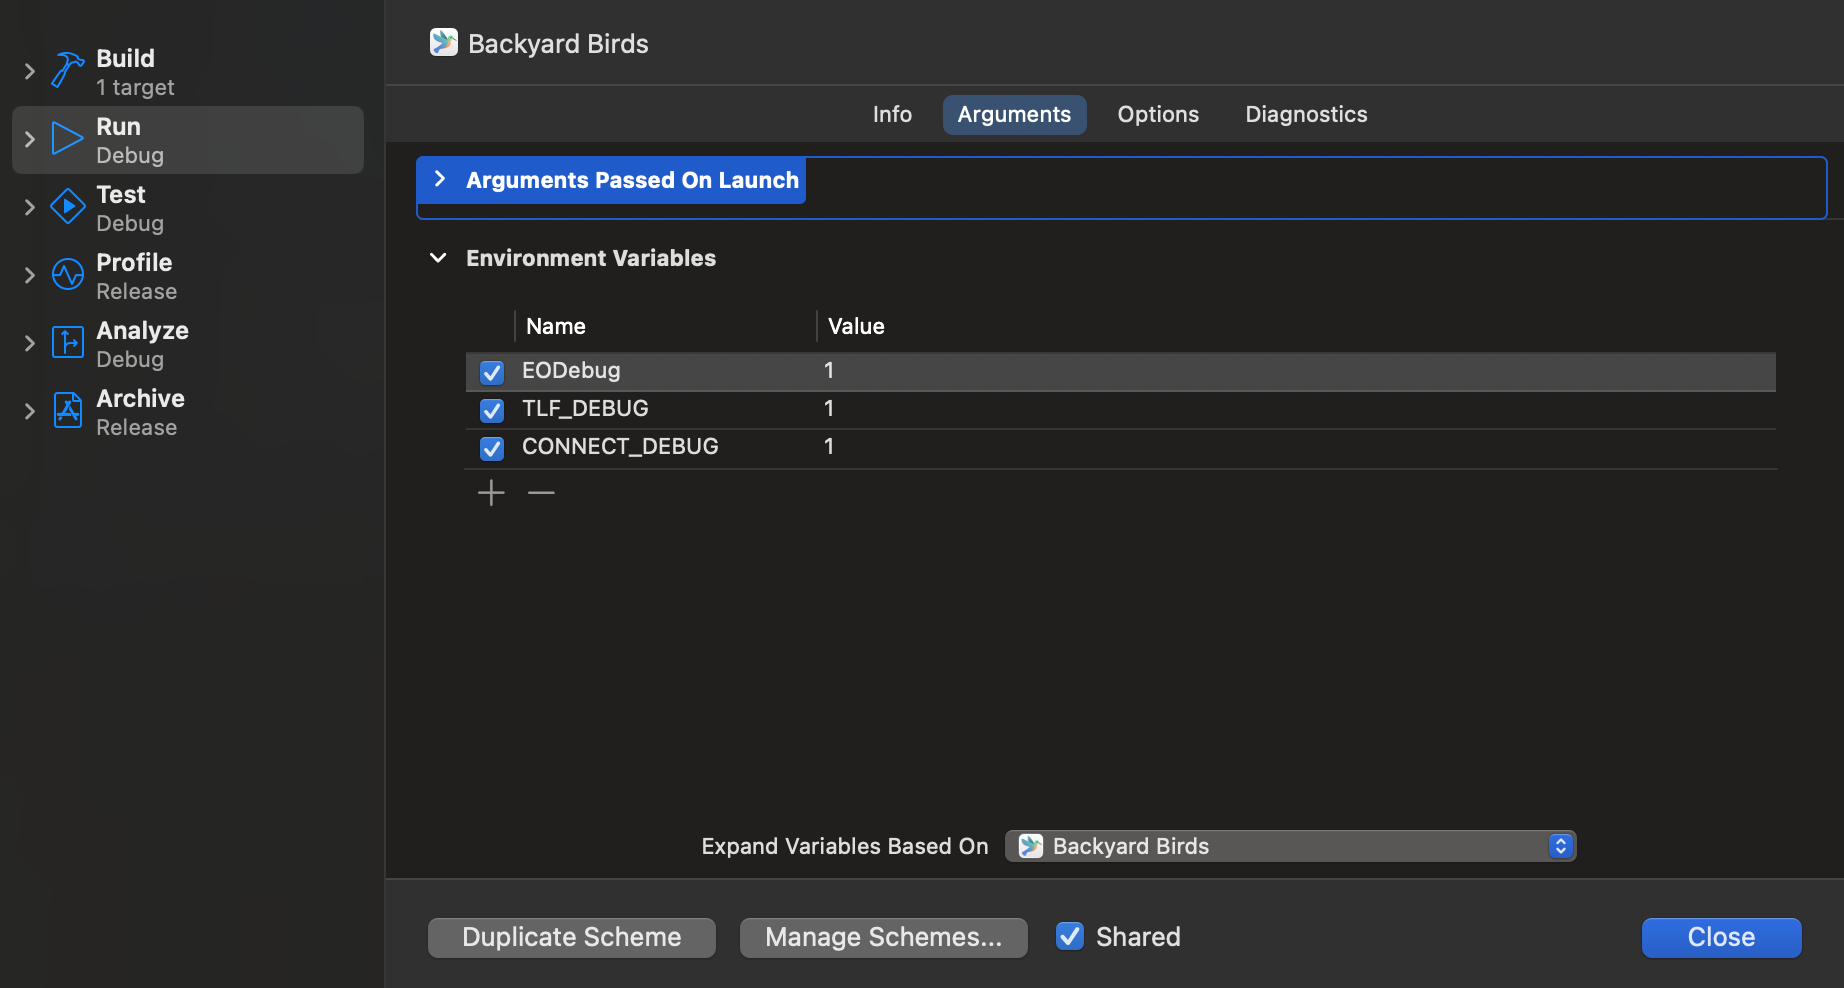
}If you have installed the debug version of the SDK, add three environment variables with the value of 1 to the project scheme: EODebug, CONNECT_DEBUG and TLF_DEBUG. This enables the SDK to write debug logs to your Xcode console window.
Important:
- When running on the iOS Simulator, you may see
com.apple.commcenter.coretelephony.xpcerrors in the console. These are expected — the Simulator has no cellular radio — and do not affect SDK operation. - When reporting an issue to our support team, always attach your debug log. It speeds up troubleshooting.
Push notifications
To add push notifications with delivery tracking and rich media images to your app, see Configure push notifications for iOS.
Related instructions
Updated about 1 hour ago