
Integrate the Connect SDK into a native iOS app (Objective-C)
The Connect SDK captures visitors' interactions with mobile applications. You can integrate the library into your native iOS app written in Objective-C and track the findings in the Acoustic Connect interface.
Language: Objective-C. For Swift, see Integrate the Connect SDK into a native iOS app (Swift).
Availability: Pro, Premium, and Ultimate
Requirements
- Acoustic Connect subscription. To use the Connect SDK, your company must have an active Connect subscription. Register your app in Connect and get credentials for it (app key and collector URL). For instructions, see Generate Connect credentials for integration.
- Development environment. Xcode 26
- Deployment target. iOS 15.1-26.2
Limitations
We offer limited support for iPad apps with a multi-window architecture. The library captures data from such apps and makes it available for analytics, but session replays may not work correctly.
Choose a build
The Connect SDK ships in two parallel builds:
- Debug build —
AcousticConnectDebug(CocoaPods),ConnectDebug-SP(Swift Package),ConnectDebug.json(Carthage). Emits verbose console logs that help you confirm the SDK is initialized, see signals leaving the device, and inspect collector responses. - Release build —
AcousticConnect,Connect-SP,Connect.json. Logs are suppressed for production use.
Start with the debug build while you integrate and test, then swap to the release build before shipping. The two builds expose the same public API, so swapping is a dependency change — no code changes required. You cannot use both builds in the same project; pick one per build configuration.
For the full dev-to-production checklist, see Prepare the Connect library for production use on iOS devices.
Initial setup
You can add the Connect library to your iOS app using the CocoaPods dependency manager. This option requires a recent version of CocoaPods.
Here are steps to follow:
- If you don't have a Podfile in your Xcode project directory, create one.
- Update the file as shown below. Set
podto eitherAcousticConnectorAcousticConnectDebug, depending on the build you want to use. - Additionally, disable User Script Sandboxing to prevent a build error (see the Troubleshooting section below).
platform :ios, '15.1'

target 'YourAppTarget' do
  use_frameworks!
  pod 'AcousticConnectDebug'
end

post_install do |installer|
  installer.generated_projects.each do |project|
    project.targets.each do |target|
      target.build_configurations.each do |config|
        config.build_settings['ENABLE_USER_SCRIPT_SANDBOXING'] = 'NO'
      end
    end
  end
end- In a terminal emulator, navigate to the root project directory and install the pods. Make sure the command is completed with no errors. If you get an error, run the same command with the
--verboseoption and share the error log with our Services team.
pod install- Close any current Xcode sessions and start using the new .xcworkspace file for your project from now on.
Important notes:
- Sometimes CocoaPods fails to load the latest version. So you may need to pull it using
pod update. - If you get a warning message after running
pod install, see our help article Removing CocoaPods warnings during integration.
Adding configuration files (Carthage and Swift Package)
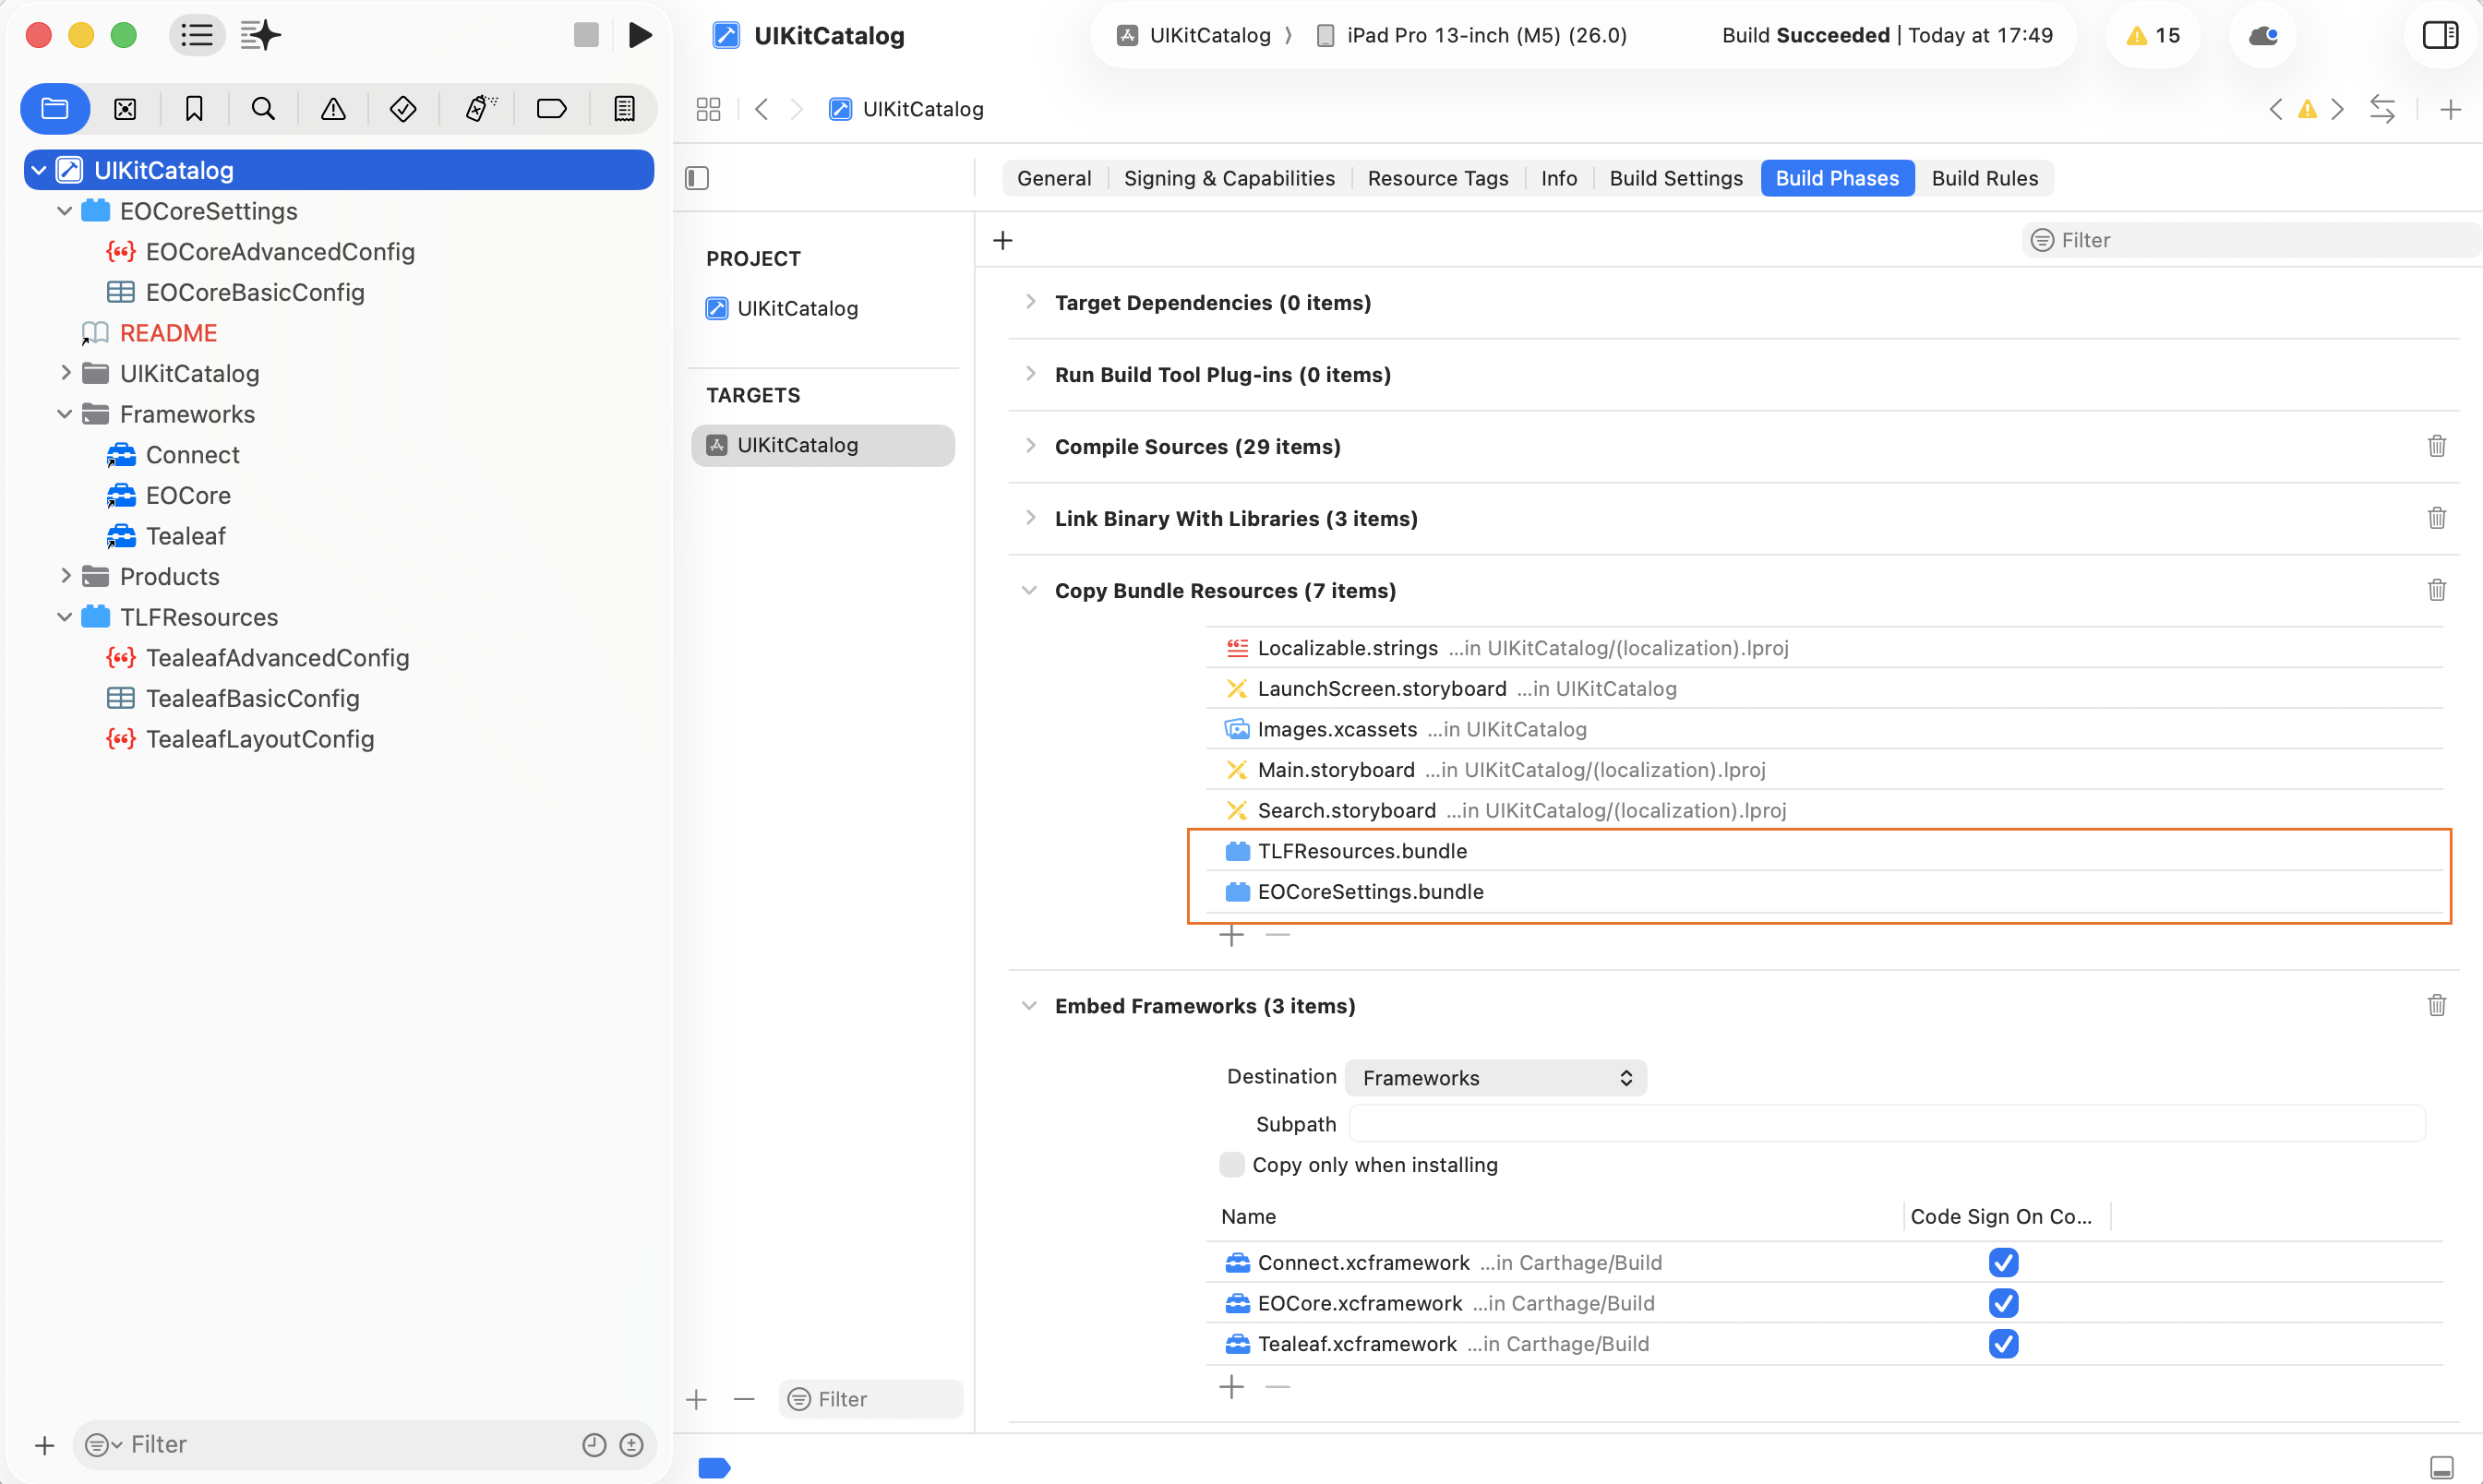
At runtime, the Connect SDK loads its configuration from two folders that must be present inside your app bundle: EOCoreSettings.bundle (for EOCore settings) and TLFResources.bundle (for Tealeaf settings). Carthage and Swift Package integrations do not create these folders automatically, so you must set them up manually before building. The Connect framework ships its own ConnectResources.bundle internally — you do not need to create or add it.
- Inside your Xcode project's source folder (for example, next to AppDelegate.m), create two folders: EOCoreSettings.bundle and TLFResources.bundle.
cd /Users/admin/Developer/UIKitCatalog/Main
mkdir EOCoreSettings.bundle
mkdir TLFResources.bundle- Open each bundle using the Show package contents option in Finder.
- Copy the following configuration files from our GitHub repository into the matching bundle. Make sure each file goes into the bundle listed in the Destination column.
| File | Destination | Purpose |
|---|---|---|
| EOCoreBasicConfig.plist | EOCoreSettings.bundle | EOCore posting and caching settings |
| EOCoreAdvancedConfig.json | EOCoreSettings.bundle | Advanced EOCore settings |
| TealeafBasicConfig.plist | TLFResources.bundle | Tealeaf posting and caching settings |
| TealeafAdvancedConfig.json | TLFResources.bundle | Advanced Tealeaf settings |
| TealeafLayoutConfig.json | TLFResources.bundle | Layout capture settings |
ImportantPlace each file inside the correct bundle. If the Tealeaf files are placed in EOCoreSettings.bundle (or vice versa), the SDK silently falls back to default settings and the integration may not work as expected. Do not place the files loose in the app bundle root either — the SDK only searches inside the two named bundles.
- In Xcode, drag both EOCoreSettings.bundle and TLFResources.bundle into the project navigator and add them to the primary target.
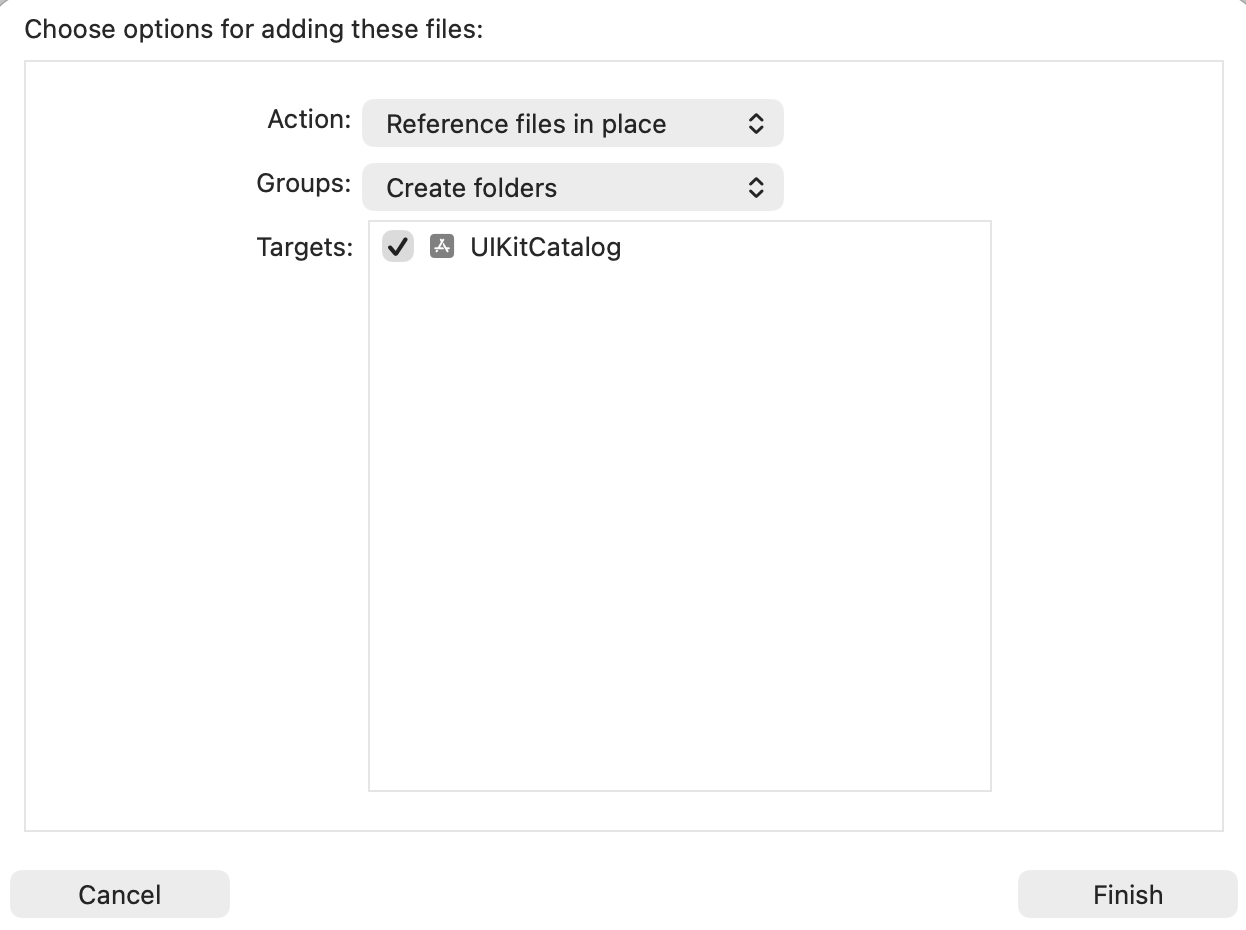
- Open the primary target. On the Build Phases tab, confirm that both bundles appear under Copy Bundle Resources. If they don't, drag them in manually.
-
In TLFResources.bundle, open TealeafBasicConfig.plist. Set KillSwitchEnabled to
NOand update the following values:- AppKey — your Connect app key.
- PostMessageUrl — your Connect collector URL.
- KillSwitchUrl — has the structure
https://<collector-host>/collector/switch/<app_key>.
Required configuration
There are some required steps to finalize the integration.
- Add 2 import statements to the AppDelegate.m header.
@import Tealeaf;
@import Connect;- Add the following code to the
didFinishLaunchingWithOptionsfunction. Replaceapp_keyandcollector_urlwith your Connect credentials.
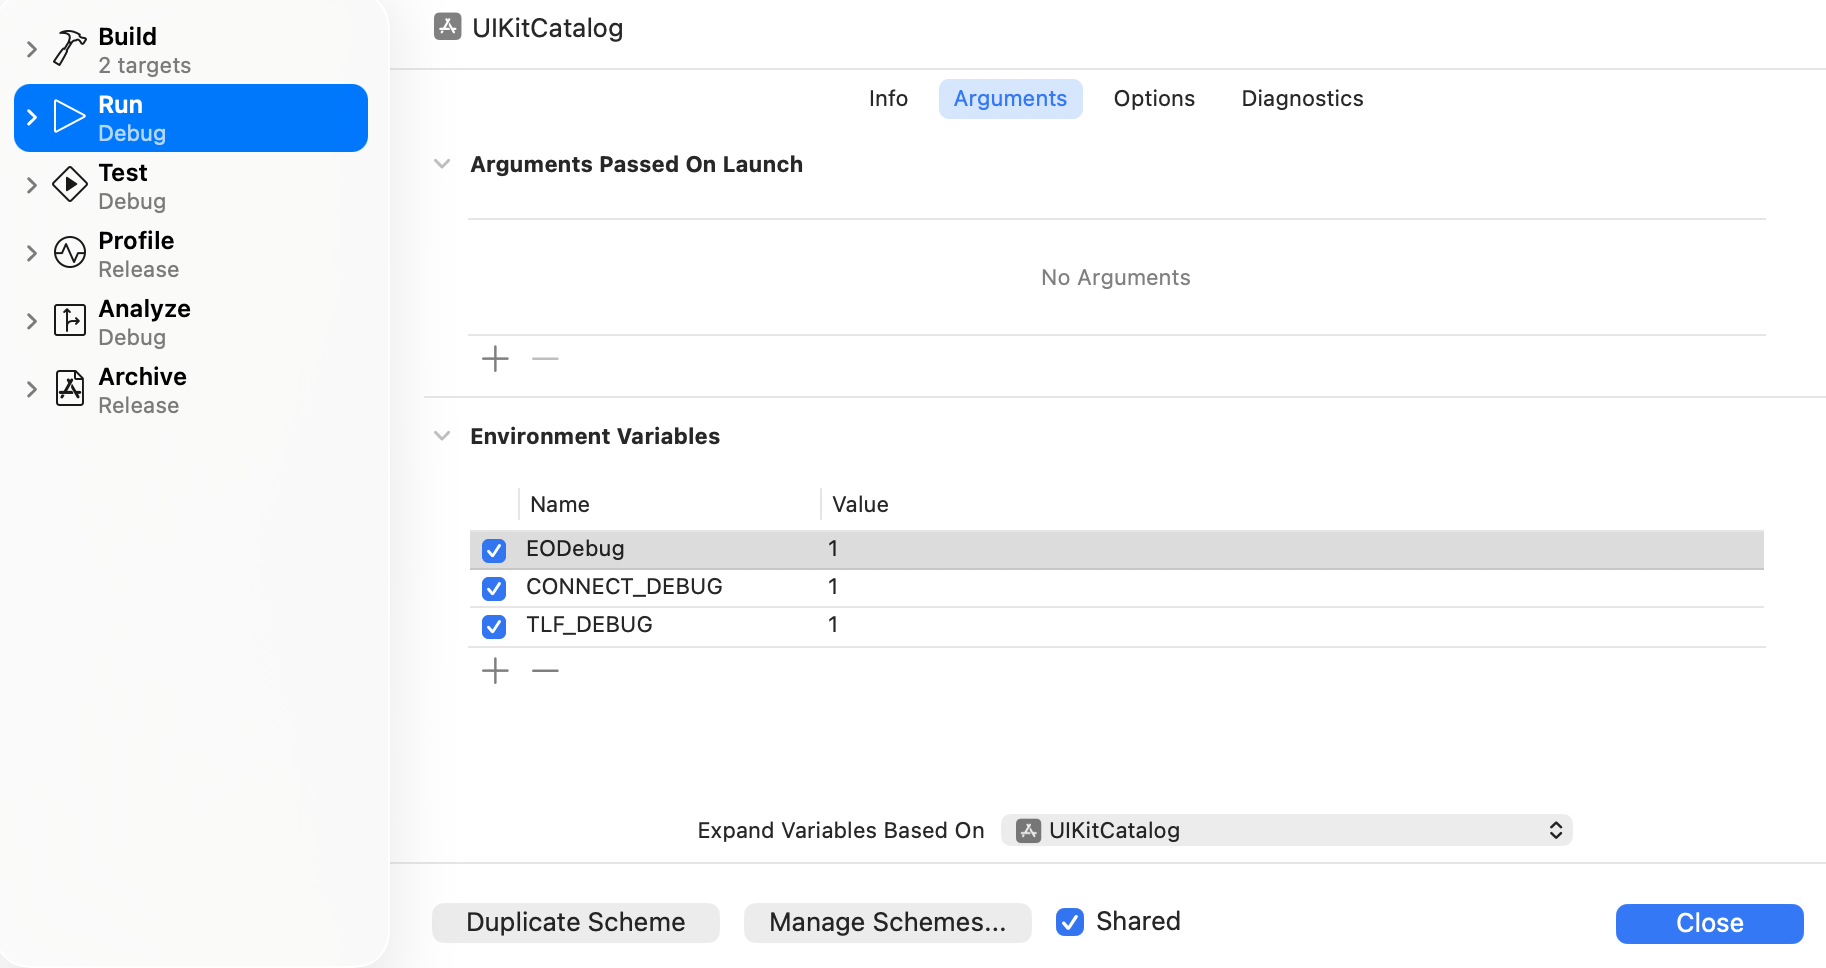
[[ConnectApplicationHelper sharedInstance] enableFramework:@"app_key" withPostMessageUrl:@"collector_url"];- If you have installed the debug version, add three variables with the value of
1to the project scheme:EODebug,CONNECT_DEBUGandTLF_DEBUG. This enables the SDK to write debug logs to your Xcode console window.
Important:
- When running on the iOS Simulator, you may see
com.apple.commcenter.coretelephony.xpcerrors in the console. These are expected — the Simulator has no cellular radio — and do not affect SDK operation. - When reporting an issue to our support team, always attach your debug log. It speeds up troubleshooting.
Troubleshooting
Build fails at [CP] Embed Pods Frameworks with rsync "Operation not permitted"
Projects using Xcode 15 or later may encounter this error when integrating the Connect SDK through CocoaPods.
Symptom
The build fails at the [CP] Embed Pods Frameworks phase. The full error output in the Xcode build log contains lines similar to the following:
rsync(XXXXX): warning: ...Connect.framework/_CodeSignature: unreadable directory: Operation not permitted
rsync(XXXXX): error: Connect.framework/ConnectResources.bundle/: mkpathat: Operation not permitted
rsync(XXXXX): error: ...Connect.framework/Info.plist: open (2) in <project dir>: Operation not permitted
rsync(XXXXX): warning: child XXXXX exited with status 1
Cause
Xcode 15 and later enables User Script Sandboxing (ENABLE_USER_SCRIPT_SANDBOXING) by default. This restricts what build phase scripts can read and write, and prevents the CocoaPods embed-frameworks script from copying xcframeworks into the app bundle at build time.
Fix
Add a post_install hook to your Podfile:
post_install do |installer|
  installer.generated_projects.each do |project|
    project.targets.each do |target|
      target.build_configurations.each do |config|
        config.build_settings['ENABLE_USER_SCRIPT_SANDBOXING'] = 'NO'
      end
    end
  end
end
After adding the hook, run pod install and rebuild.
This approach persists across future pod install runs. If you prefer to apply the fix manually, go to Xcode → target Build Settings, search for User Script Sandboxing, and set it to No — but note this setting will not survive a pod install unless the hook is also in place.