Integrate the Connect library into a native Android app based on Jetpack Compose
The Connect SDK is a library that captures visitors' interactions with mobile applications. You can integrate the library into your Jetpack Compose app and track the findings in the Acoustic Connect interface.
Note
New to Connect? Install a preconfigured sample app and explore the implementation faster.
Requirements
- Acoustic Connect. To use the Connect SDK, your company must have an active Connect subscription. Proper credentials are required for each app. For instructions, see Generate Connect credentials for integration.
- Development environment. To integrate the library into a native Android app, you need Android Studio.
- Mobile app compatibility. The library can capture user experience data on end users' devices running Android 5.0 (API level 21) and later.
Limitations
We do not guarantee that the current version of the library (10.4.28) is compatible with Android apps using a mixture of the Android View framework and Jetpack Compose.
General guidelines
It is important that you assign unique IDs to all UI controls that you want to capture.
Prerequisites
Before you get down to the integration, make sure the following conditions are met:
- AndroidManifest.xml has the following required permissions:
<!-- Required permissions -->
<uses-permission android:name="android.permission.INTERNET"/>
<uses-permission android:name="android.permission.ACCESS_NETWORK_STATE"/>
<uses-permission android:name="android.permission.ACCESS_WIFI_STATE"/>

<!-- Recommended permissions: location -->
<uses-permission android:name="android.permission.ACCESS_FINE_LOCATION"/>
<uses-permission android:name="android.permission.ACCESS_COARSE_LOCATION" />
- Your Jetpack Compose project has the
NavControllerclass. The same navigation controller instance must be used throughout the navigation hierarchy.
Initial setup
- Open the version catalog file (
gradle/libs.versions.toml). Add Connect to the[versions]and[libraries]blocks.
[versions]
connect = "10.4.28"
[libraries]
connect = { module = "io.github.go-acoustic:connect", version.ref = "connect" }
- In the app-level build file (build.gradle.kts), update the
dependenciesblock to support the Connect library.
implementation(libs.connect)
- Synchronize the project.
- Open the main entry point of the app and add an import statement for
ConnectWrapper(a function that wraps around the UI tree of your app).
import com.acoustic.connect.android.connectmod.composeui.ConnectComposeUI.Companion.ConnectWrapper
- Customize the ConnectWrapper function for your app. The required parameters are listed below.
// Connect SDK Wrapper init with app key and post message URL
ConnectWrapper(
    navController = navController,
    appKey = "your_key",
    postMessageURL = "your_endpoint_url"
){
| Parameter | Values | Definition |
|---|---|---|
appKey | String | The application key generated for the current app in Connect. To learn more, see Get an application key for the Connect library. |
navController | String. Valid values: navController and appState.navController. | The type of navigation controller |
postMessageURL | String | The endpoint associated with your Connect subscription |
- Integrate
ConnectWrapperintonavController. It is important that you placeConnectWrapperat the root level of your app's composition.
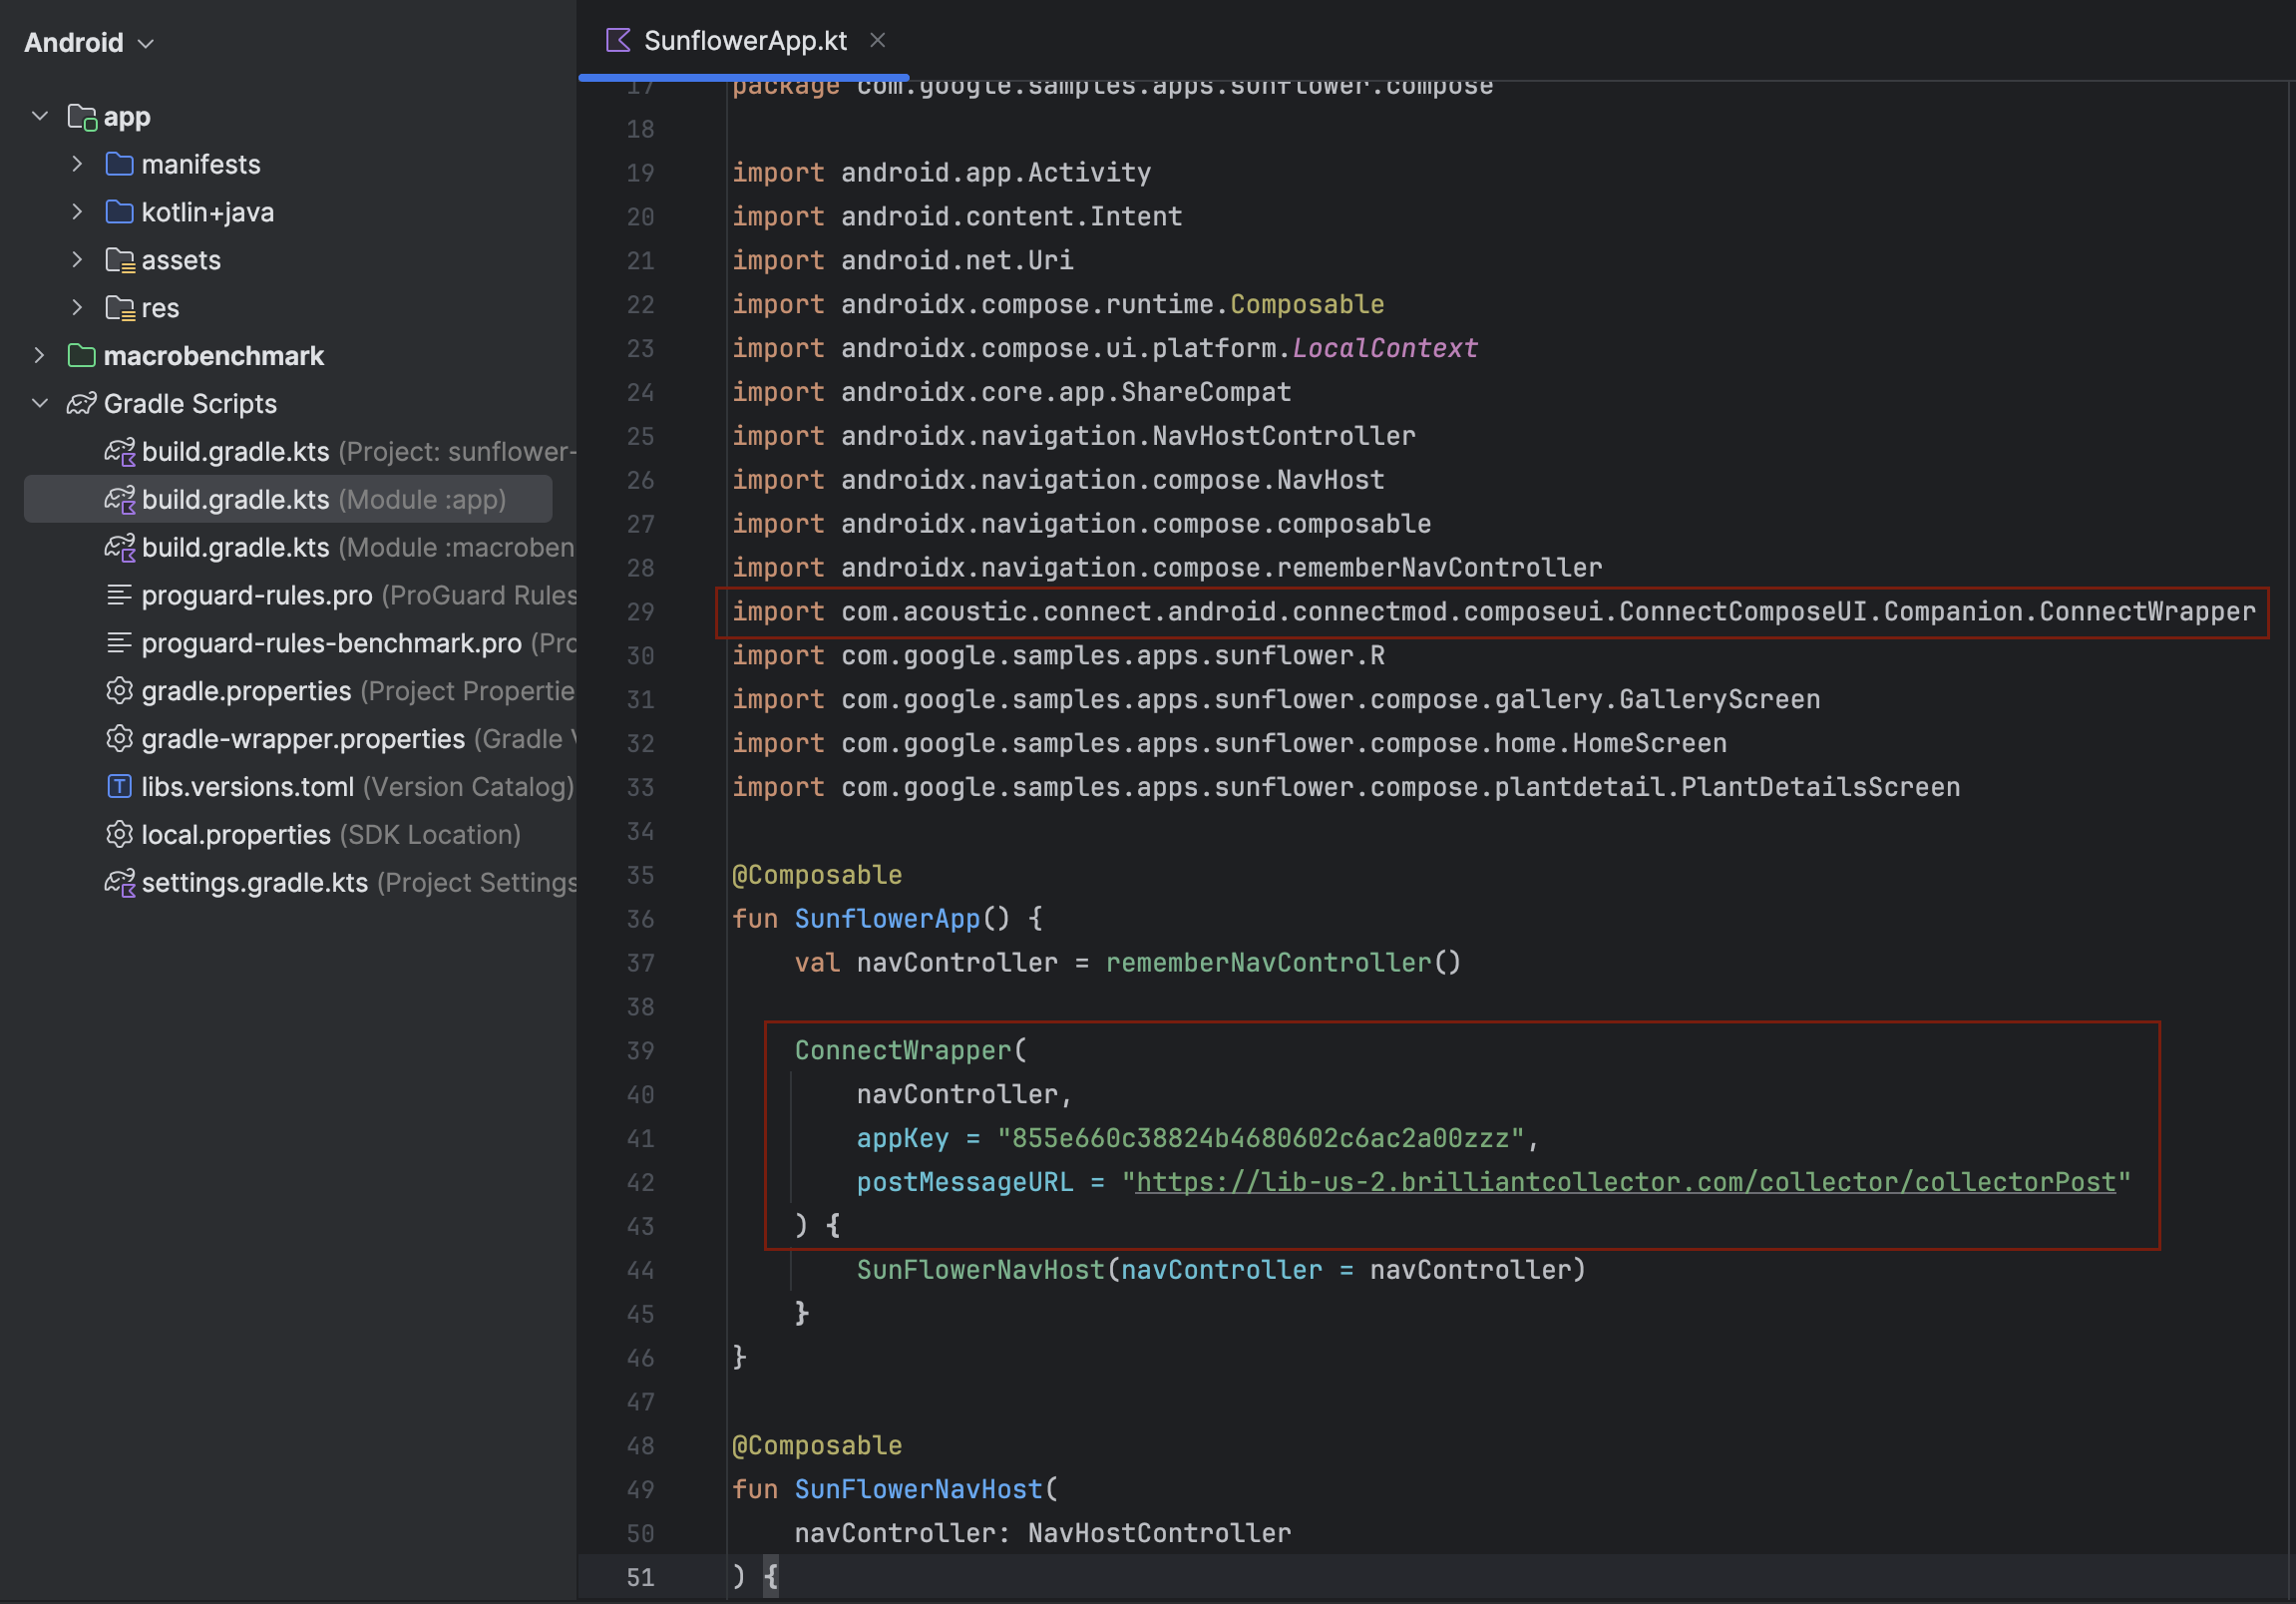
Example from Google's Sunflower app
- Build and run your app.
ConnectWrapper integration examples
There are different ways to integrate ConnectWrapper with your navigation setup. Choose the approach that best fits the app architecture.
If your app uses a direct navigation controller, add the ConnectWrapper function right after you call rememberNavController(). The app content must be inside. For example, Google's official Sunflower app that we use for demo purposes has a direct navigation controller.
@Composable
fun YourApp() {
    val navController = rememberNavController()

    ConnectWrapper(
        navController = navController,
        appKey = "your_key",
        postMessageURL = "your_endpoint_url"
    ) {
        // Your app content
        YourNavHost(navController = navController)
    }
}
For better state management and testing, hoist navController to a state holder. Google's official Now in Android is an example of such an app.
class YourAppState(val navController: NavHostController) {
    // Other state management...
}

@Composable
fun rememberYourAppState(navController: NavHostController = rememberNavController()): YourAppState {
    return remember(navController) { YourAppState(navController) }
}

@Composable
fun YourApp() {
    val appState = rememberYourAppState()

    ConnectWrapper(
        navController = appState.navController,
        appKey = "your_key",
        postMessageURL = "your_endpoint_url"
    ) {
        // Your app content using appState
    }
}
If your app has multiple navigation graphs, use the following approach.
@Composable
fun YourApp() {
    val navController = rememberNavController()

    ConnectWrapper(
        navController = navController,
        appKey = "your_key",
        postMessageURL = "your_endpoint_url"
    ) {
        NavHost(navController = navController, startDestination = "main") {
            // Your navigation graph
        }
    }
}
And here is a less typical example from an app with multiple back stack support.
@Composable
fun YourApp() {
    val navController = rememberNavController()
    // Configure back stack behavior
    val configuration =
        NavHostController.Configuration(
            navigatorProvider = navController.navigatorProvider,
            backStackBehavior = BackStackBehavior.MULTIPLE_BACK_STACKS
        )

    ConnectWrapper(
        navController = navController,
        appKey = "your_key",
        postMessageURL = "your_endpoint_url"
    ) {
        // Your multi-stack navigation
    }
}
Need a refresher?
Here is an official article explaining Jetpack navigation - Define routes and create a NavHostController.
Further steps
Updated 1 day ago