
Integrate the Tealeaf SDK into your Flutter app
You can integrate the Tealeaf SDK into your iOS and Android apps based on the Flutter framework. The installation relies on the pub package manager.
Requirements
- Acoustic Tealeaf. To use the Tealeaf SDK, you need an active Tealeaf subscription.
- Development environment. To integrate the SDK into your app, you need a standard Flutter environment. Supported versions: 3.3.0 - 3.16.0.
- Mobile app compatibility. The Tealeaf SDK can function on end users' devices running Android 5.0 (API level 21) - Android 14 (API level 34). Supported iOS versions - 12.0 and later.
Initial setup
- In a terminal emulator, navigate to the root project directory and run the following command.
flutter pub add tl_flutter_plugin- Find a new dependency in the pubspec.yaml file.
dependencies:
tl_flutter_plugin: ^2.8.0- Open
lib/main.dartand add an import statement there:
import 'package:tl_flutter_plugin/tl_flutter_plugin.dart';- Open to the Tealeaf Automation CLI directory on your computer:
$HOME/.pub-cache/hosted/pub.dev/tl_flutter_plugin-<TEALEAF-PLUGIN-VERSION>/package/tealeaf_cli. Copy the full path to the directory. - Copy
/tealeaf_clito the root of your home directory. For example:
cp -r /Users/admin/.pub-cache/hosted/pub.dev/tl_flutter_plugin-2.8.0/package/tealeaf_cli /Users/admin/tealeaf_cli - Navigate to the
tealeaf_clidirectory that you have just created and fetch dependencies for your project.
cd $HOME/tealeaf_cli
flutter pub get- Navigate to the root project directory. Submit your Tealeaf credentials (application key and endpoint URL).
cd <YOUR_PROJECT_PATH>
dart run $HOME/tealeaf_cli/bin/tealeaf_cli.dart <AppKey> <PostMessageURL>- Find a configuration file in the root project directory - TealeafConfig.json. It will contain the app key and endpoint URL you have submitted. Here is a fragment of the file.
{
  "Tealeaf": {
    "AppKey": "855e660c38824b4680602c6ac2a00zzz",
    "PostMessageUrl": "https://lib-us-2.brilliantcollector.com/collector/collectorPost",
    "KillSwitchUrl": "https://lib-us-2.brilliantcollector.com/collector/switch/fa47722a7fef4bcd8677fd8d6d113a0d",
    "useRelease": false,
    "iOSVersion": "",
    "AndroidEOCoreVersion": "+",
    "AndroidTealeafVersion": "+"
  }
}
Integration with the main app
Launch task creation (optional)
The sample app includes the launch.json task for the VS Code IDE that integrates the above steps into a pre-build flow.
- Create a .vscode folder and add the prelaunch task labeled
Run Tealeaf CLI.
"preLaunchTask": "Run Tealeaf CLI"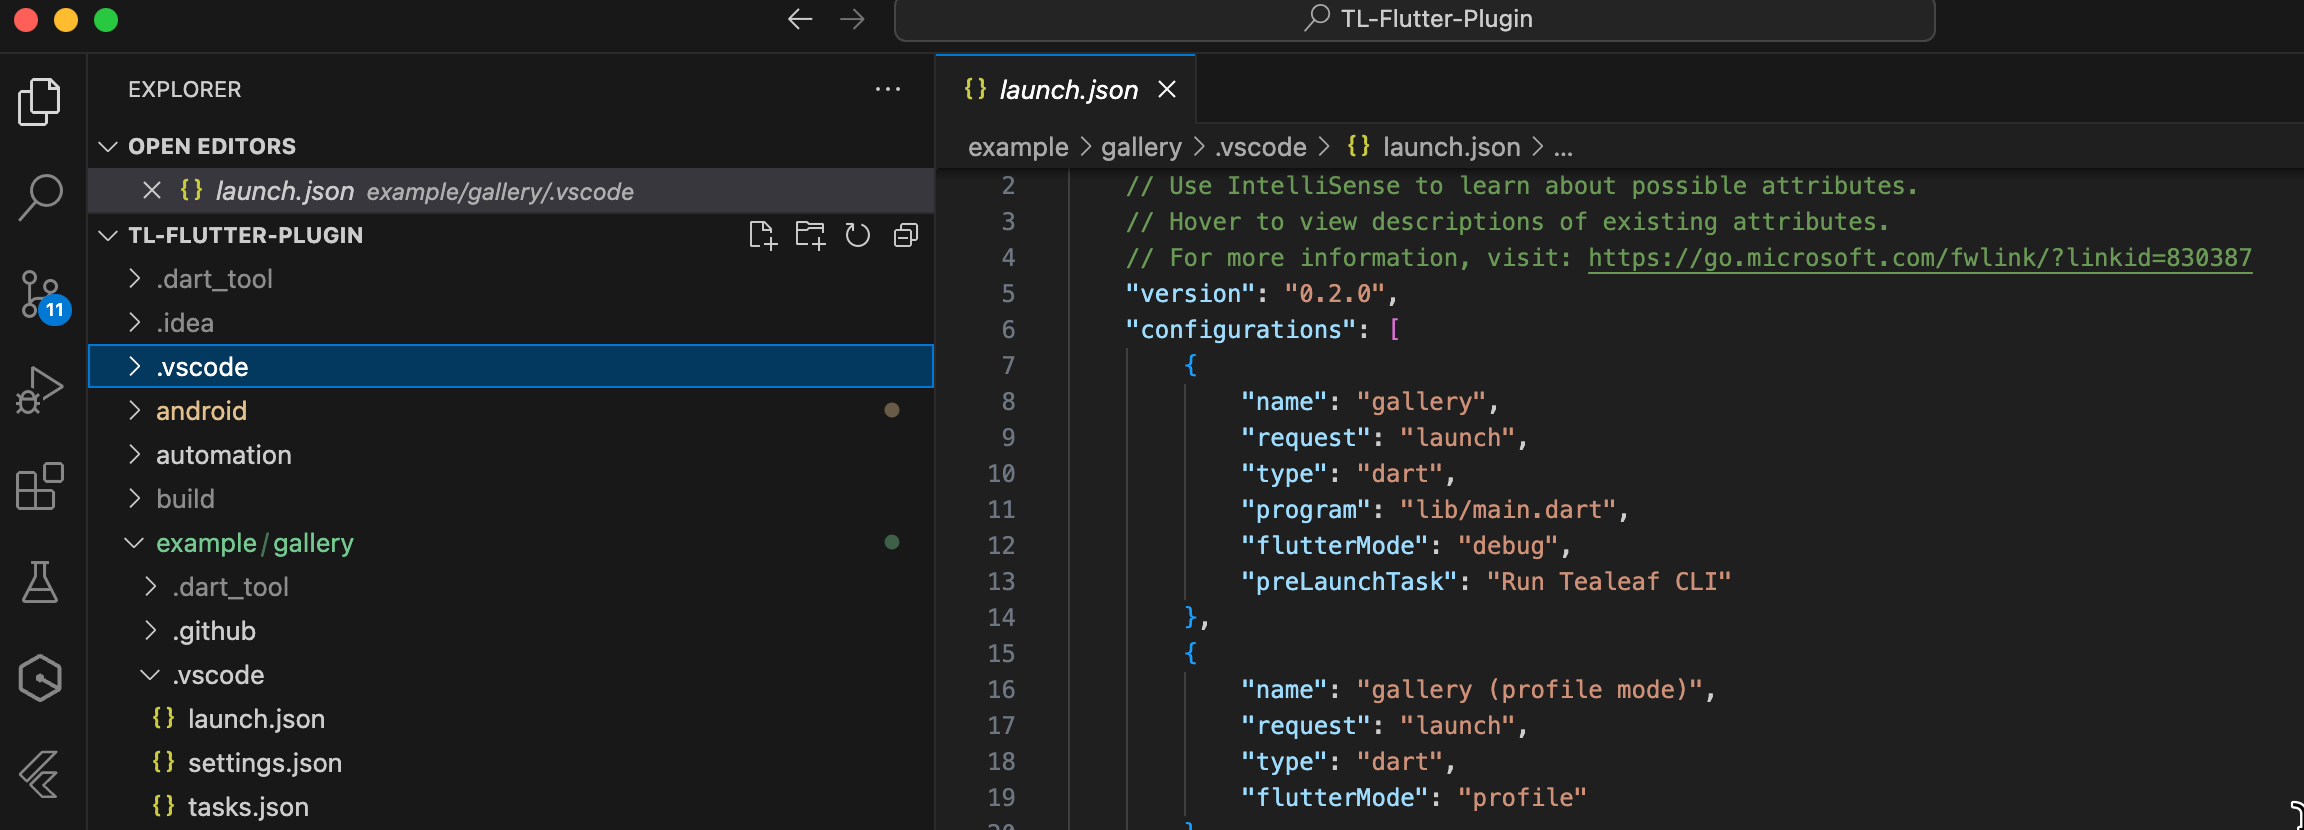
- Copy the tasks.json file to your app's .vscode folder. Update the
argsusing your application key and endpoint URL.

Add Tealeaf Wrapper and Navigation Observer
Tealeaf Wrapper enables auto instrumentation. Tealeaf.loggingNavigatorObserver handles the app's navigation route changes and event logging.
void main() async {
  ///
  /// Add Tealeaf Wrapper for auto instrumentation
  ///
  runApp(Tealeaf(
    child: const GalleryApp()));
}

class GalleryApp extends StatelessWidget {
  ...
  @override
  Widget build(BuildContext context) {
    return ModelBinding(
      child: Builder(
        builder: (context) {
          return MaterialApp(
            ///
            /// Add the required Tealeaf loggingNavigatorObserver to the navigatorObservers list
            ///
            navigatorObservers: [Tealeaf.loggingNavigatorObserver],

            ...
          );
Material navigation and navigation widgets
Does your app use Material navigation or any of the following widgets: TabBar, TabBarView or BottomNavigationBar? Logging screen change events for them requires some additional setup.
For example, if a BottomNavigationBar is used without a proper Route-based navigation setup (e.g., by showing and hiding widgets within the same screen), LoggingNavigatorObserver won't be able to log navigation events.
To log navigation events for these types of widgets, you would need to add below code snippets when the user interacts with these widgets (e.g., onTap or onChanged callback functions).:
PluginTealeaf.logScreenLayout('logicalPageName');Further steps
- Test session replay - see the instruction for the sample app
- Enable privacy protection - see Masking using semantics accessibility labels
- Enable advanced configuration settings
Updated 3 months ago