Instrument a Cordova Android application
Overview
Use Android Studio to instrument an Android Cordova application.
The Cordova application provides cross-platform, hybrid application capability by providing built-in UI controls that help developers create custom hybrid apps with the native UI look and feel.
Prerequisites
This tutorial expects you to use Android Studio to instrument the Android Cordova application. Versions 6.x to 7.1.4 of Cordova are supported.
Note:
To find the current Cordova framework version on your sample app, open a command window, go to the project directory, and enter
cordova platform is.
Sample code
For sample code that shows how to instrument your Cordova app with the Tealeaf SDK, go to SampleCordova
Note:
The Cordova framework is updated to refer to the CordovaLib folder under SampleCordova/platforms/android. If you specify a different folder for the Cordova framework, you might not have the most up-to-date framework.
Add libraries to your Cordova application
- Open Android Studio and select Open an existing Android Studio project.
- Select your Android project from your file system. For this tutorial, the project name is SampleApp-Cordova.
- Under Gradle Scripts in the left-hand pane, select build.gradle (Module: NameOfYourProject). In this example, build.gradle (Module: SampleApp-Cordova).
- In your build.gradle (Module:NameOfYourProject) file, find a section called
dependenciesand the following lines of code:
implementation files('libs/tealeafmod.jar')
implementation files('libs/eocore.jar')
implementation 'androidx.appcompat:appcompat:1.0.0'
Your build.gradle (Module: NameOfYourProject) file should look like this now:

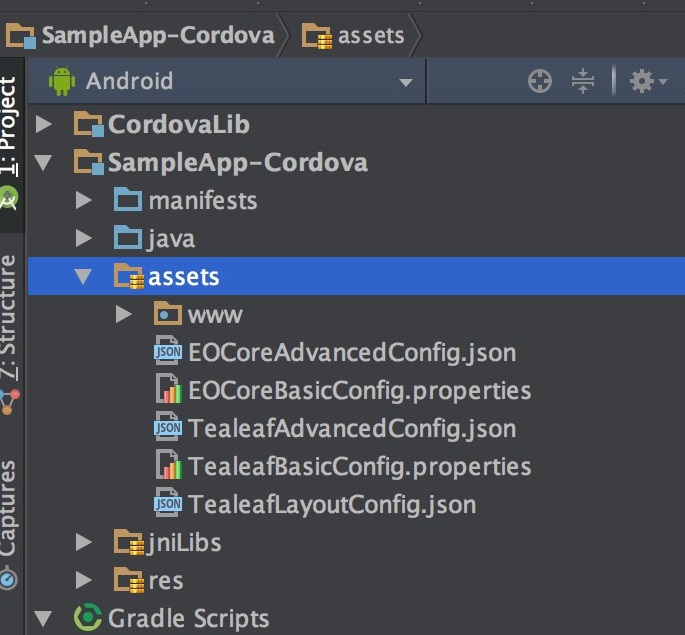
- Under the assets folder in the left-hand pane, add the following files:
EOCoreAdvancedConfig.jsonEOCoreBasicConfig.propertiesTealeafAdvancedConfig.jsonTealeafBasicConfig.propertiesTealeafLayoutConfig.json
Note:
In
TealeafAdvancedConfig.json, verify that theEnableActivityLifeCycleListenerparameter is set totrue.
Your assets folder should look like this now:

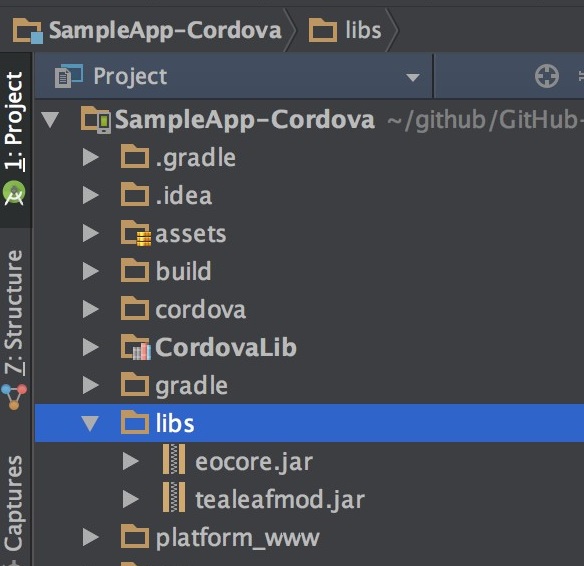
- To add the jar files, change the view of your left-hand pane menu from Android to Project.
- Under the libs folder in the left-hand pane, add the eocore.jar and the tealeafmod.jar.
Your libs folder should look like this now:

- Press Sync Now to include the Tealeaf SDK.
Check your permissions and Tealeaf configurations
In your TealeafBasicConfig.properties file, change the following settings so you can see your sessions and replay your activies and gestures on the Replay portal:
- Set the KillSwitch property to
false
#Kill switch settings
KillSwitchEnabled=false
- Capture the native layout of the application
#Capture native layout
LogViewLayoutOnScreenTransition=true
- Enable gestures on the hybrid part of the application and disable gestures on the native (Since this is a hybrid application)
#Gesture enabled or not
SetGestureDetector=false
CaptureNativeGesturesOnWebView=false
In your TealeafLayoutConfig.json, allot enough time for your activity to load:
"AutoLayout": {
 "MainActivity": {
  "do": true,
  "screenViewName": "MainActivity",
  "delay": 5000,
  "takeScreenShot": false
 }
}
In this example, the first activity is called MainActivity, and we want a 5000 millisecond delay. This means we allot the activity 5 seconds to load its UI components and then the SDK starts scanning the page.
Previous instrumentations of Cordova might use the following parameters in the TealeafLayoutConfig.json. These parameters are not used in the SDK (10.2.1.264 and later) and must be removed:
Example:
“IsCordovaApp”: true
“CordovaLayoutDelay”: 750
In your left-hand menu, open AndroidManifest.xml and set the following permissions:
<uses-permission android:name="android.permission.INTERNET"/>
<uses-permission android:name="android.permission.READ_PHONE_STATE"/>
<uses-permission android:name="android.permission.ACCESS_WIFI_STATE"/>
<uses-permission android:name="android.permission.ACCESS_NETWORK_STATE"/>
<uses-permission android:name="android.permission.ACCESS_COARSE_LOCATION"/>
<uses-permission android:name="android.permission.ACCESS_FINE_LOCATION"/>
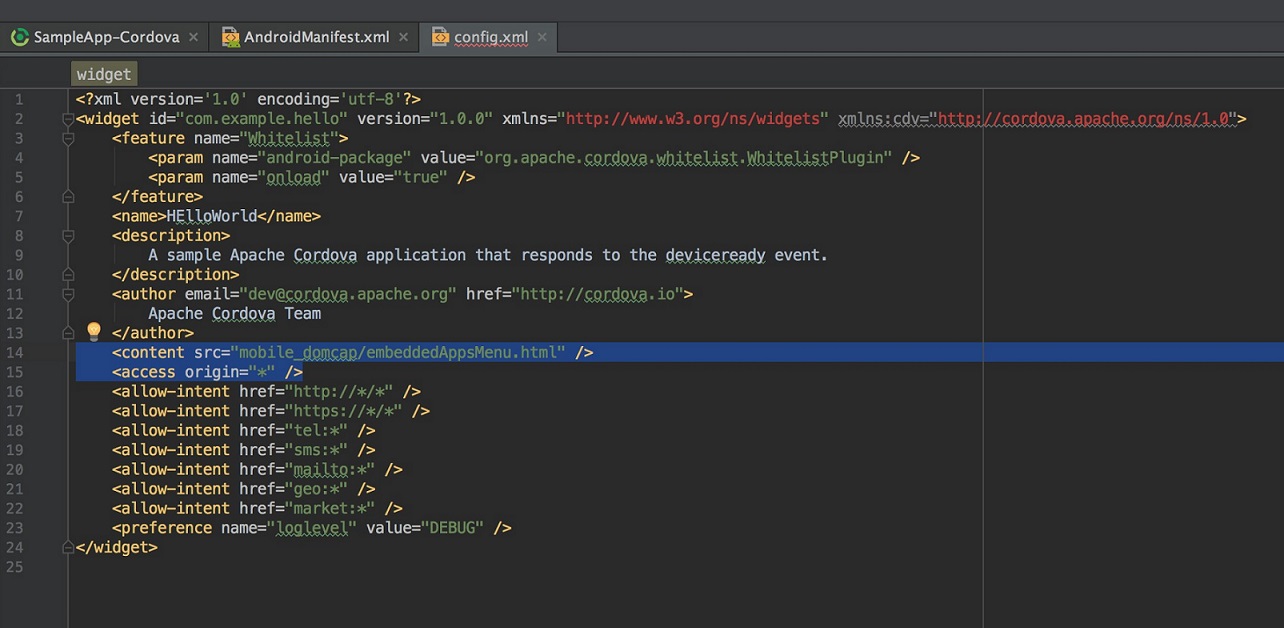
In your left-hand menu, under the res folder, open the xml folder to the config.xml file. Add the following lines:
<content src="mobile_domcap/embeddedAppsMenu.html"/>
<access origin="*"/>
embeddedAppsMenu.html is the first page that we want to render when the application is open. The embeddedAppsMenu.html file is under the res/www/mobile_domcap folder in the sample app.
Your config.xml file should look like this now:

Instrument the native part of your Cordova application
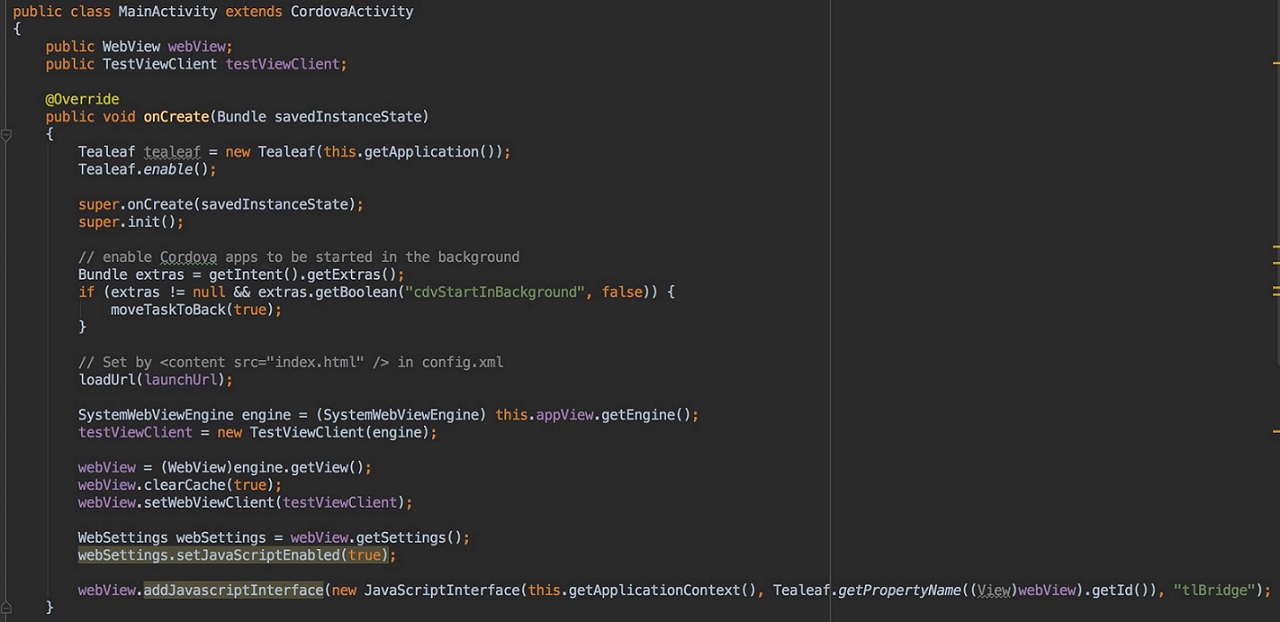
- In your
MainActivityfile, you need to have the following in youronCreate()function:
Tealeaf tealeaf = new Tealeaf(this.getApplication());
Tealeaf.enable();

SystemWebViewEngine engine = (SystemWebViewEngine) this.appView.getEngine();
testViewClient = new TestViewClient(engine);


webView = (WebView)engine.getView();
webView.clearCache(true);
webView.setWebViewClient(testViewClient);


WebSettings webSettings = webView.getSettings();
webSettings.setJavaScriptEnabled(true);


webView.addJavascriptInterface(new JavaScriptInterface(this.getApplicationContext(),
Tealeaf.getPropertyName((View)webView).getId()), "tlBridge");
Your onCreate method should look like this now:

The last line is setting up the bridge between the native part of the application and the web part of the application.
- Create a
TestViewClientfunction after theonCreatefunction:
public class TestViewClient extends SystemWebViewClient {
  public TestViewClient(SystemWebViewEngine parentEngine){
    super(parentEngine);
    LOG.d("userwebview", "TestViewClient()");
  }


  /**
   *{@inheritDoc}
   */
   @Override
   public boolean shouldOverrideUrlLoading(final WebView view, final String url){
     view.loadUrl(url);
     return true;
   }


   /**
    *{@inheritDoc}
    */
   public void onPageStarted(final WebView view, final String url){
     view.loadUrl("javascript:TLT.registerBridgeCallbacks([ "
          + "{enabled: true, cbType: 'screenCapture', cbFunction: function (){tlBridge.screenCapture();}},"
          + "{enabled: true, cbType: 'messageRedirect', cbFunction: function (data){tlBridge.addMessage(data):}}]);");
   }
}
- If your activities or fragments contain
Tealeaf.onResume(),Tealeaf.onPause(), orTealeaf.onDestroy()statements, remove the statements. The SDK handles these statements now. - Add a function for gesture detection:
public boolean dispatchTouchEvent(MotionEvent e) {
  //detector.onTouchEvent(e);
  Tealeaf.dispatchTouchEvent(this, e);
  return super.dispatchTouchEvent(e);
}
You have instrumented the native part of your Cordova appplication.
Next, instrument the web part in your assets/www folder using the UIC Tealeaf SDK. You are then ready to run your application and find your logged session. For more information, see Configuring DOM Capture and Replay for Hybrid applications
Updated almost 2 years ago
