
Integrate the Campaign Cordova SDK into your app
The Cordova Campaign SDK provides mobile app message handling and display capabilities for Android and iOS apps. To add the library to your app, use npm CLI. For basic and advanced settings, we provide a unified configuration file CampaignConfig.json.
Warning
The Campaign SDK does not encrypt data transmitted via push notifications and in-app messages. To transmit sensitive information, you must encrypt it before sending and decrypt it in the memory of the end user's device.
Requirements
Acoustic Campaign
- To use the library, your company must have an active Acoustic Campaign subscription.
- You must register your mobile app with Campaign and get access keys for it. You need separate keys for each platform (Android and iOS) and environment (testing and production). For instructions, see Get an access key for the Campaign library.
- Prepare the base URL associated with your subscription. Contact your account manager if you don't know your base URL yet.
Mobile app compatibility
The Campaign library works on end users' devices running the following operating systems:
- Android 5.0 (API level 21) and later
- iOS 13 and later
Warning
The iOS Simulator app is unable to handle push messages. Run your app on a real device.
Your mobile app
There are two additional requirements related to the Android version of your app:
- The app must registered and implemented (this is necessary to enable testing and creating notifications).
- The install location of the app must be set to the internal memory of a mobile device, not to external storage cards.
Development environment
To integrate the Campaign library into an Android app using Cordova, you will need the following:
- Android Studio Iguana | 2023.2.1 Patch 1 or later
- Cordova Android plugin 12.0.1 or later
To integrate the Campaign library into an iOS app using Cordova, you will need the following:
- Xcode 15 with Command Line Tools
- Cordova iOS plugin 7.1.x or later
See official Cordova documentation for detailed requirements.
Initial setup
- Navigate to the main project directory and install the Campaign Cordova plugin.
npm i cordova-acoustic-mobile-push
- Wait till the plugin is installed and find a new file in the root directory of your project (CampaignConfig.json). Use this file to customize the library configuration.
- Make sure you are using the right build. During the testing stage, set
useReleasetofalse. For production, usetrue.
"useRelease": true,
Configure your projects
- In CampaignConfig.json, update the
androidVersionvalue if you need a version which is not the latest. Keep the field blank to use the latest available version (recommended). - In the
androidsection, enter your app key for Android and your base URL.
{
  "useRelease": true,
  "androidVersion": "",
  "android": {
    "baseUrl": "https://mobile-sdk-lib-XX-Y.brilliantcollector.com",
    "appKey": {
      "prod": "INSERT APP KEY HERE"
    }
  }
}
- Run the following Node.js command from the root project directory. This is necessary to apply the changes made to CampaignConfig.json.
node node_modules/cordova-acoustic-mobile-push/scripts/installPlugins.js
- Download your Firebase configuration file (google-services.json) from the Firebase console. Add the file to the
platforms/android/app/directory in your project. - Build your Android app.
cordova build android
- Run your Android app.
cordova run android
- In CampaignConfig.json, update the
iOSVersionvalue if you need a version which is not the latest. Keep the field blank to use the latest available version (recommended). - In the
iossection, enter your app key for iOS and your base URL.
{
  "useRelease": true,
  "iOSVersion": "",
  "iOS": {
    "baseUrl": "https://mobile-sdk-lib-XX-Y.brilliantcollector.com",
    "appKey": {
      "dev": "INSERT YOUR DEV APPKEY HERE",
      "prod": "INSERT YOUR PROD APPKEY HERE"
    }
  }
}
- Run the following Node.js command from the root project directory. This is necessary to apply the changes made to CampaignConfig.json.
node node_modules/cordova-acoustic-mobile-push/scripts/installPlugins.js
- Build your iOS app.
cordova build ios
- Run your iOS app.
cordova run ios
Important
Do not change the app keys after you publish your apps.
Finalize the iOS configuration
Step A: Add the Notification Service Extension
One of the frameworks installed using the installPlugins.js script is AcousticMobilePushNotification. It lets you enable dynamic action categories and media attachments in iOS notifications. Before a notification from the APNs service is displayed to an end user, the media attachment URL is extracted, and then the media file is downloaded and attached to the notification.
The notification service extension functions as a separate app within your app bundle and requires separate provisioning.
Important
The notification service target must be compatible with the version of the Campaign library you are using. So if you have a beta version of the library and want to switch to the stable version or visa versa, make sure you unlink the current target first and then add a new one.
- In your XCode project, click File > New > Target.
- On the iOS tab, select Notification Service Extension.
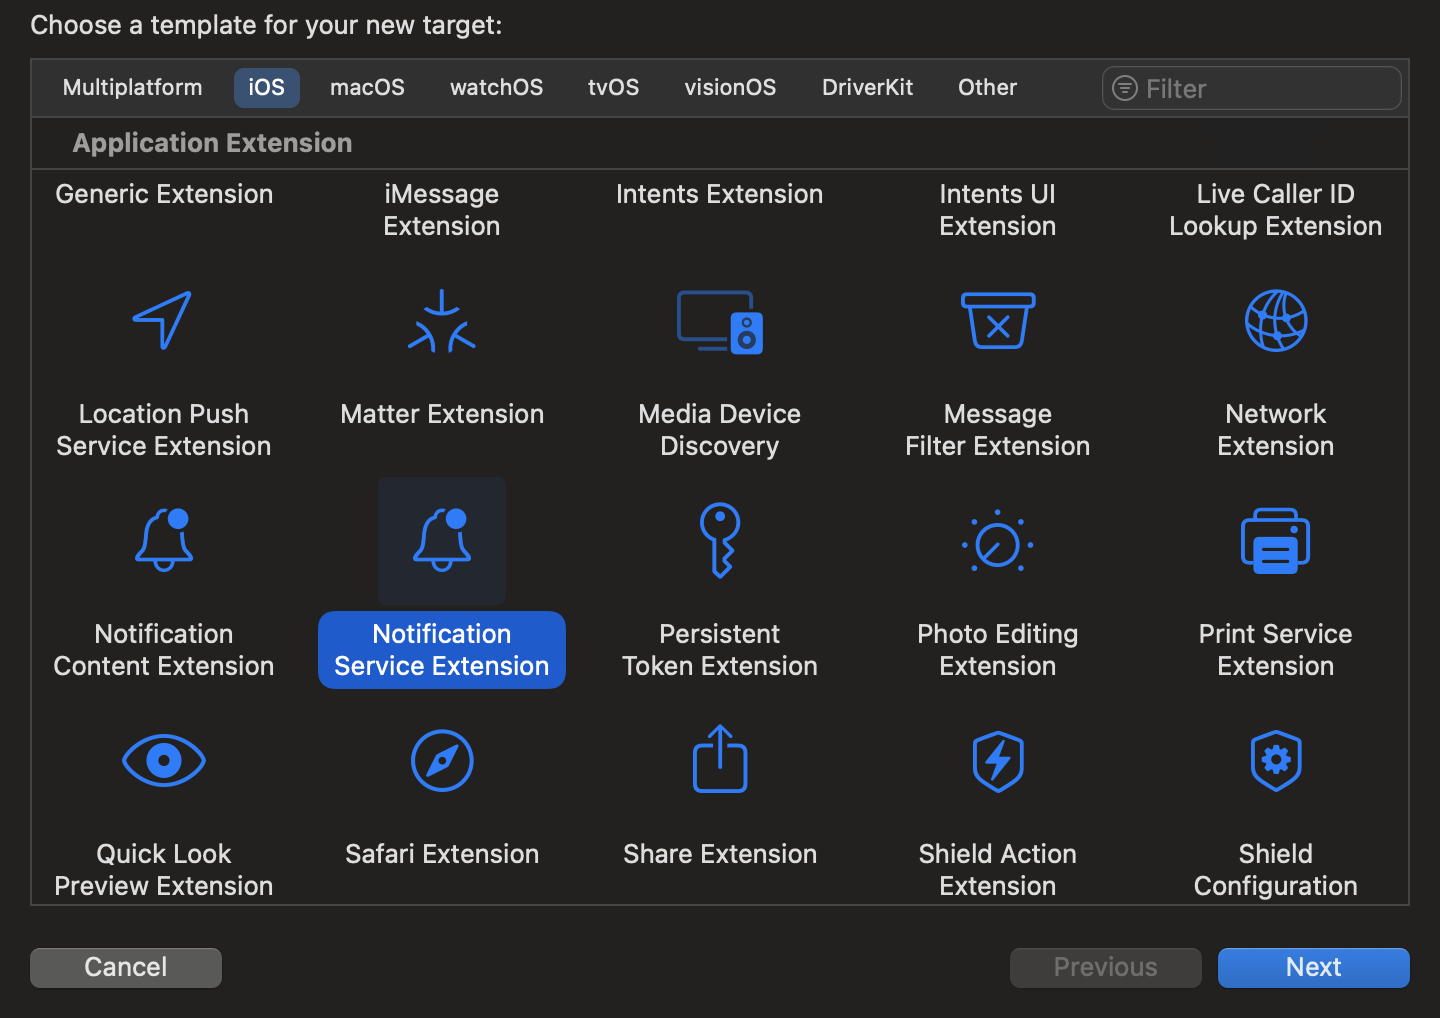
- In the Language list, select Objective-C. Fill out the remaining settings as appropriate.
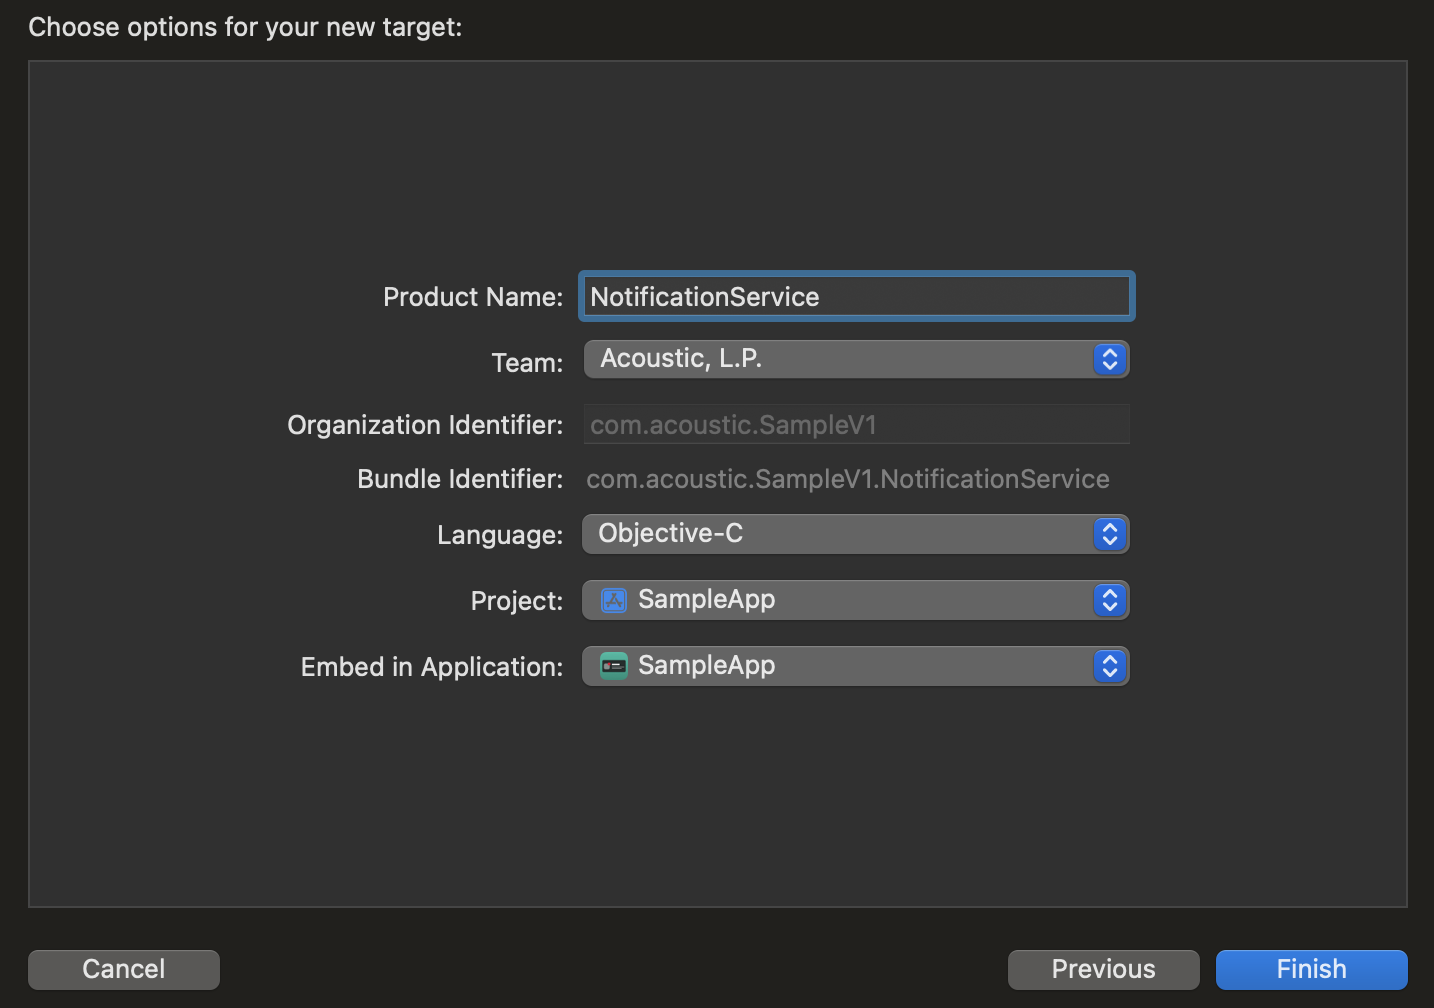
- If a confirmation message appears, select Activate.

- Find a new target and a new directory in your project.
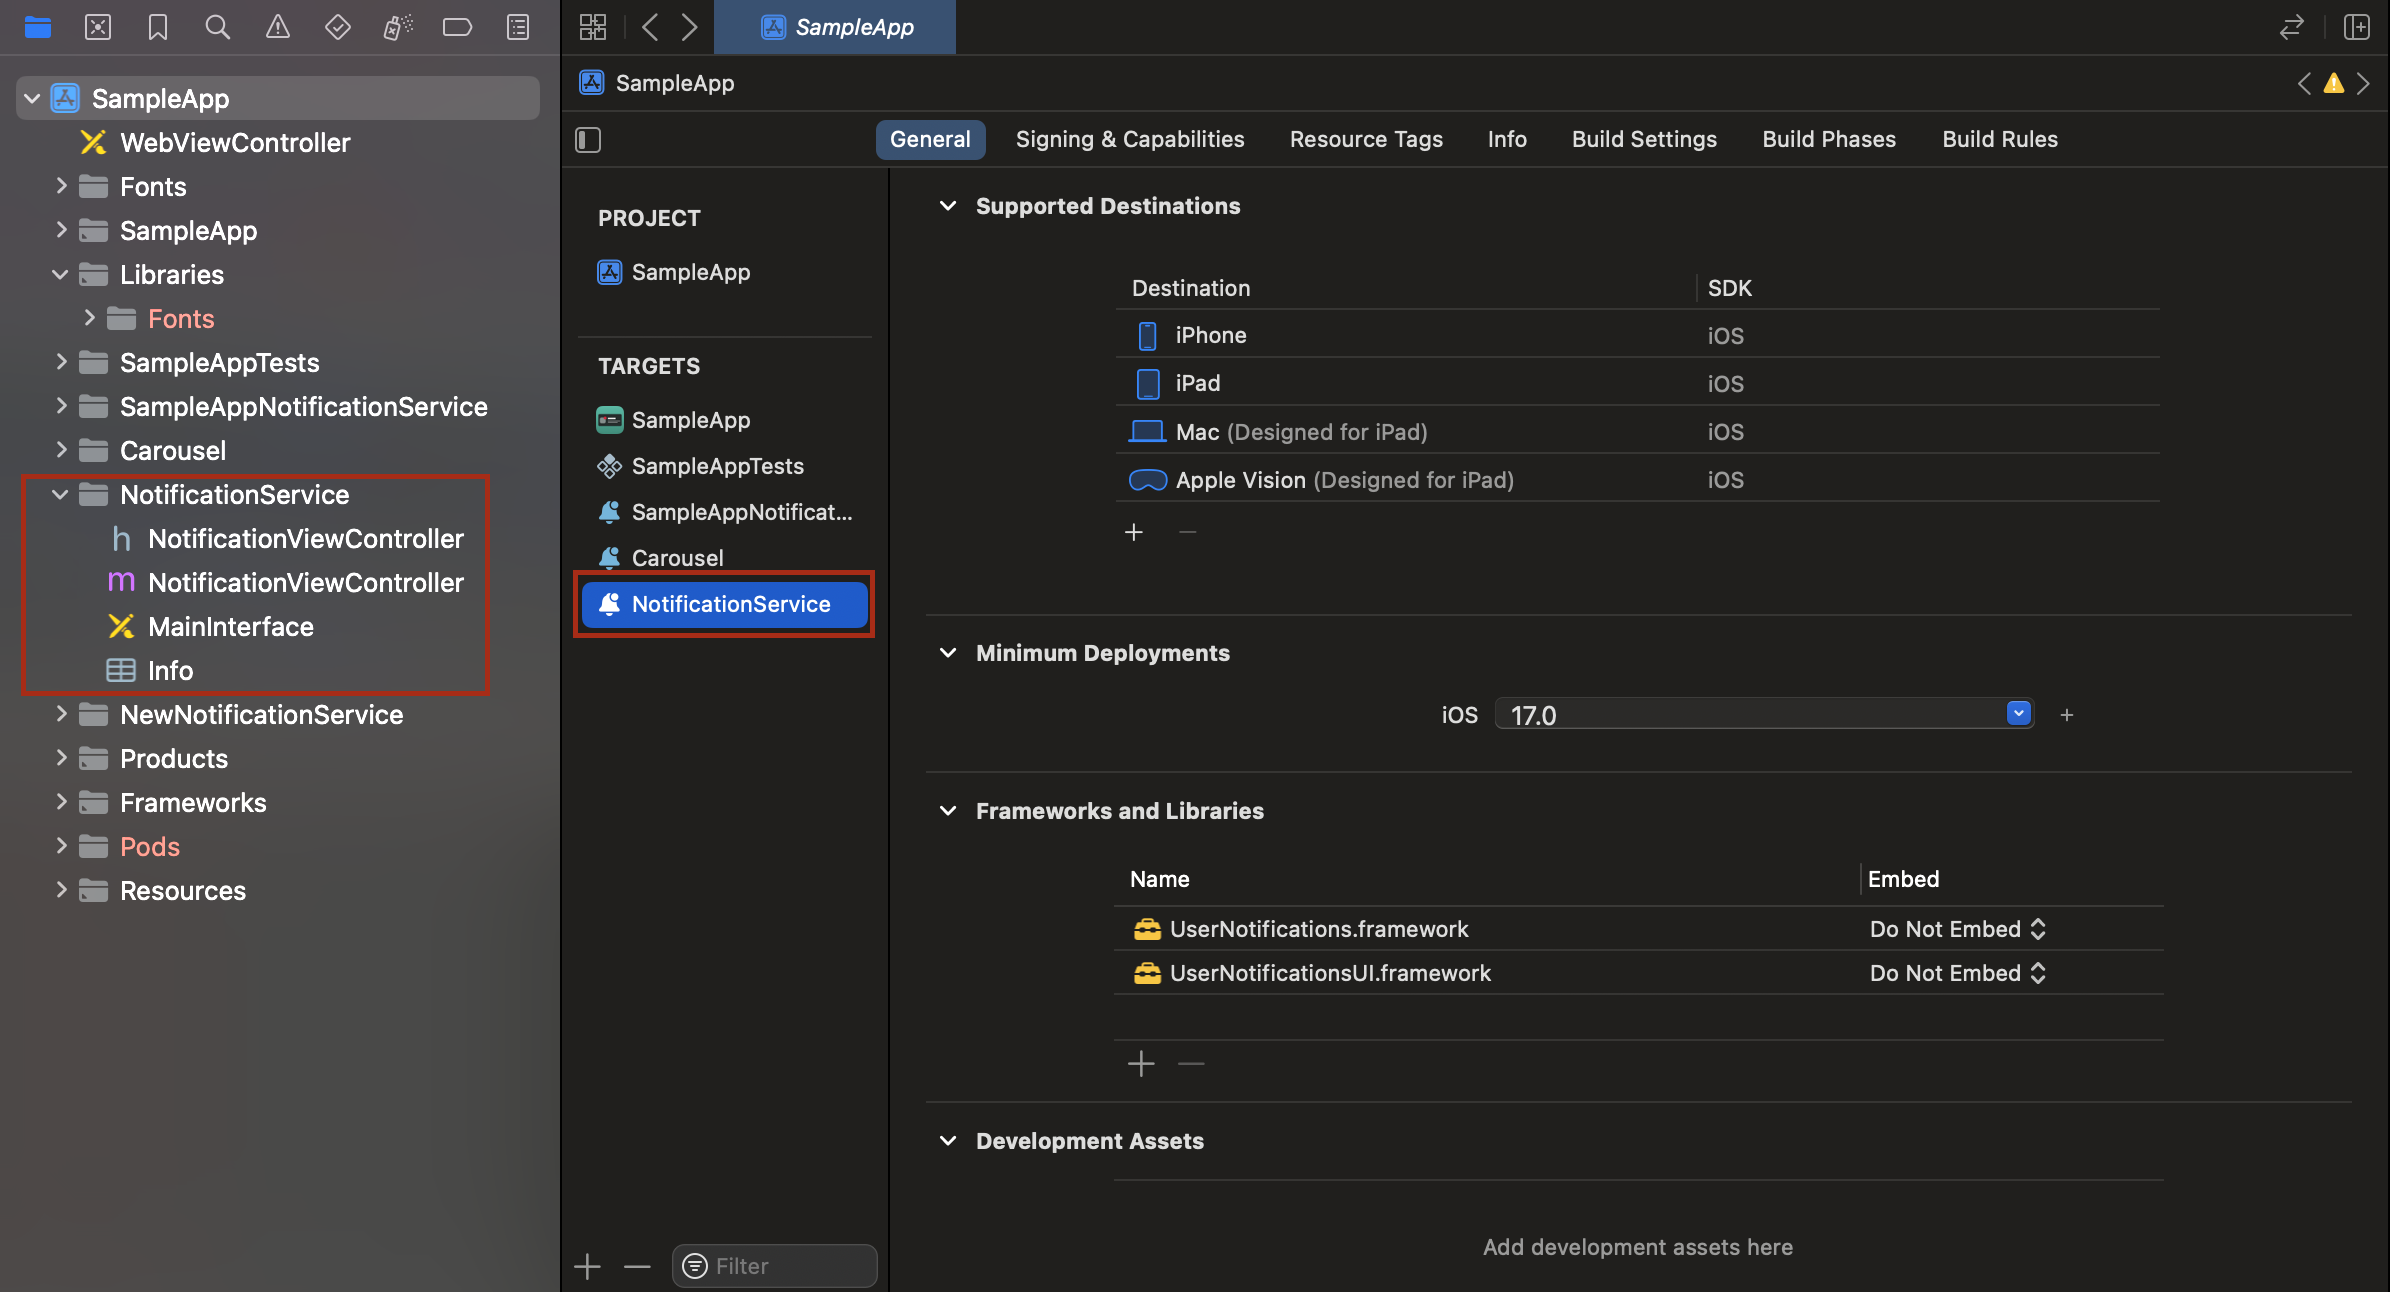
Step B: Configure the Notification Service target
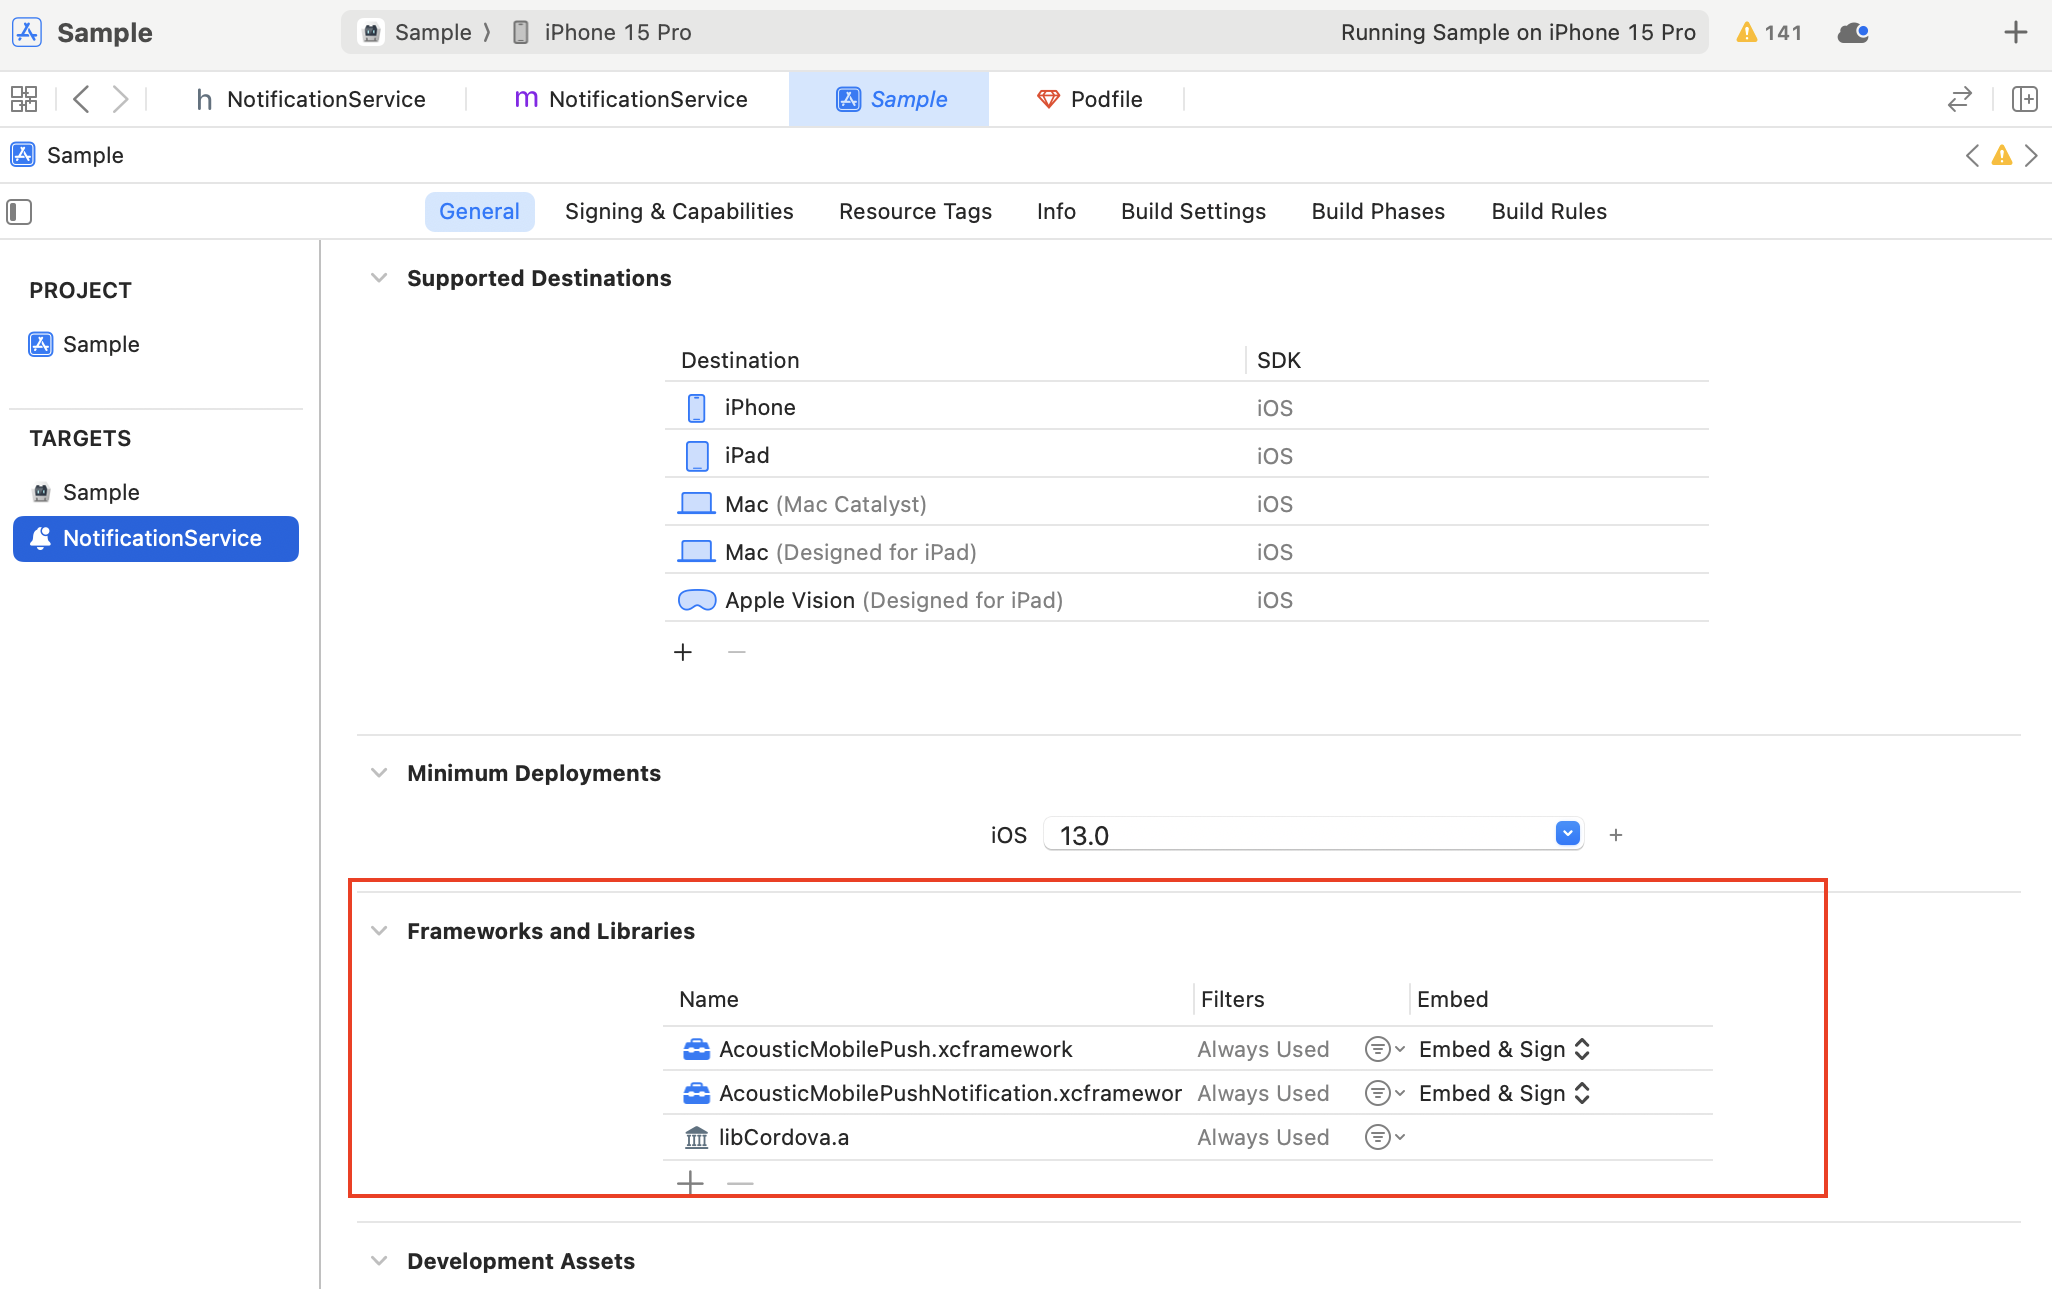
Select the new target and go through the following settings on the General tab.
- Minimum deployments. Make sure the iOS version is the same as in the primary application target.
- Frameworks and Libraries. Add AcousticMobilePushNotification.xcframework and libCordova.a. For AcousticMobilePushNotification.xcframework, the Embed and Sign option must be selected. AcousticMobilePush.xcframework should already be present based on earlier steps in these instructions.
On the Signing & Capabilities tab, add two capabilities: Keychain Sharing and App Groups. Make sure you use the same values as for the primary application target.
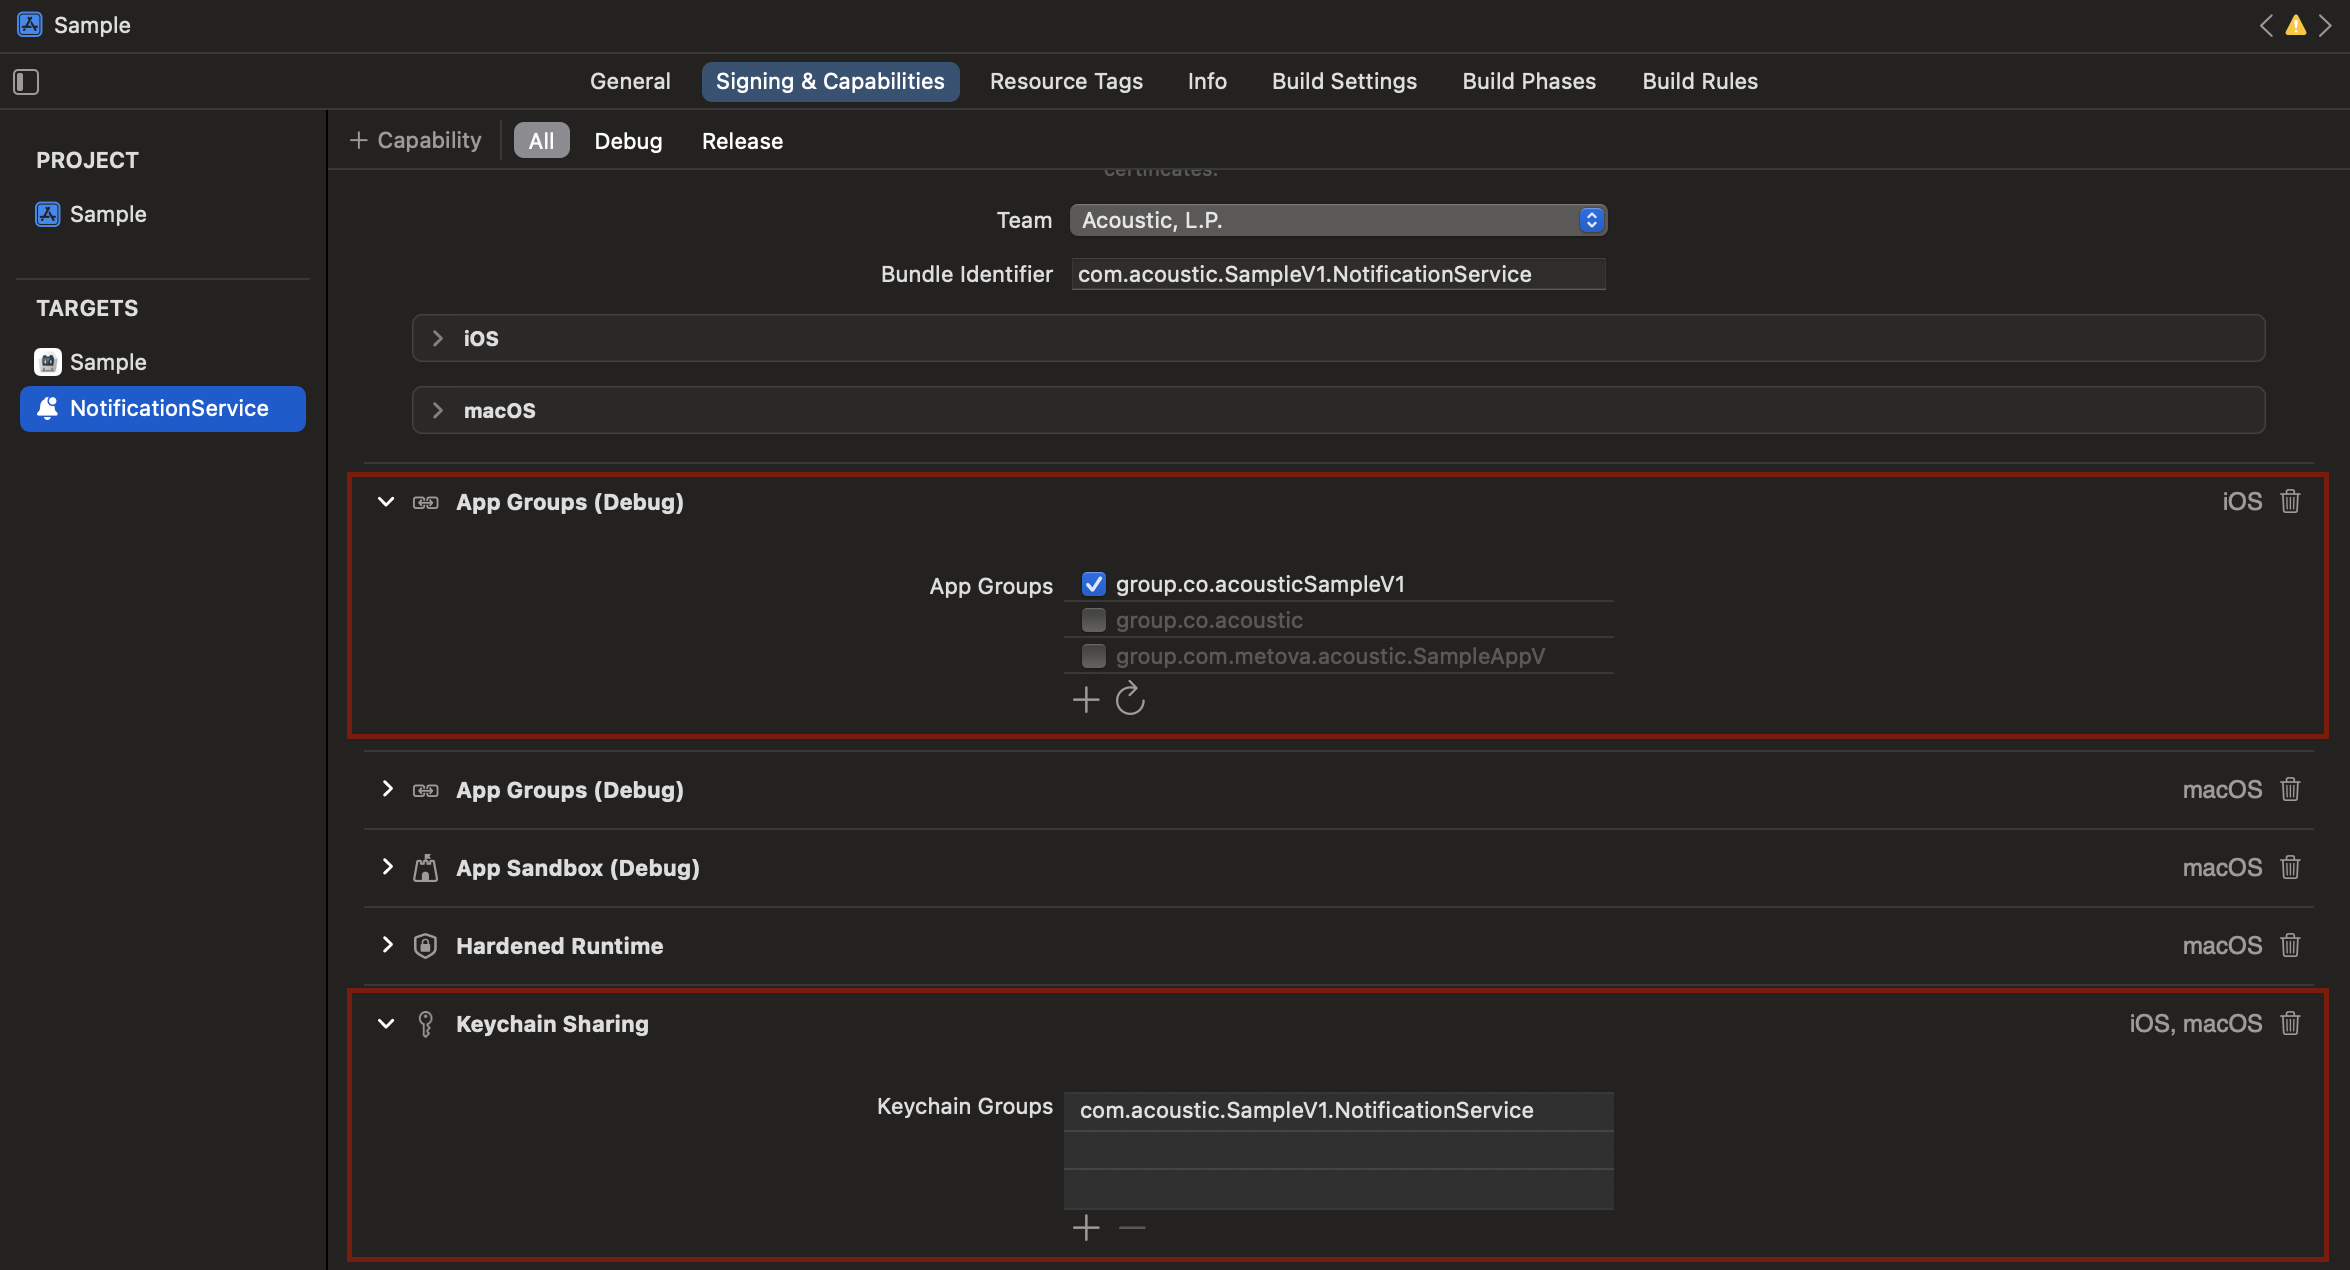
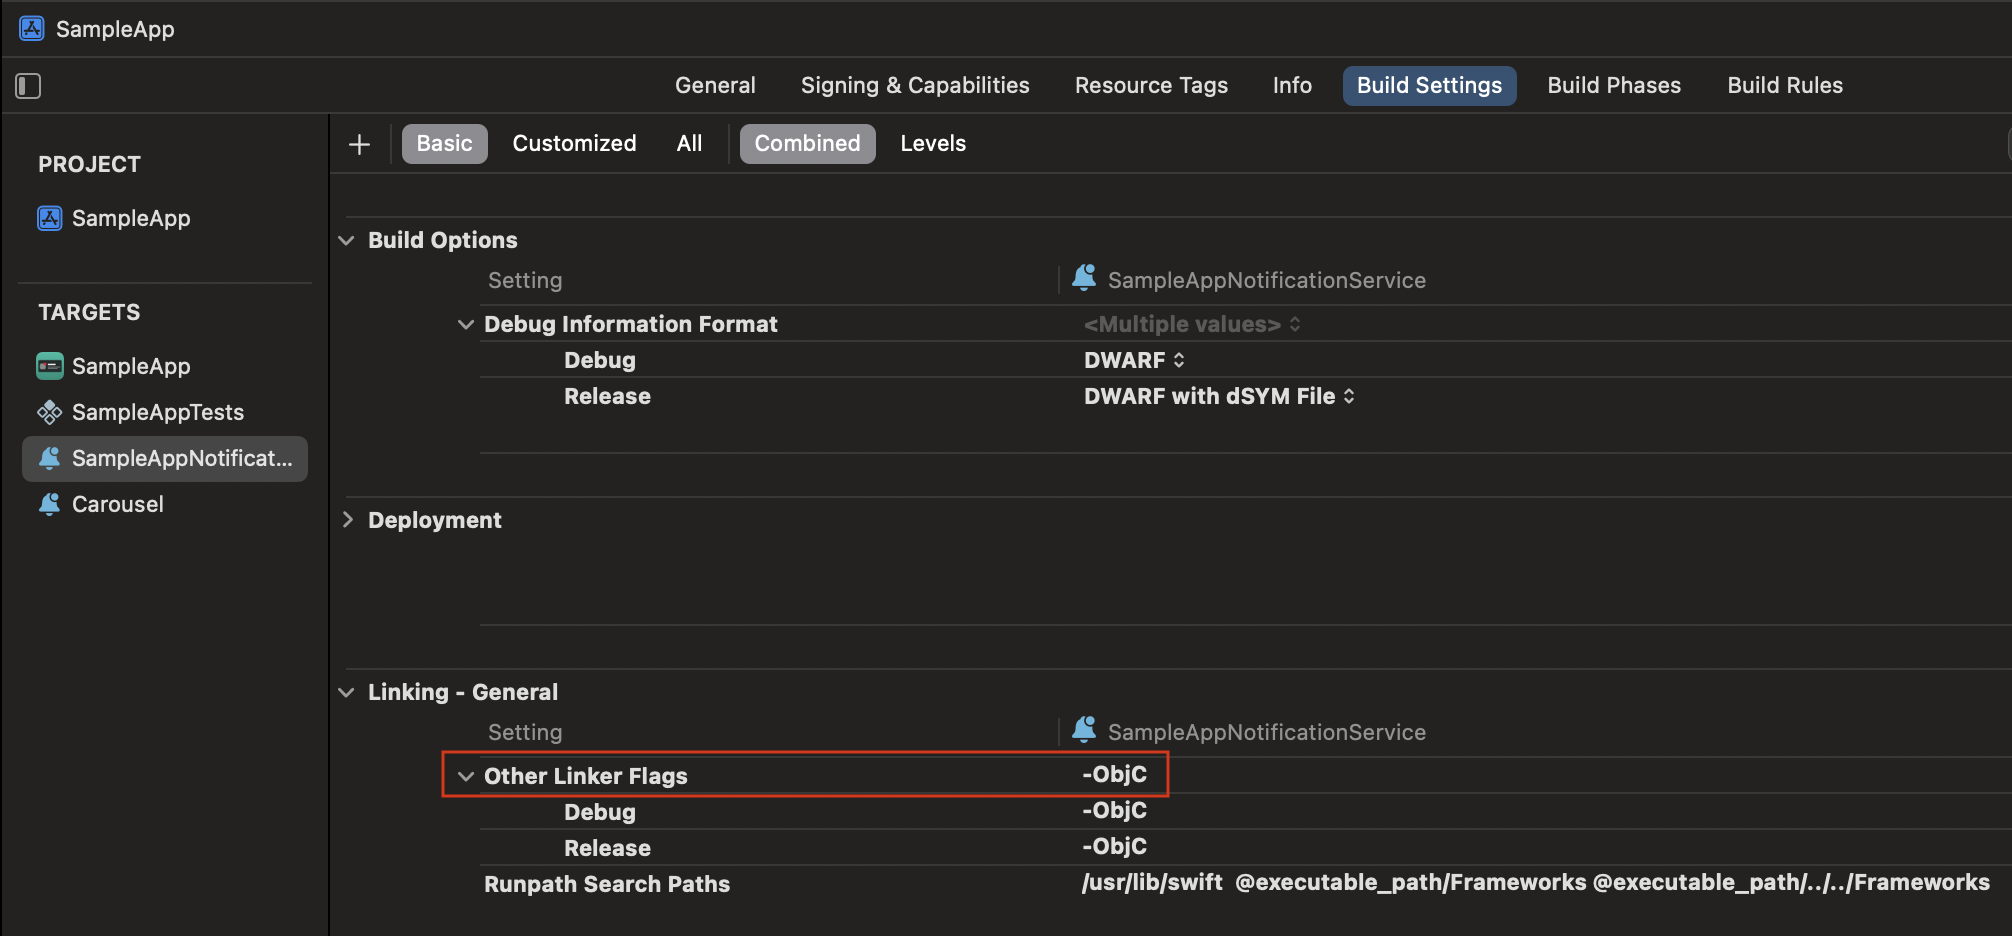
On the Build Settings tab, expand the Linking - General section. Make sure Other Linker Flags is set to -ObjC.
Step C: Update related project files
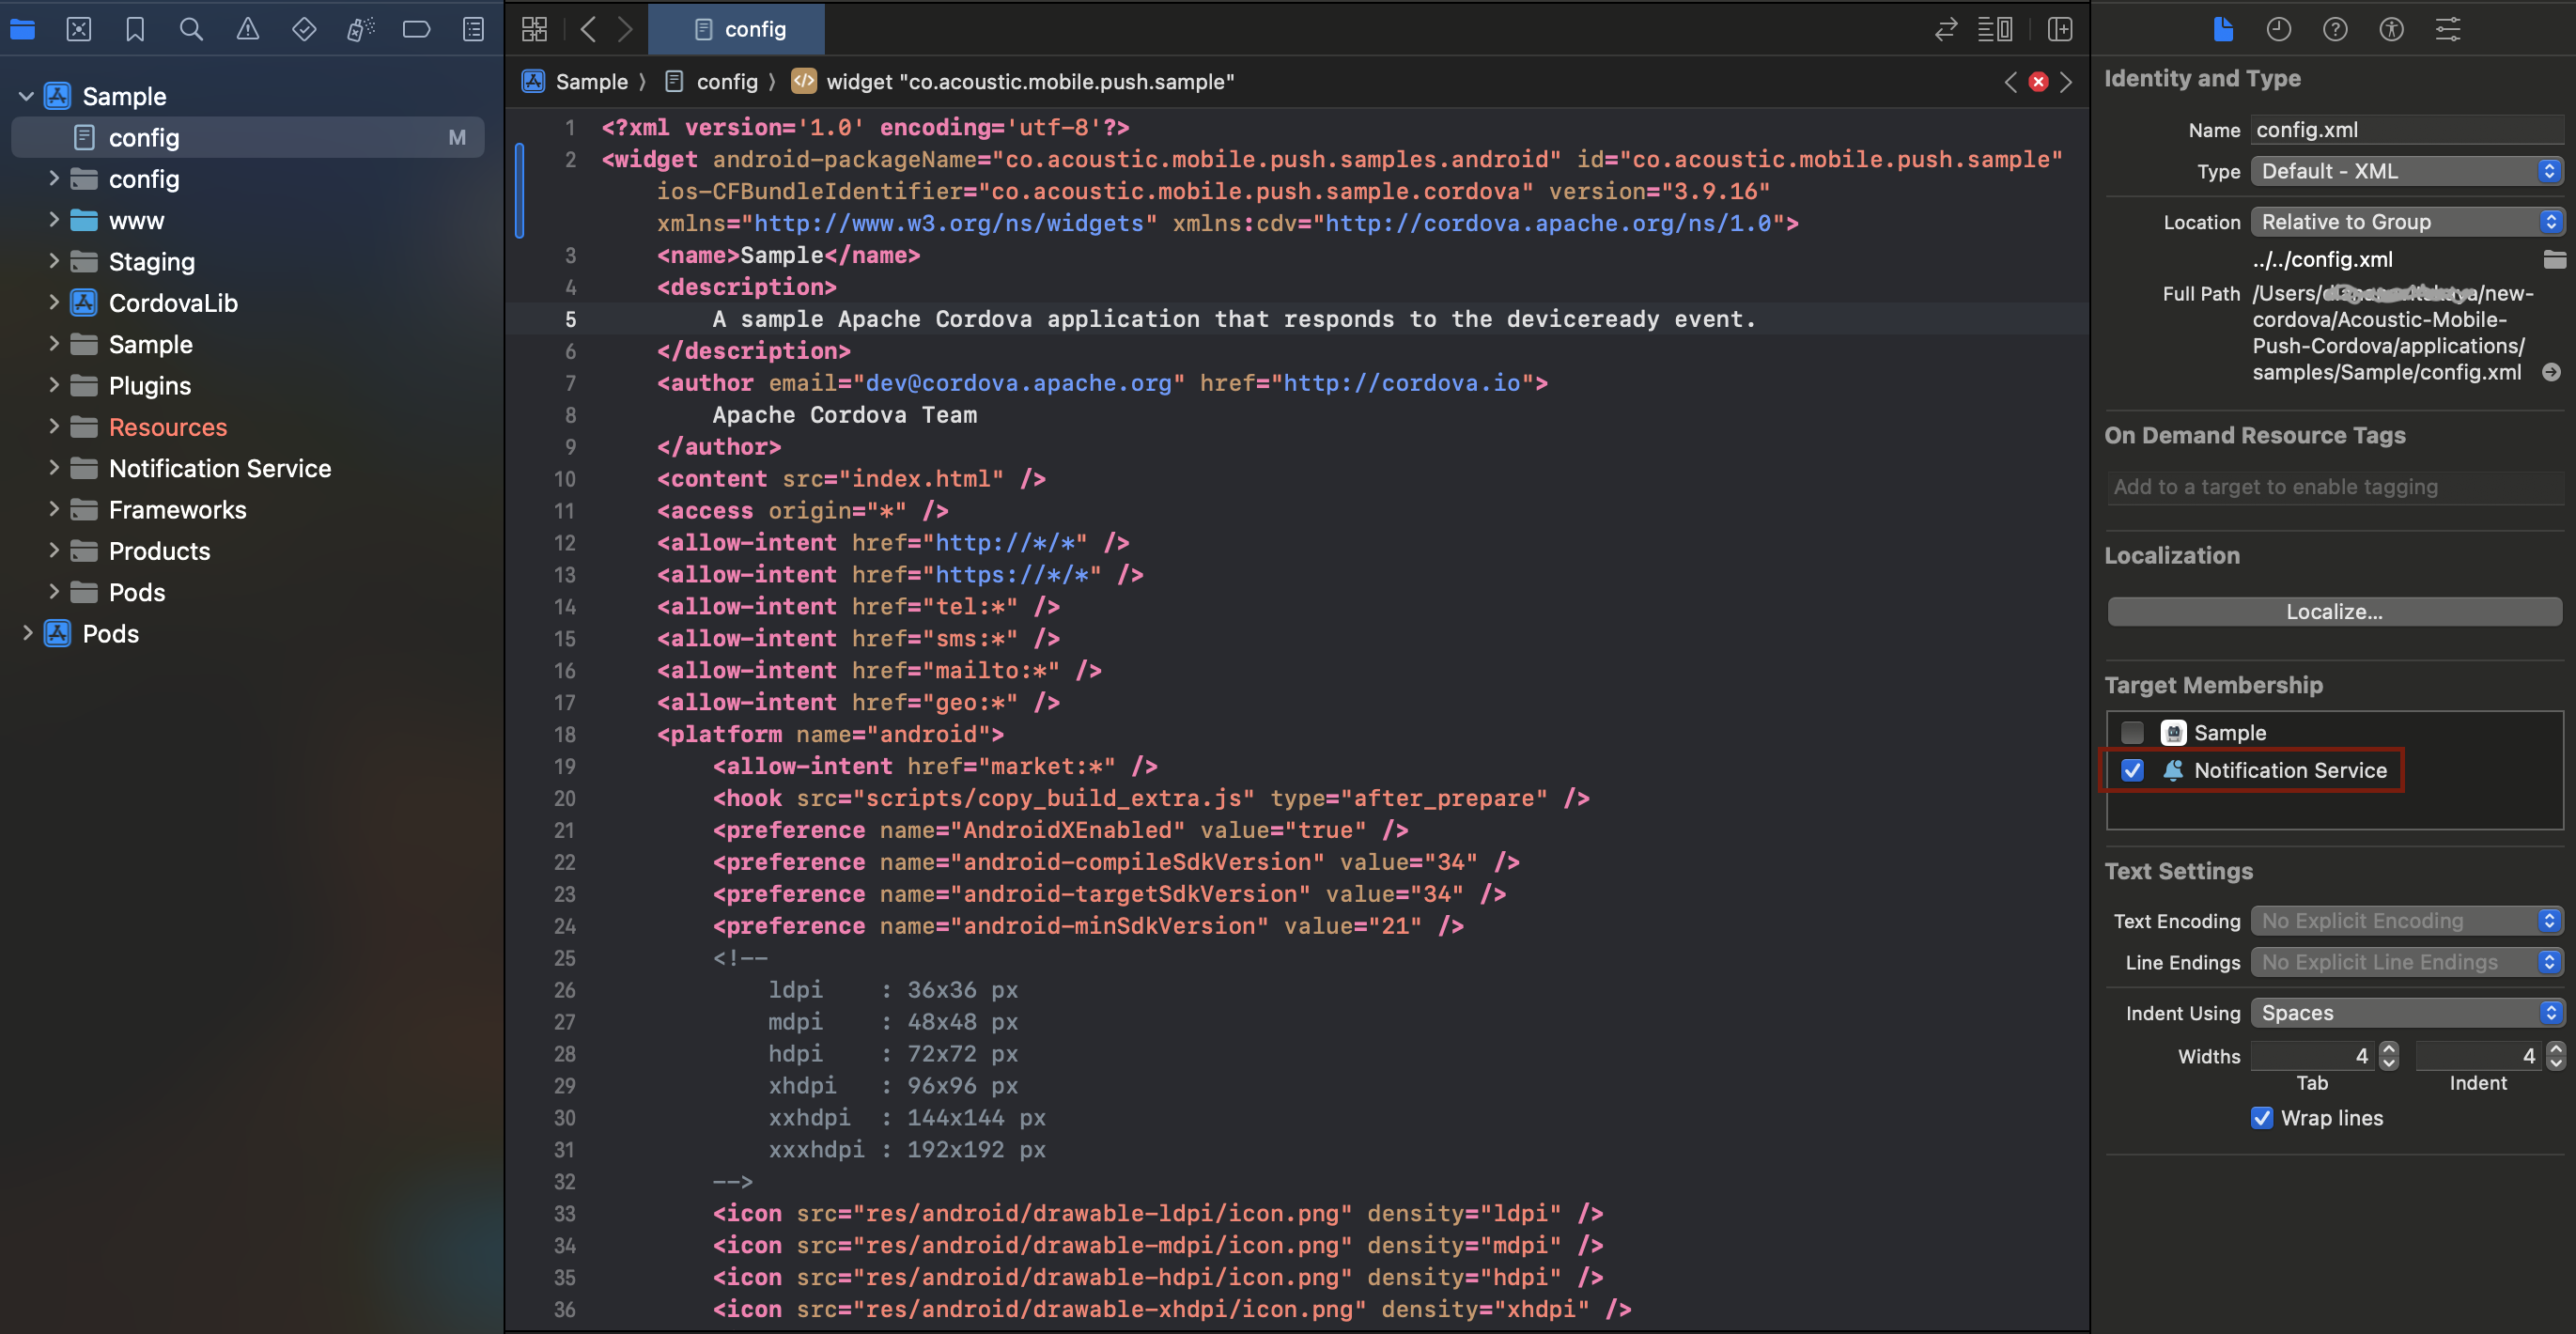
- In the project navigator, select config.xml. Add the Notification Service target to the file's Target Membership.
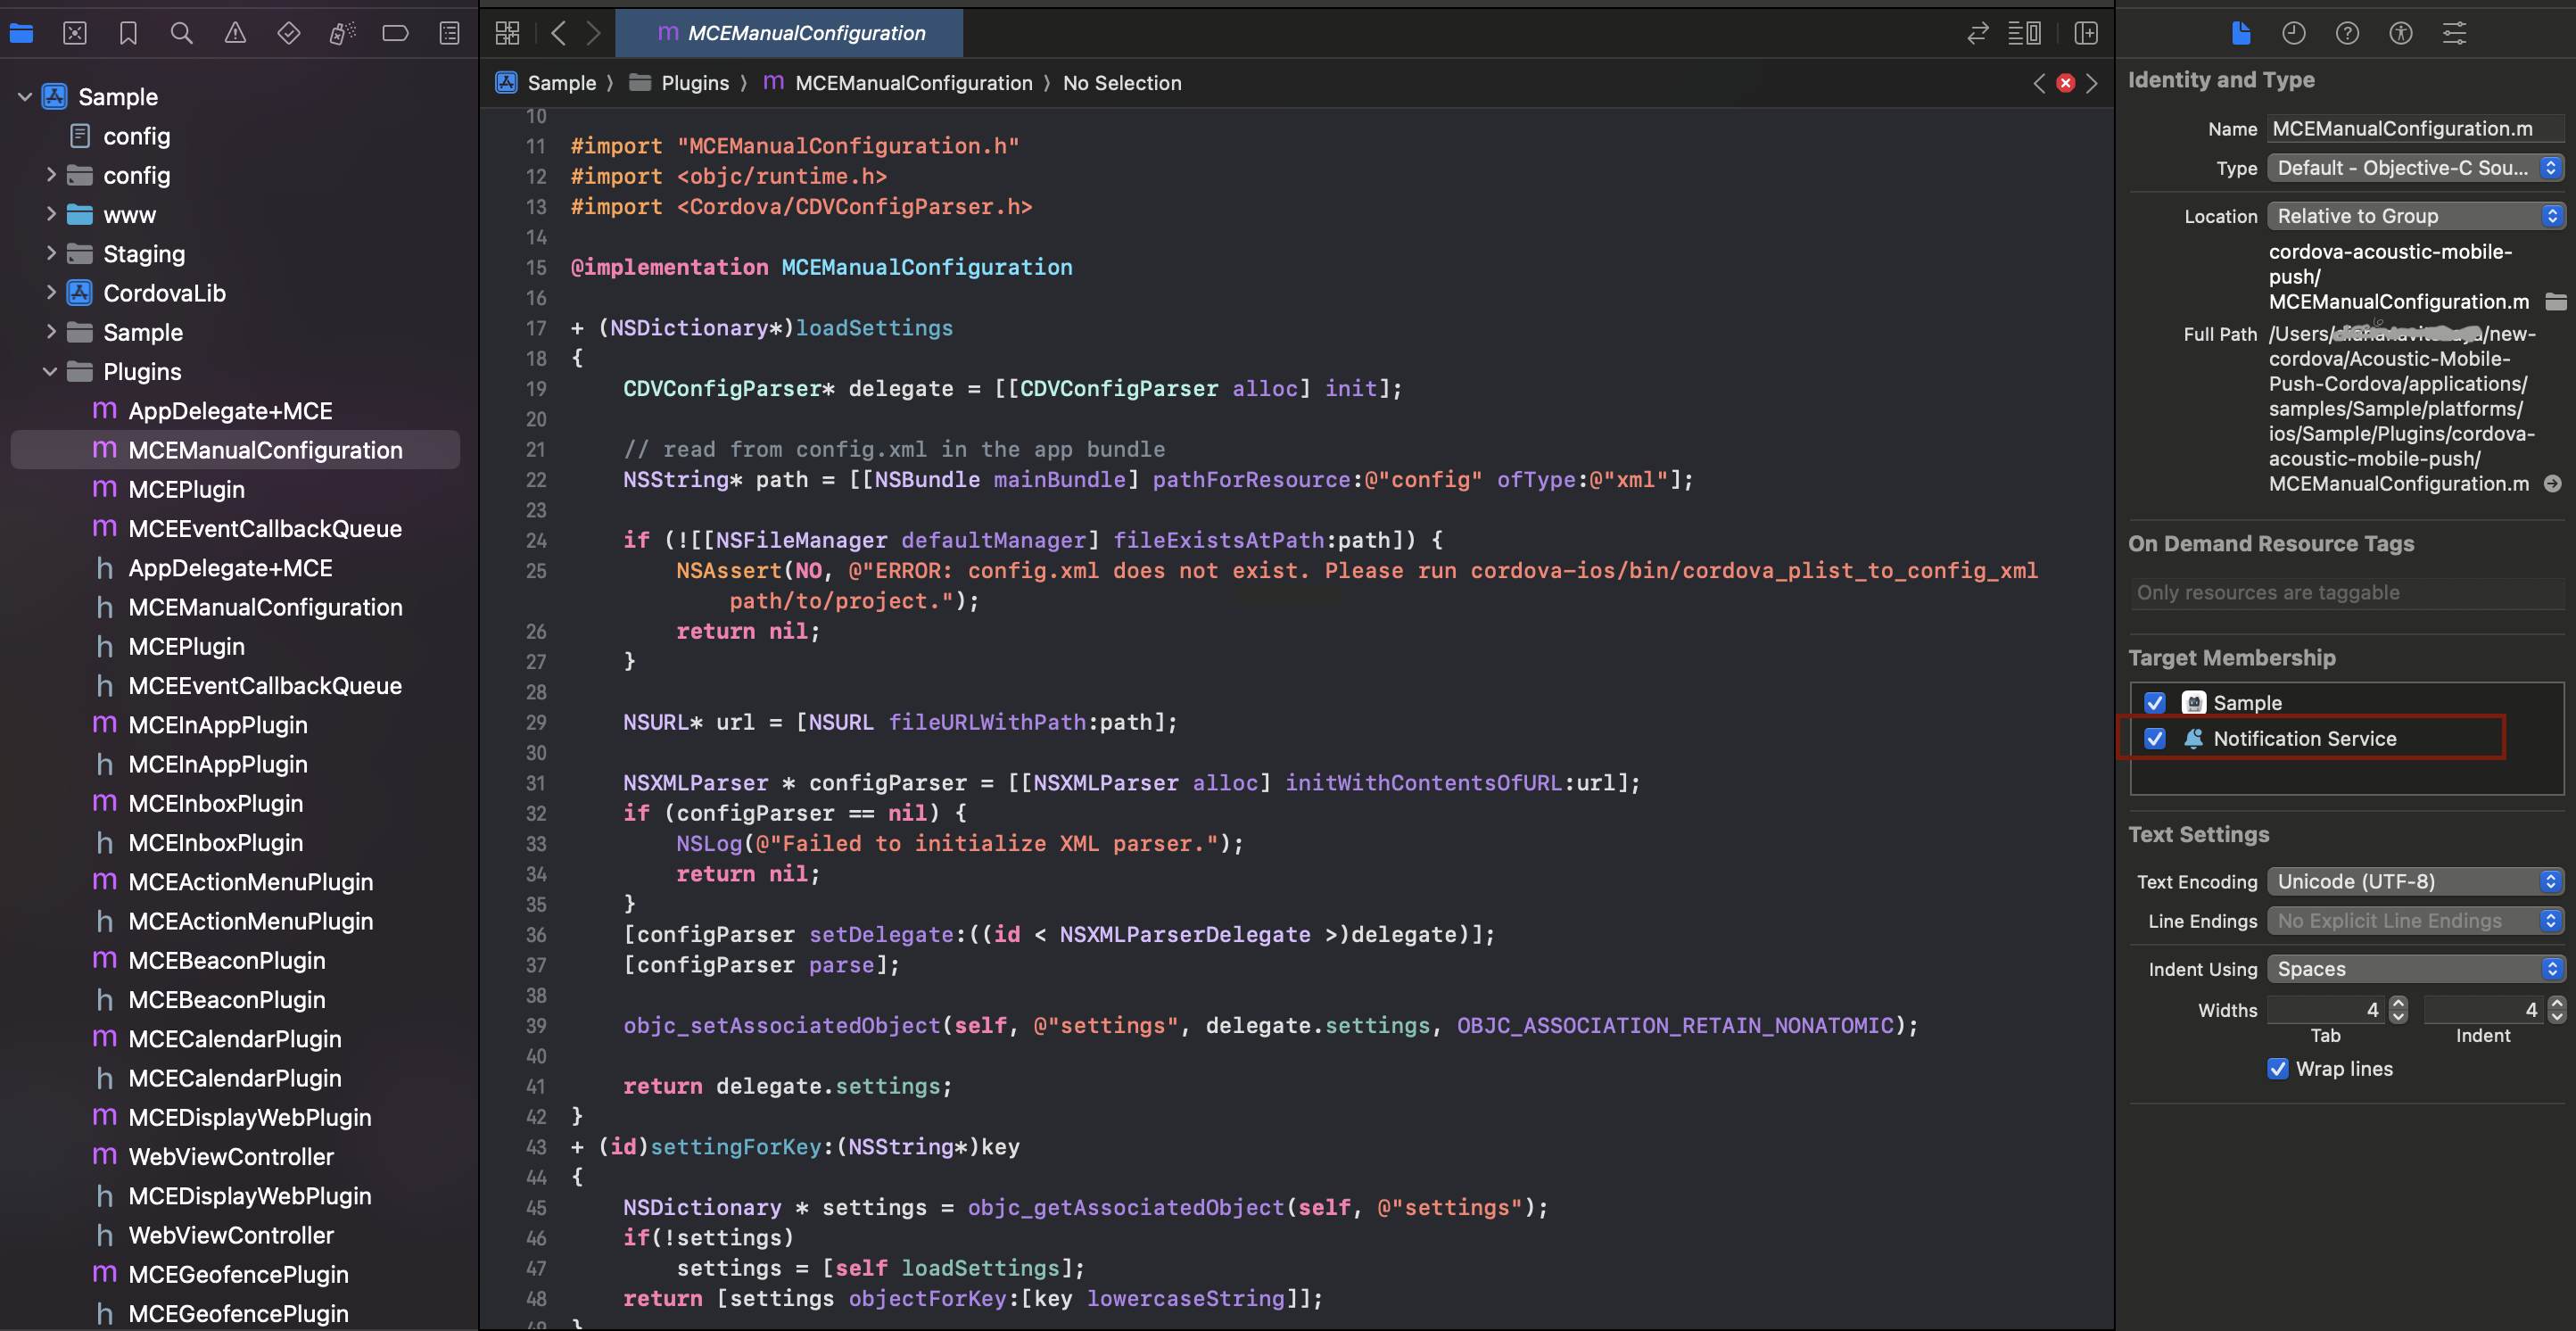
- In the project navigator, open the Plugins directory and select MCEManualConfiguration.m. Add the Notification Service target to the file's Target Membership.
- In the project navigator, open the Notification Service directory and select NotificationViewController.h. Import the AcousticMobilePushNotification framework.
#import <AcousticMobilePushNotification/AcousticMobilePushNotification.h>
- In the same file, add an MCE notification service property.
@property MCENotificationService * notificationService;
- In the same directory, select NotificationViewController.m. Import MCEManualConfiguration.h and AcousticMobilePush.h.
#import "MCEManualConfiguration.h"
#import "AcousticMobilePush/AcousticMobilePush.h"
- Create an initializer method to initialize the
MCENotificationServiceproperty:
- (instancetype)init {
  if (self = [super init]) {
    [MCEConfig sharedInstanceWithDictionary:MCEManualConfiguration.xmlSettings];
    self.notificationService = [[MCENotificationService alloc] init];
  }
  return self;
}
- Update the
didReceiveNotificationRequestmethod to use the notification-action.
if (request.content.userInfo[@"notification-action"]) {
  [self.notificationService didReceiveNotificationRequest:request
                                       withContentHandler:contentHandler];
  return;
}
- In the
serviceExtensionTimeWillExpiremethod, call themce mobile pushmethod of the same name.
[self.notificationService serviceExtensionTimeWillExpire];
- In order to support the latest iOS version, make sure that config.xml in the root directory has the following entry.
<platform name="ios">
	<preference name="deployment-target" value="13.0"" />
</platform>
- Run the following Node.js command from the main project directory.
node node_modules/cordova-acoustic-mobile-push/scripts/installPlugins.js
Here are sample NotificationViewController files for your reference.
#import <UserNotifications/UserNotifications.h>
#import <AcousticMobilePushNotification/AcousticMobilePushNotification.h>
@interface NotificationService : UNNotificationServiceExtension
@property MCENotificationService * notificationService;
@end
#import "NotificationService.h"
#import "MCEManualConfiguration.h"

@interface NotificationService ()

@property (nonatomic, strong) void (^contentHandler)
(UNNotificationContent *contentToDeliver);
@property (nonatomic, strong) UNMutableNotificationContent
*bestAttemptContent;

@end

@implementation NotificationService
-(instancetype)init {
    if(self = [super init]) {
        [MCEConfig sharedInstanceWithDictionary: MCEManualConfiguration.
xmlSettings];
        self.notificationService = [[MCENotificationService alloc]
init];
    }
   return self;
}

- (void)didReceiveNotificationRequest:(UNNotificationRequest *)request
withContentHandler:(void (^)(UNNotificationContent * _Nonnull))
contentHandler {
    if(request.content.userInfo[@"notification-action"]) {
        [self.notificationService didReceiveNotificationRequest:
request withContentHandler: contentHandler];
        return;
    }
}

- (void)serviceExtensionTimeWillExpire {
    [self.notificationService serviceExtensionTimeWillExpire];
}

@end
Updated 10 months ago