
Add the Campaign SDK to your React Native app
The React Native Campaign SDK provides mobile app message handling and display capabilities for Android and iOS apps. To add the SDK to your app, use yarn or npm CLI. For basic and advanced settings, we provide a unified configuration file CampaignConfig.json.
WarningThe Campaign SDK does not encrypt data transmitted via push notifications and in-app messages. To transmit sensitive information, you must encrypt it before sending and decrypt it in the memory of the end user's device.
Requirements
Acoustic Campaign
- To use the SDK, your company must have an active Acoustic Campaign subscription.
- You must have a developer account for Acoustic Campaign. The account must have the following permissions enabled: Enable Mobile App Push and Enable Development for Mobile App Push.
- You must have the base URL associated with your subscription. Contact your account manager if you don't have the base URL yet.
Mobile app compatibility
The Campaign library works on end users' devices running the following operating systems:
- Android 5.0 (API level 21) and later
- iOS 13 and later
WarningThe iOS Simulator app is unable to handle push messages. Run your app on a real device.
Development environment
To add the Campaign SDK to an iOS app using React Native, you will need the following:
- Xcode 15 with Command Line Tools
- Node.js 18 or later
- React Native 0.64 or later
- Apple Developer Program membership (free accounts do not support push notifications)
To add the Campaign SDK to an Android app using React Native, you will need the following:
- Node.js 18 or later
- React Native 0.64 or later
Only older JSC bridge architecture is supported. Expo applications are not supported unless they are ejected as native applications.
Before you begin
Before you begin, make sure the following conditions are met.
- Your iOS project uses an explicit App ID and is assigned to a team. For the App ID, the push notification service is enabled.
- In your iOS project, the Push Notifications capability is enabled. For instructions, see Adding capabilities to your app in the Xcode guide.
- Your app is registered with Apple Push Notification service (APNs). You can use either of the following authentication methods to secure connection to APNs: token-based (p8) (recommended by Apple) or certificate-based (p12).
Important
The provisioning profile must match the push certificate. For example, a development provisioning profile works with a development push certificate.
What to prepare for the setup depending on the selected authentication type:
| Authentication type | Credentials to submit to Acoustic Campaign |
|---|---|
| Token-based (p8) | 1) An authentication token signing key, which is a text file with the .p8 extension 2) A 10-character string with the Key ID 3) The Team ID associated with your app 4) The Bundle ID assigned to your app |
| Certificated-based (p12) | 1) A certificate file with the .p12 extension 2) CSR (a private key used to encrypt the certificate) |
- Your mobile app is registered and implemented (this is necessary to enable testing and creating notifications).
- Firebase Cloud Messaging is enabled.
- The install location of your app must be set to the internal memory of a mobile device, not to external storage cards.
Initial setup
- Add
react-native-acoustic-mobile-pushfrom the project folder.
yarn add react-native-acoustic-mobile-pushnpm i react-native-acoustic-mobile-push- Edit
App.jsto include the following two lines after the existing import statements:
import { NativeModules } from 'react-native';
const { RNAcousticMobilePush } = NativeModules;
RNAcousticMobilePush.requestPushPermission();
NoteIf you aren't using the App.js bundle, you can import the SDK into the component you need.
Customizing library configuration
Step A: get an app key
To activate the Campaign SDK within your iOS app, you must generate an app key for it and upload the app's push certificate to Acoustic Campaign.
- Log in to Acoustic Campaign under a developer account.
- In the navigation menu, select Administration > Push developer resources.
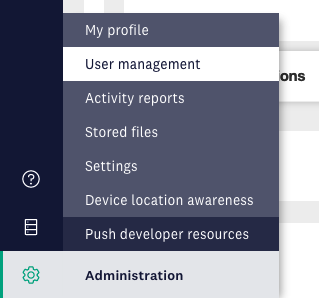
Access to mobile app setup
- Under Apps, click to add a new app.
- In the Push Service field, select APNs. Then select the type of authentication to use: P8 or P12. Provide required credentials for the selected authentication type.
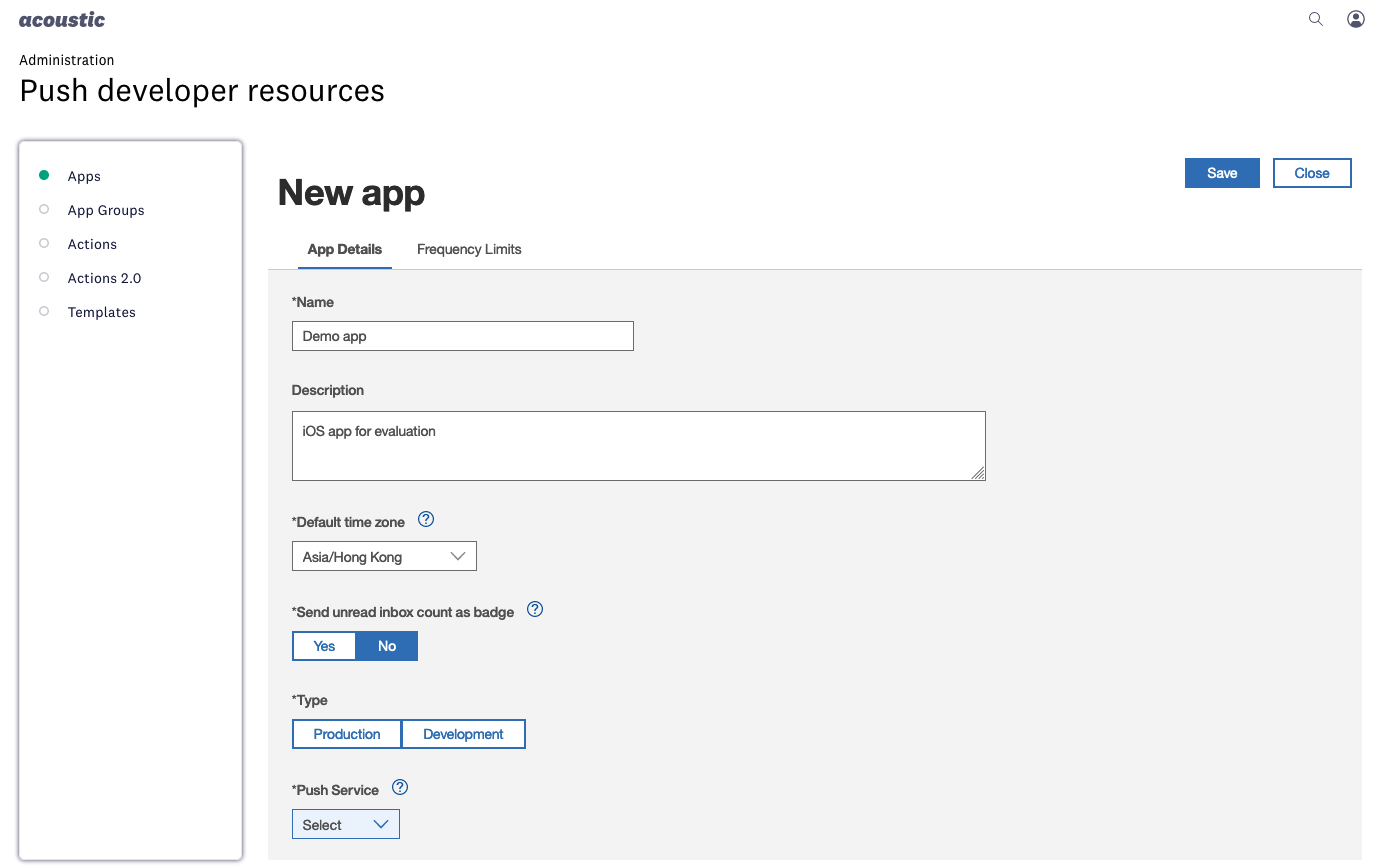
Adding mobile app to Campaign
- Set the Type setting in accordance with the distribution model. Select Development to run the app from Xcode with a development provisioning profile. Or select Production to run the app with an App Store, Enterprise, or ad hoc provisioning profile.
- Fill out the remaining settings and save the changes.
- Copy your app key and keep it handy for the setup.
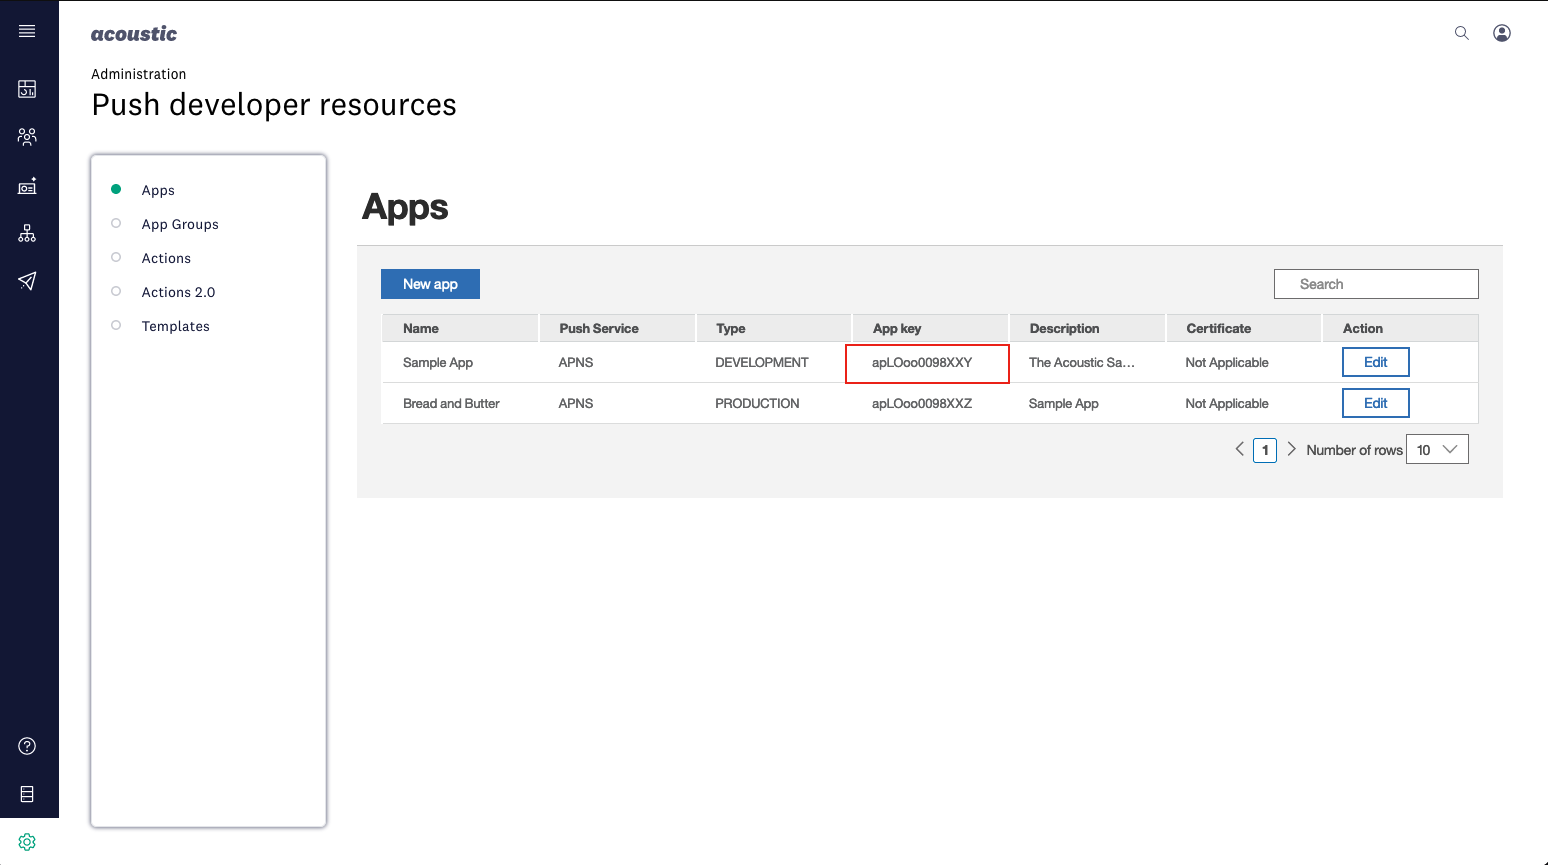
Copy app key
Step B: update the configuration file
- In the root directory of your app, find the CampaignConfig.json file. Use this file to customize the SDK configuration.
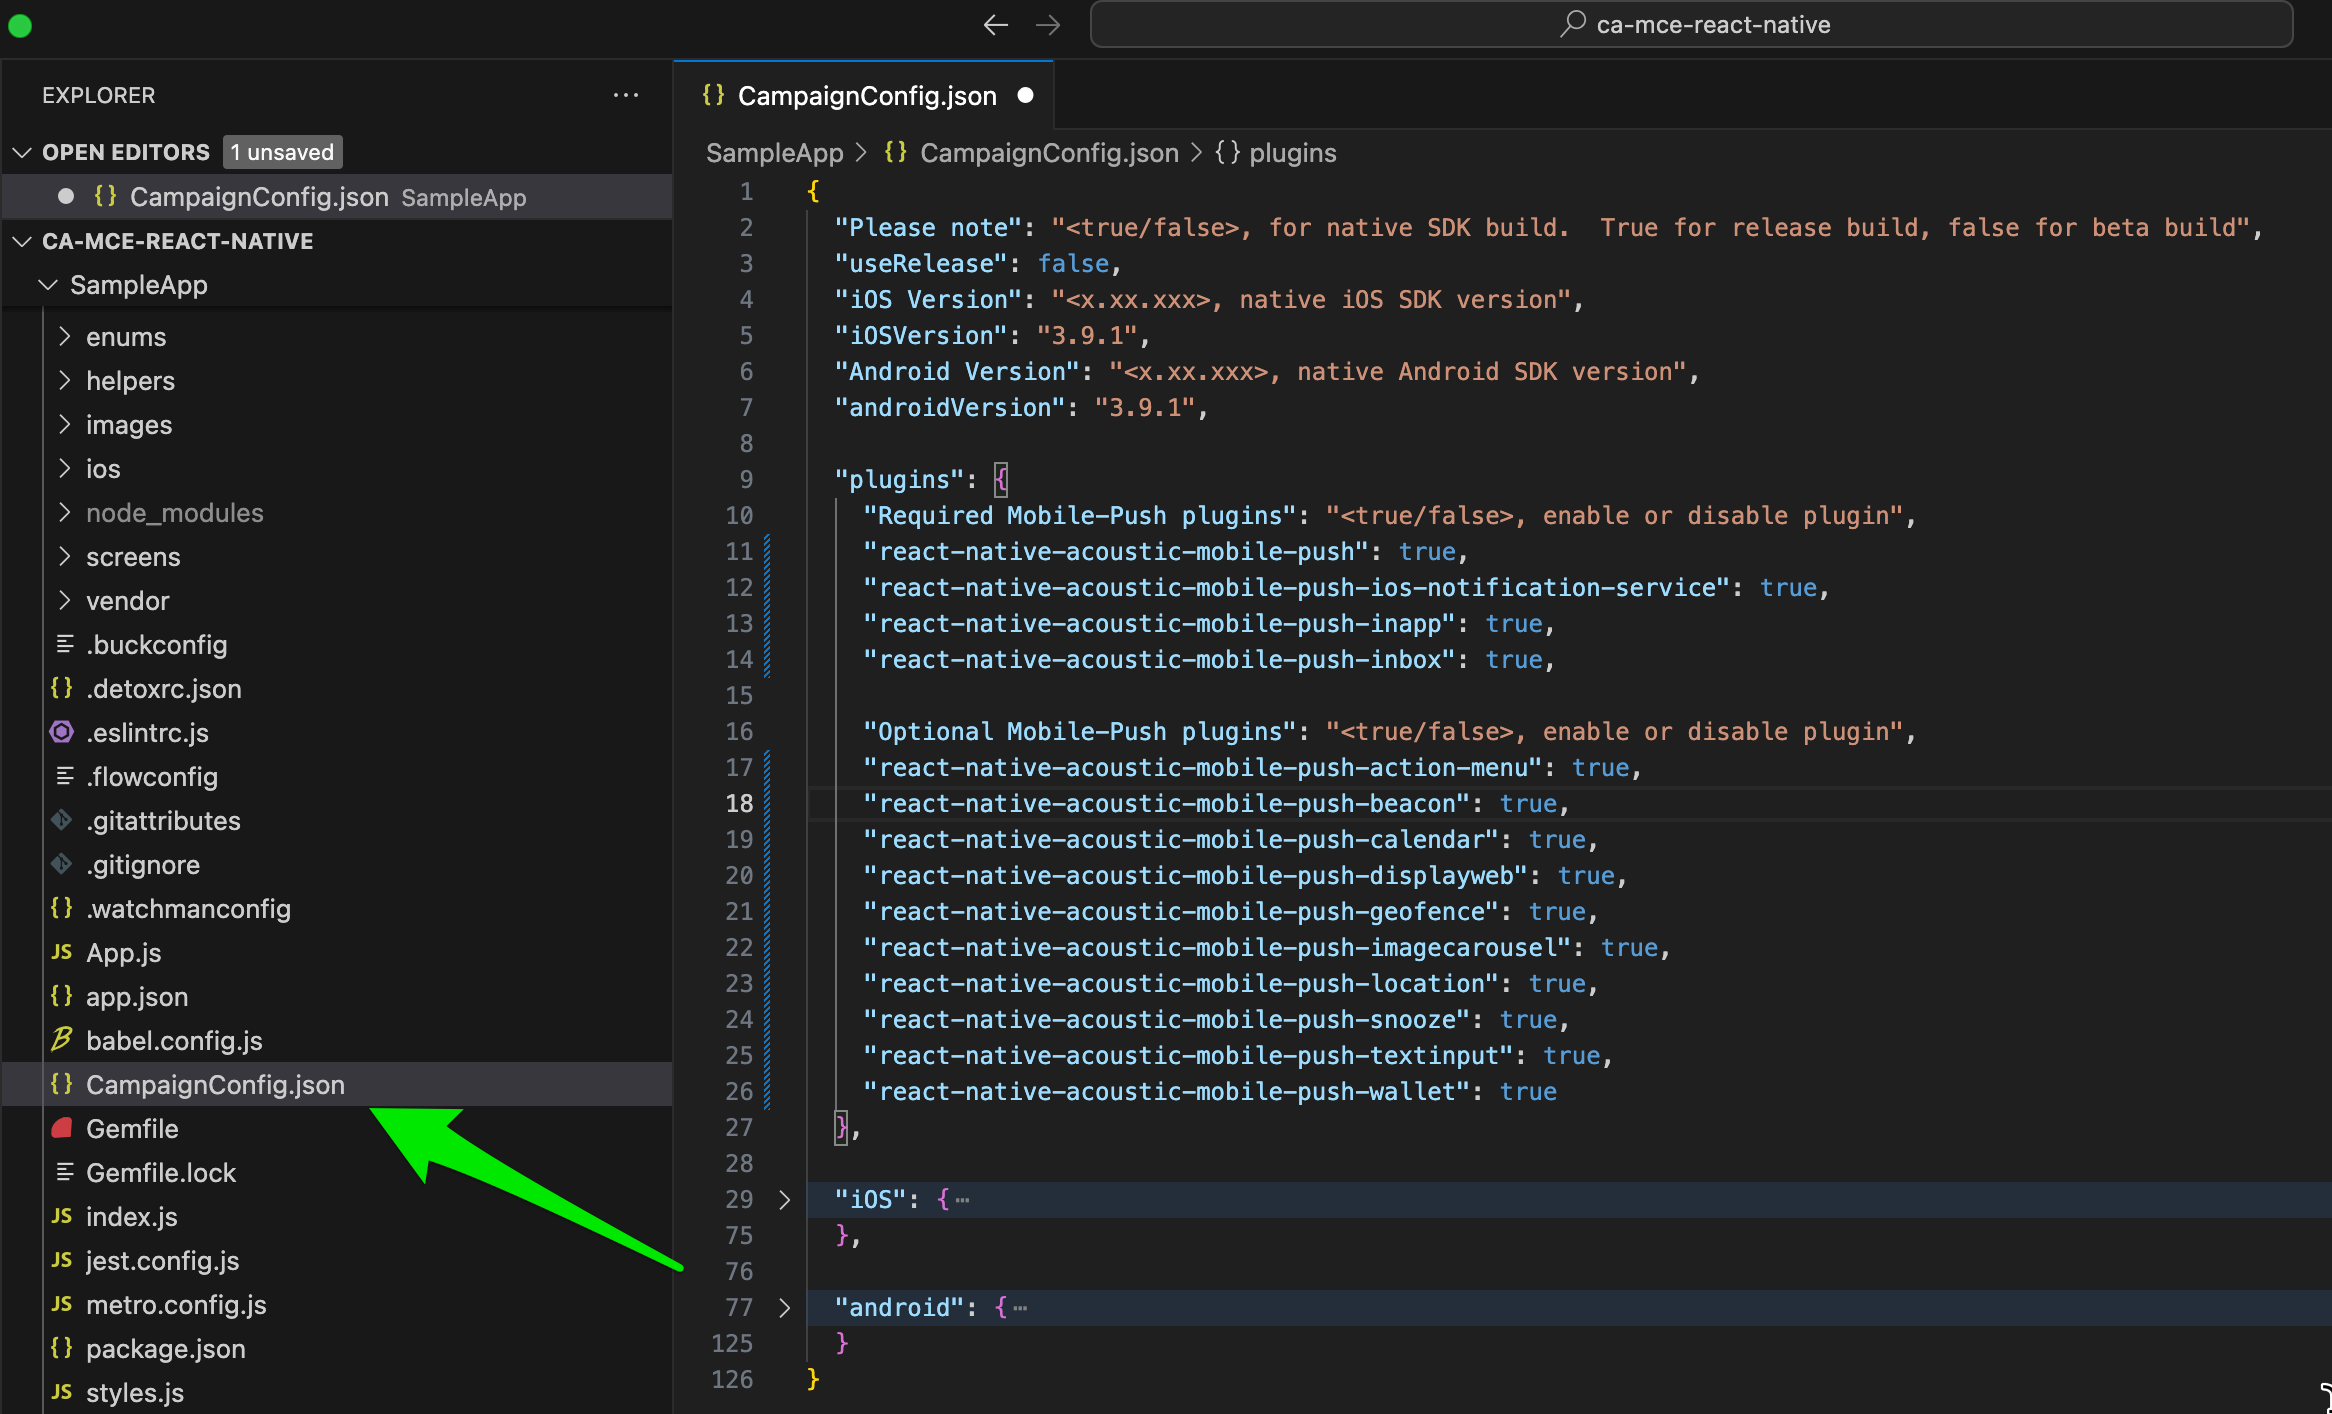
CampaignConfig.json in the root folder
- Make sure you are using the right build. During testing, set
useReleasetofalse. For production, usetrue.
"useRelease": true,
- Check the version of the Campaign SDK for your iOS app. We recommend using the latest version whenever possible.
"iOSVersion": "3.9.18",
- In the
iOSsection, enter the app key you have generated at step A and the base URL provided by your account team. Do not change the app key after you publish your app.
{
  "baseUrl": "https://mobile-sdk-lib-XX-Y.brilliantcollector.com",
  "appKey": {
    "dev": "INSERT YOUR DEV APPKEY HERE",
    "prod": "INSERT YOUR PROD APPKEY HERE"
  }
}
- Important: to apply the updates, navigate to the main project directory and run the following Node.js command.
node node_modules/react-native-acoustic-mobile-push/postinstall.js ./
To learn more about your options, see the following recipe: Configure mobile SDKs [iOS].
Step A: get an app key
To activate the Campaign SDK within your Android app, you must generate an app key for it and upload the app's push certificate to Acoustic Campaign.
- Log in to Acoustic Campaign under a developer account.
- In the navigation menu, select Administration > Push developer resources.
Access to mobile app setup
- Under Apps, click to add a new app.
- In the Push Service field, select GCM/FCM. Then select the type of authentication to use: Legacy or V1. Provide required credentials for the selected authentication type.
Adding mobile app to Campaign
- Fill out the remaining settings as appropriate and save the changes.
- Copy your app key and keep it handy for the setup.
Copy app key
Step B: update the configuration file
- In the root directory of your app, find the CampaignConfig.json file. Use this file to customize the SDK configuration.
CampaignConfig.json in the root folder
- Make sure you are using the right build. During testing, set
useReleasetofalse. For production, usetrue.
"useRelease": true,
- Check the version of the Campaign SDK for your Android app. We recommend using the latest version whenever possible.
"androidVersion": "3.9.18",
- In the
androidsection, enter the app key you have generated and the base URL provided by your account team. Do not change your app key after you publish your app.
{
  "baseUrl": "https://mobile-sdk-lib-XX-Y.brilliantcollector.com",
  "appKey": {
    "prod": "INSERT APP KEY HERE"
  }
}
- Important: to apply the updates, navigate to the main project directory and run the following Node.js command.
node node_modules/react-native-acoustic-mobile-push/postinstall.js ./
To learn more about available configuration options, see the following recipe: Configure mobile SDKs [Android].
Final project preparation
Step A: Add the Notification Service Extension
The AcousticMobilePushNotification framework lets you enable dynamic action categories and media attachments in iOS notifications. Before a notification from the APNs service is displayed to an end user, the media attachment URL is extracted, and then the media file is downloaded and attached to the notification.
The notification service extension functions as a separate app within your app bundle and requires separate provisioning.
Important
The notification service target must be compatible with the version of the Campaign library you are using. So if you have a beta version of the library and want to switch to the stable version or visa versa, make sure you unlink the current target first and then add a new one.
- In your XCode project, click File > New > Target.
- On the iOS tab, select Notification Service Extension.
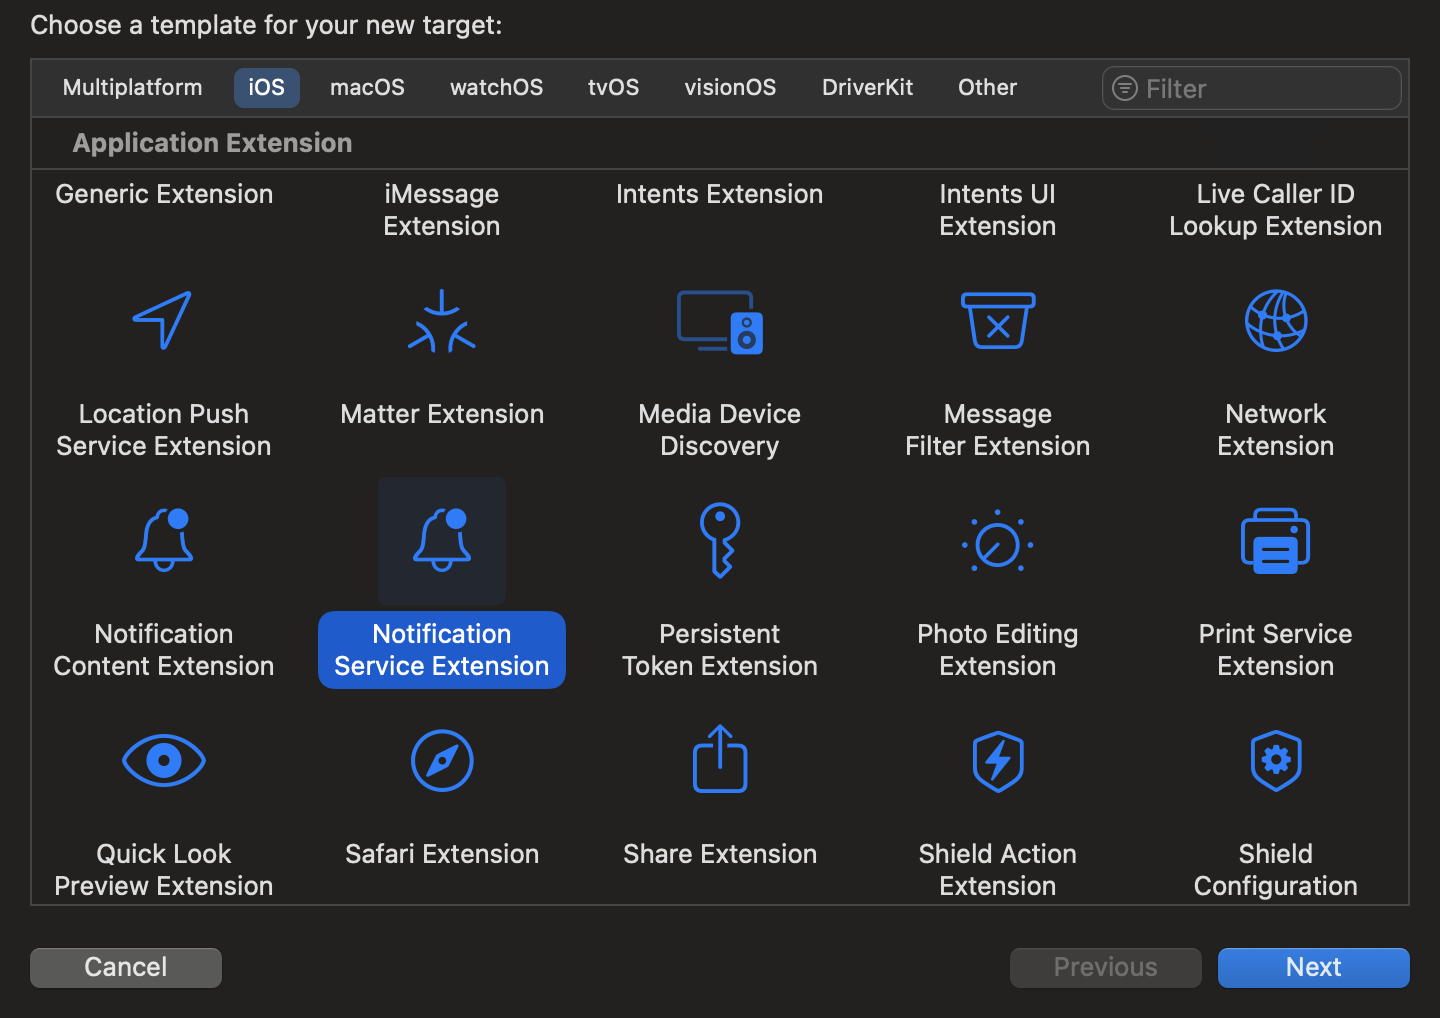
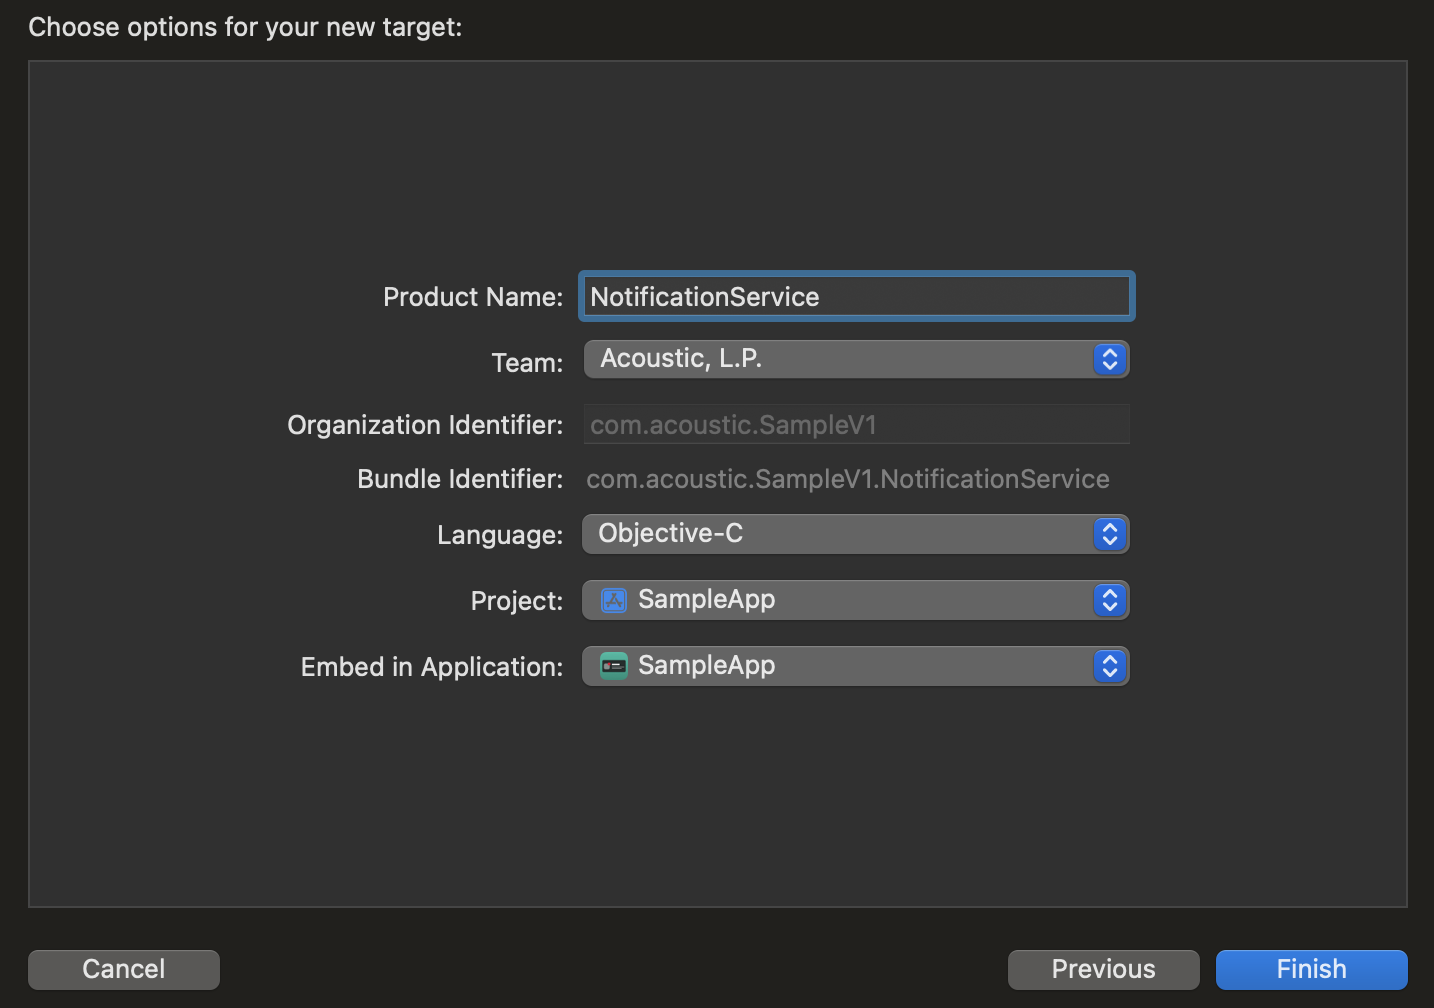
- In the Language list, select Objective-C. Fill out the remaining settings as appropriate.
- If a confirmation message appears, select Activate.

- Find a new target and a new directory in your project.
Step B: Configure the Notification Service target
Select the new target and go through the following settings on the General tab.
- Signing. Select the same team that the main project target belongs to and configure the bundle ID. A typical pattern for the bundle ID is
com.company.app.notificationif your app bundle ID iscom.company.app. - Minimum deployments. Make sure the iOS version is the same as in the primary application target.
- Frameworks and Libraries. Add AcousticMobilePushNotification.xcframework and select the Embed and Sign option for it.
On the Signing & Capabilities tab, add two capabilties: Keychain Sharing and App Groups. Make sure you use the same values as for the primary application target.
On the Build Settings tab, expand the Linking - General section. Make sure Other Linker Flags is set to -ObjC.
Step C: Update related project files
- Add the MceConfig.json file to the Notification Service target. Open the file and check the notification service target membership in the Target Membership of the File Inspector in the Xcode pane.
- Replace the contents of NotificationService.m with the following code.
// NotificationService.m
#import "NotificationService.h"

@implementation NotificationService

@end
- Replace the contents of NotificationService.h with the following code.
// NotificationService.h
#import <UserNotifications/UserNotifications.h>
#import <AcousticMobilePushNotification/AcousticMobilePushNotification.h>

@interface NotificationService : MCENotificationService

@end
Step D: build and run the app
- Run the iOS.
- Run
pod installfrom the App'siosfolder. - Launch your iOS app.
npx react-native run-ios
Note
The iOS Simulator app is unable to handle push messages. Run your app on a real device.
- Go to the Firebase Console and download the Firebase Android configuration file (google-services.json). Add the file to your project folder:
android/app/. - If you are going to support location services, add the following line to the app-level build.gradle file.
implementation 'com.google.android.gms:play-services-location:<play-services version>'
- Synchronize your project and run the app.
npx react-native run-android
Further steps
When you finish testing and are ready to try more features, consider enabling notification action plugins. Here are instructions for React Native projects.
Updated 3 months ago