
Move your Cordova integration to production
When you have finished integrating and testing the Connect SDK in development, work through this checklist to move your integration to production.
Language: JavaScript, with TypeScript definitions
Availability: Pro, Premium and Ultimate
Switch the SDK to the release build
In development, ConnectConfig.json uses "useRelease": false, which pulls in the AcousticConnectDebug iOS pod. Before releasing, switch to the release build - this replaces it with the AcousticConnect release pod, which suppresses verbose logging regardless of Xcode build configuration.
- Open ConnectConfig.json in the root of your project and set
useReleasetotrue.
{
  "Connect": {
    "useRelease": true,
    ...
  }
}- Remove and re-add the iOS platform. A plain
cordova preparewon't pick up the change - removing the platform and re-adding it triggers a clean install. This ensures a clean build with the correct pod in all targets.
npx cordova platform rm ios
npx cordova platform add ios
npx cordova build ios
This only affects iOS. Android always uses the same release SDK artifact regardless of useRelease.
Update push notification settings
Create a dedicated production integration in Connect. This is required for iOS because the APNs environment and version key must match your Distribution-signed build. For Android it's recommended - it keeps test data out of production analytics and prevents campaigns from reaching test devices.
The production version appears as a separate app all across Connect - in Analytics, Segmentation, Message composer, Campaigns and Sessions.
Step 1: Update platform credentials
- Create a production Firebase project in the Firebase console and download its google-services.json.
- Replace google-services.json at your Cordova project root with this file.
WarningThe Cordova plugin only reads one google-services.json from the project root - there's no automatic build-type switching like native Android's
app/src/debug/andapp/src/release/folders. If you don't use separate branches for development and production, swap the file manually before each build.
- Generate a service account key for the production project (Settings > Service accounts > Generate new private key).
- Share the service account key with your Connect administrator.
- If you haven't already, replace your test notification icon with your own branded icon - see Add a notification icon.
No project changes are needed - the aps-environment entitlement switches automatically based on build configuration.
- In the Apple Developer portal, check that your APNs key supports both Sandbox and Production. If it's Sandbox-only, generate a new key with Production or both environments enabled.
- Share your push notification credentials with your Connect administrator. Use the same ones from your test setup if your key supports both Sandbox and Production or the new key if you generated one in the previous step.
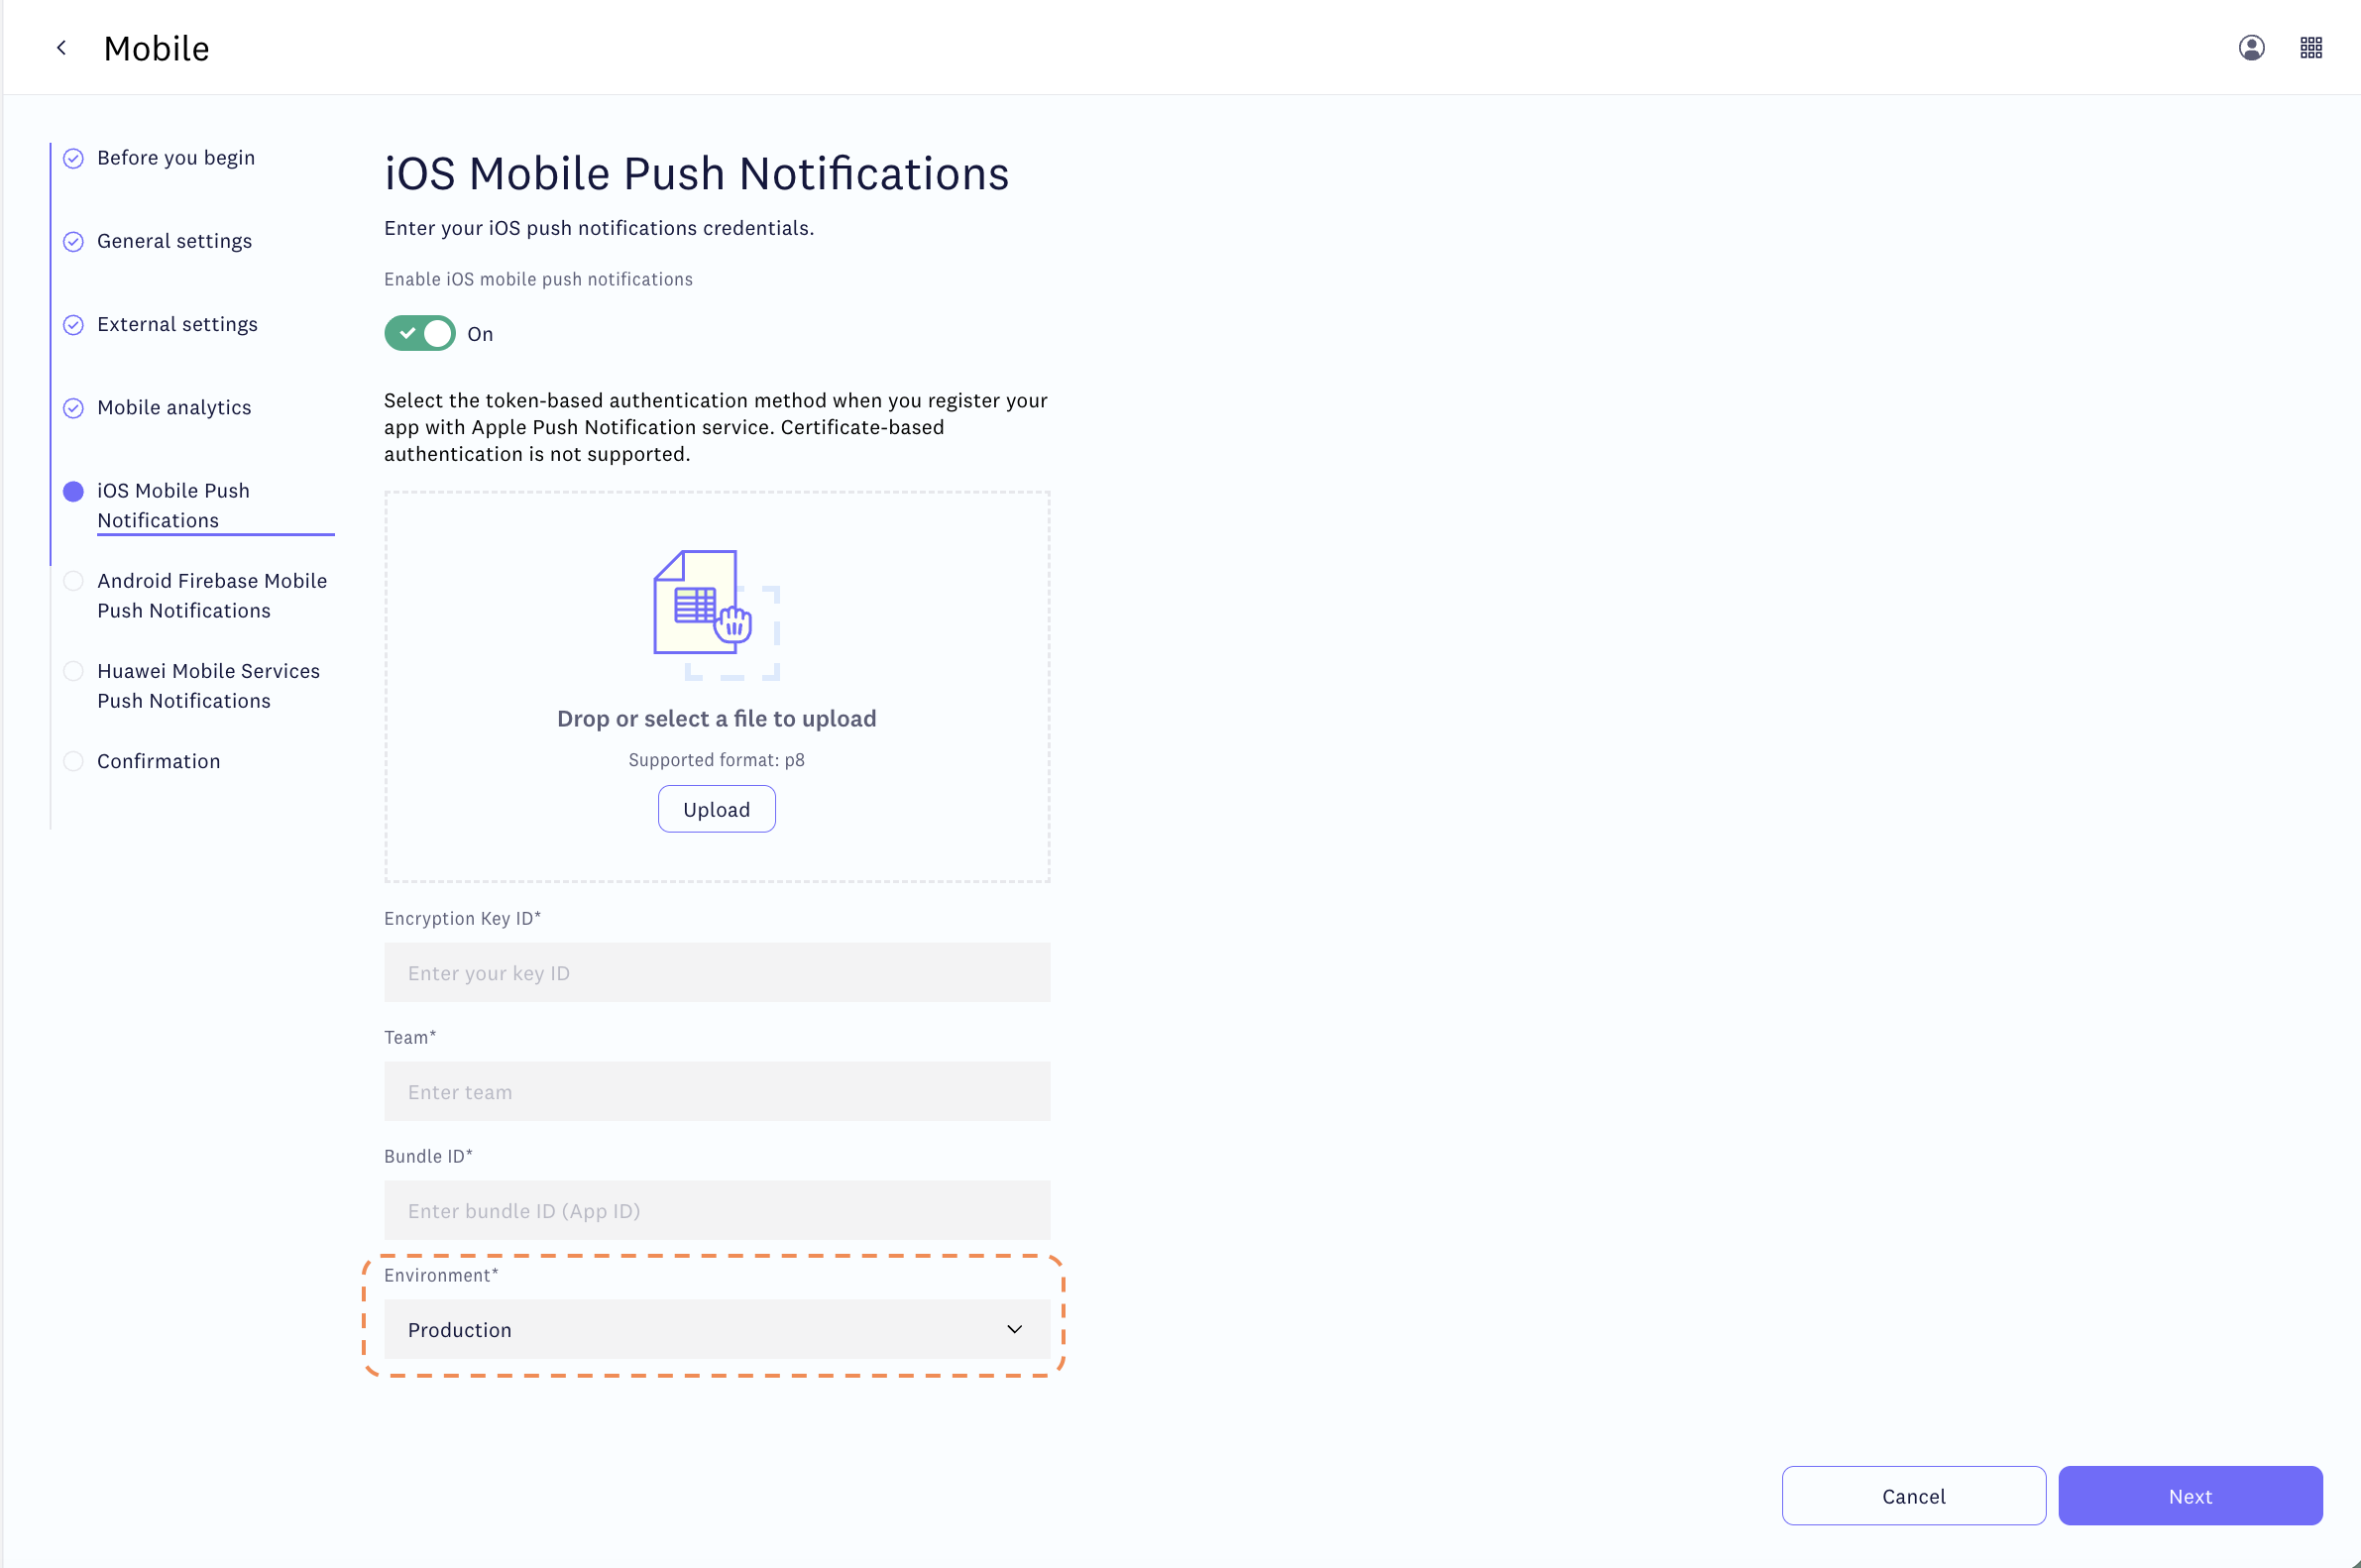
- Ask the administrator to set the Environment field to Production in the new integration.
Step 2: Create a production integration in Connect
Ask your Connect administrator to create a dedicated production Mobile app integration and share the new app key and collector URL with you.
What exactly the Connect administrator does
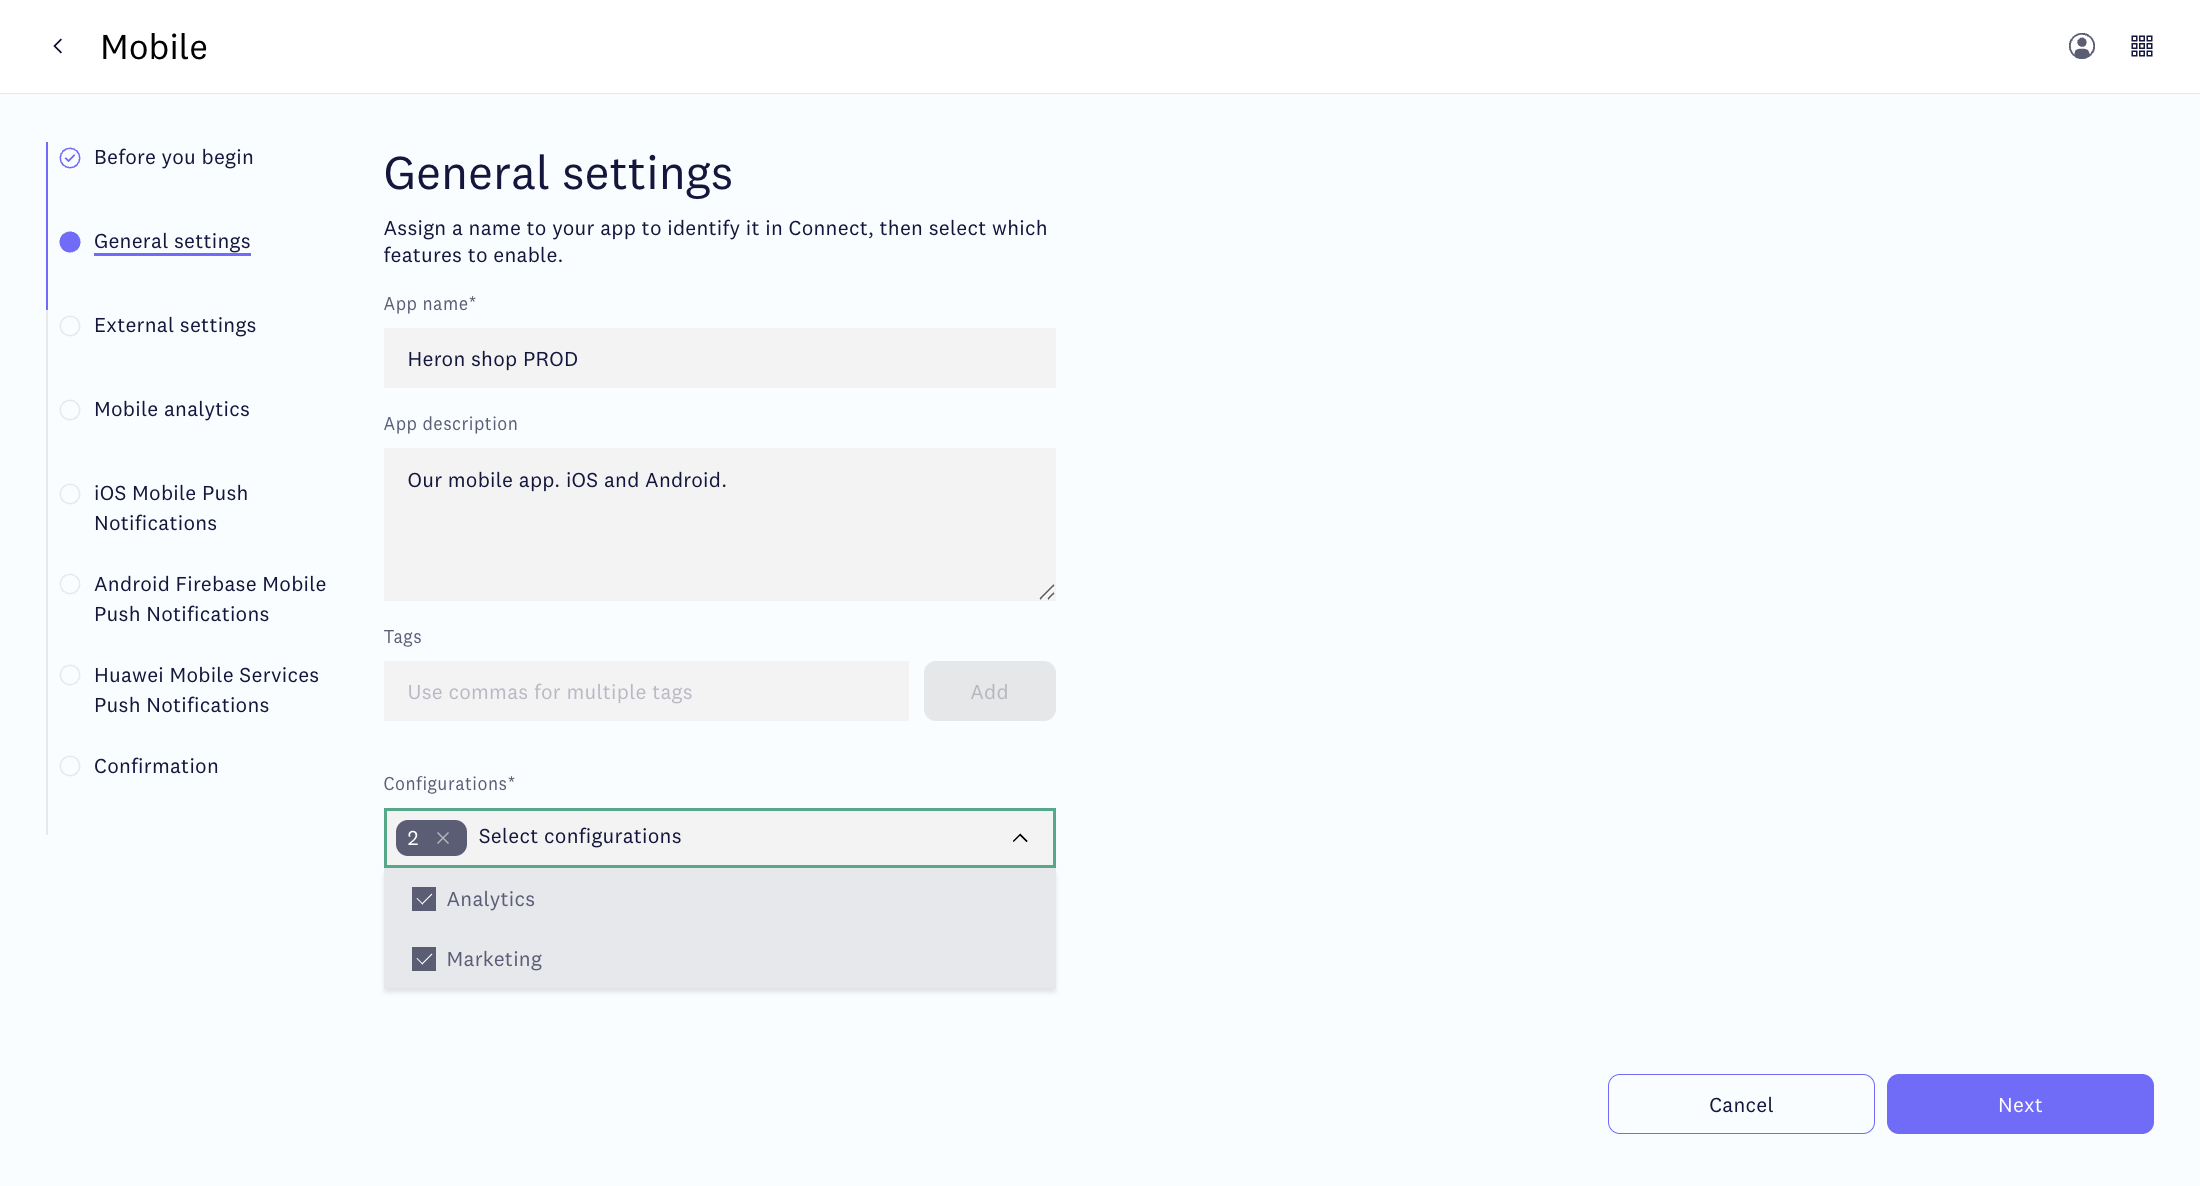
- General settings - under Configurations, select both Analytics and Marketing. Assign a descriptive name to the app to differentiate it from the development version (for example, "My App - Prod").
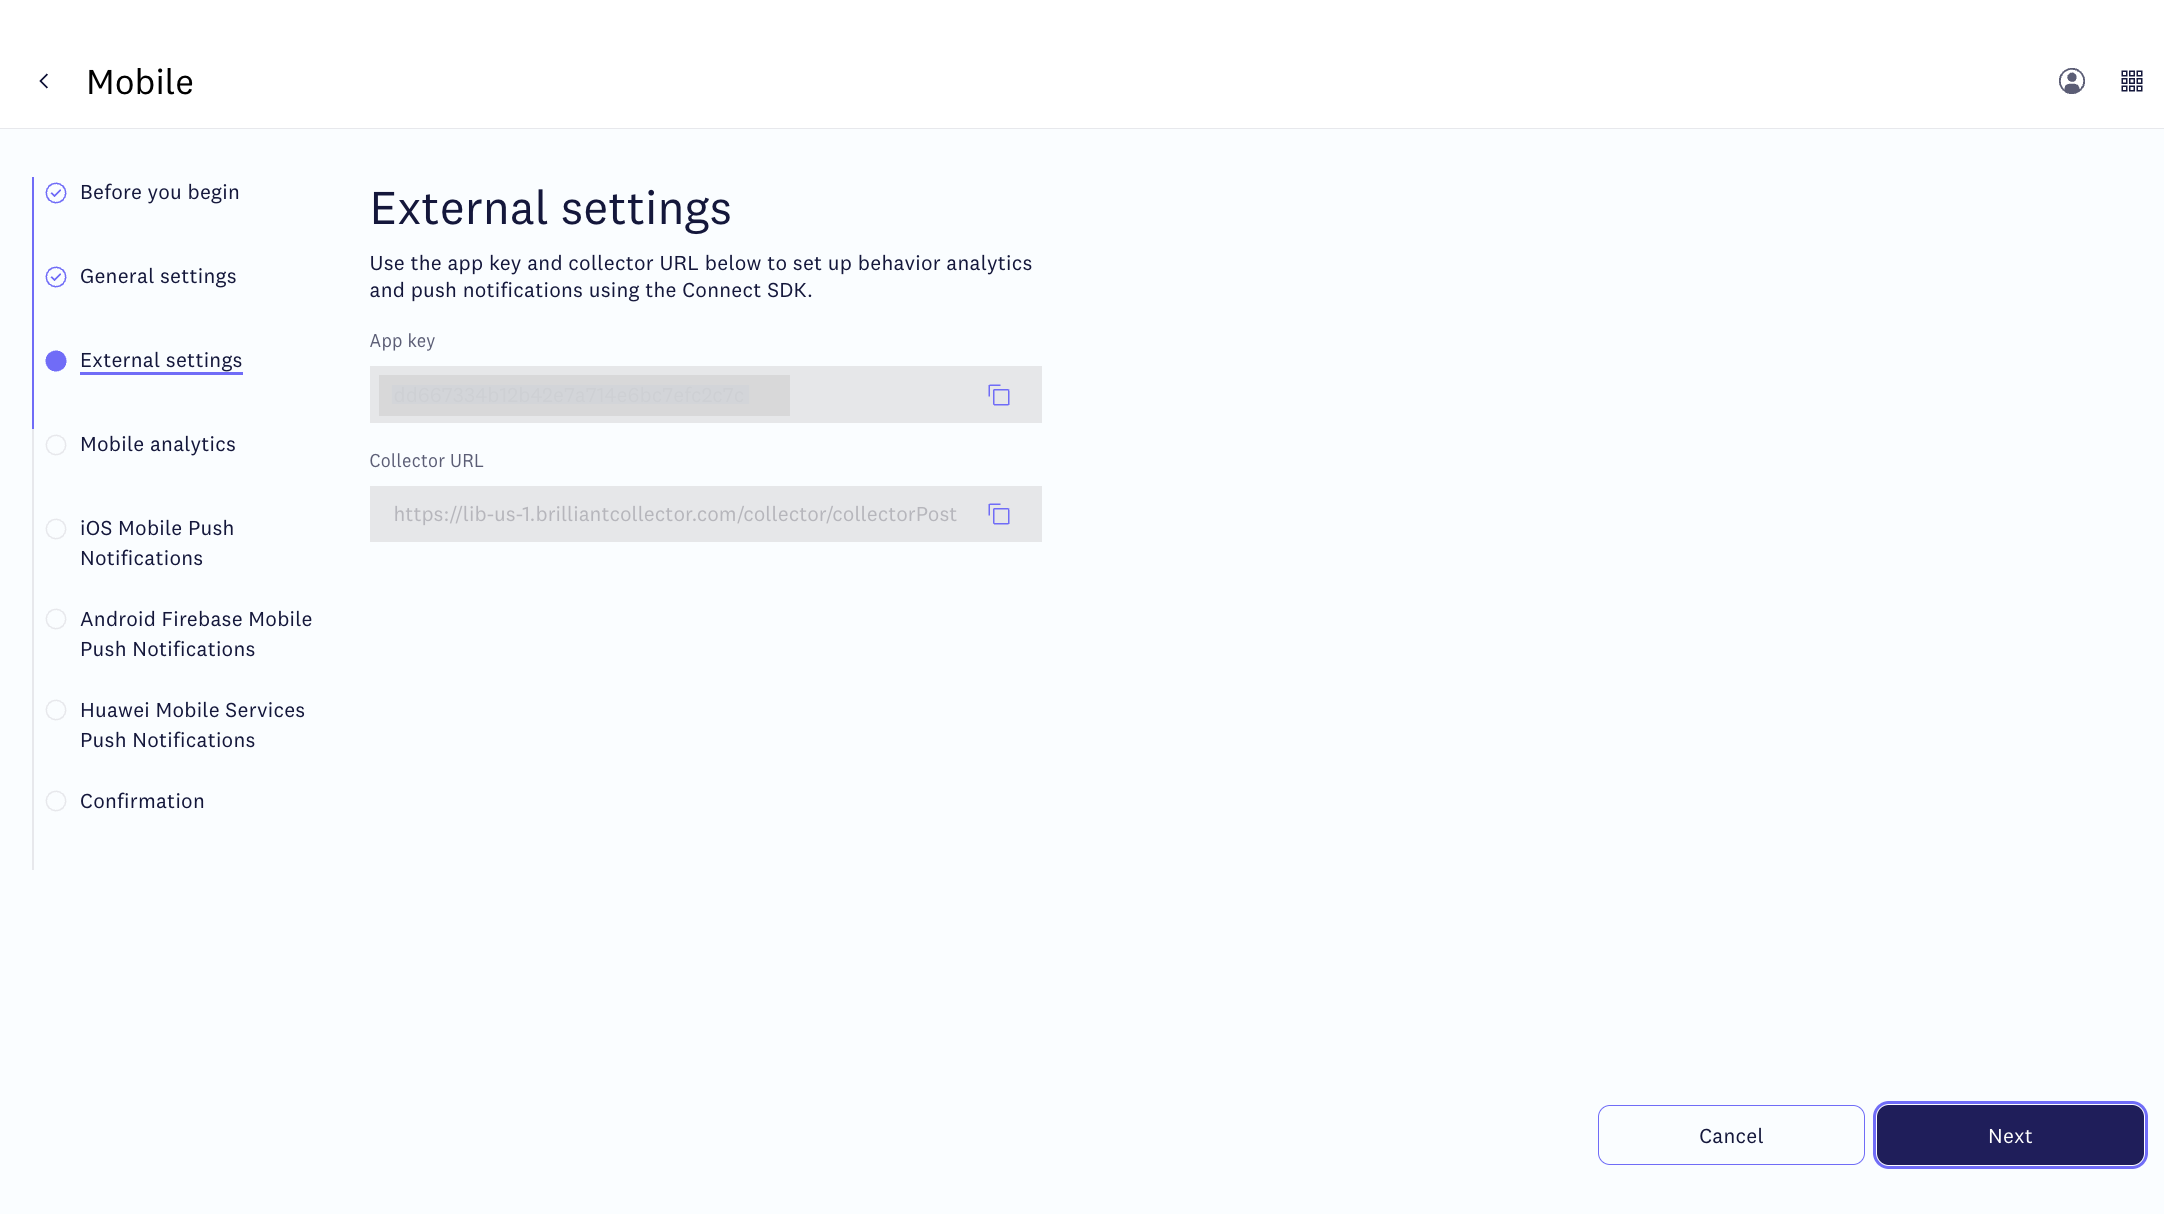
- External settings - Copy the app key and collector URL from here. The collector URL can differ from the one in your project if your company has separate production and testing subscriptions.
- iOS Mobile Push Notifications - All values are the same as for your development integration, except for Environment which must be Production for a Distribution-signed build. A mismatch breaks push delivery.
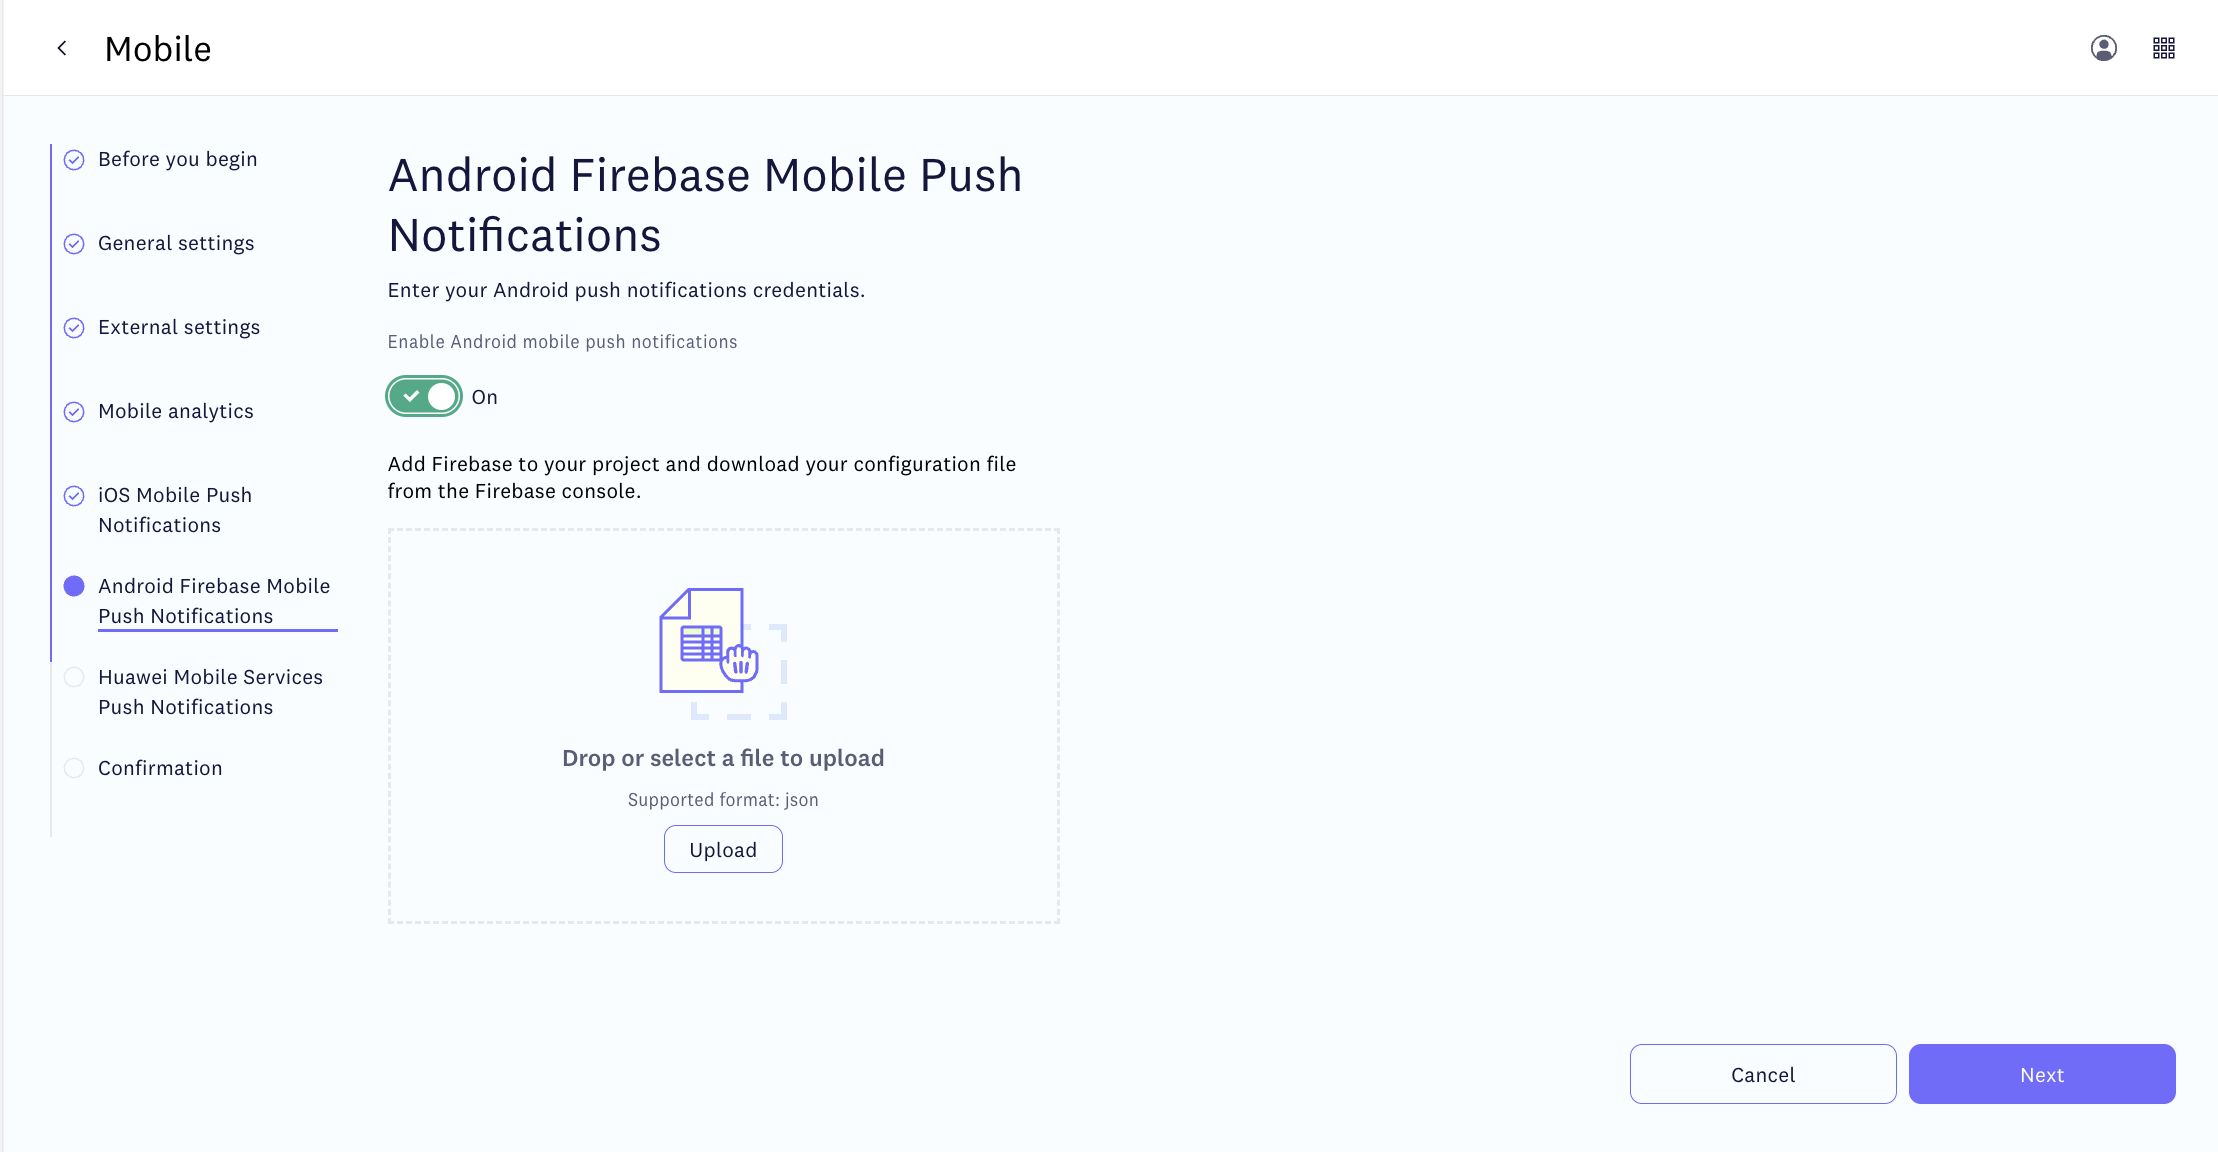
- Android Firebase Mobile Push Notifications - Requires the production Firebase service account key from Step 1 above.
- Huawei Mobile Services Push Notifications - leave this off. Huawei push isn't supported for hybrid apps.
- Confirmation - save the integration.
Step 3: Update your project and test
- Update
AppKeyandPostMessageUrlin ConnectConfig.json with the production values from your Connect administrator. - Run
npx cordova prepareto sync the updated configuration into the platform directories.
- Add a location usage description to config.xml with wording appropriate for your app. The Connect SDK includes location APIs, and Apple requires this string before you can upload to App Store Connect.
<platform name="ios">
    <edit-config target="NSLocationWhenInUseUsageDescription" file="*-Info.plist" mode="merge">
        <string>This app uses your location to show nearby stores and local offers.</string>
    </edit-config>
</platform>- Remove and re-add the iOS platform to pick up the new configuration cleanly:
npx cordova platform rm ios
npx cordova platform add ios- In Xcode, set the Run scheme's build configuration to Release.
- Archive and distribute via TestFlight to an iPhone.
- Launch the app on the device and grant notification permission when prompted.
- Coordinate with your marketing team to send a test push to your device or do it yourself - see Test your push notification setup.
- Verify the notification appears and push signals appear in the contact's activity feed in Connect.
- Build a signed release APK or AAB and install it on a real device.
- Launch the app on the device and grant notification permission when prompted.
- Coordinate with your marketing team to send a test push to your device or do it yourself - see Test your push notification setup.
- Verify the notification appears and push signals appear in the contact's activity feed in Connect.
Updated 3 months ago